RAW Food for Truth Living foods lifestyle. Nutritious, raw, vegan recipes. Meals & tips for natural healing. Allergen-free, organic dishes. Courses you can prepare in no time. Meal-planning for those "on a budget". Discovering wild edibles. Eco-friendly, conscious, healthy living. . . . at home, in the office, and on the road.
Showing posts with label lunch. Show all posts

Thai-Inspired Creamy Bowl of Deliciousness

Friday, October 25, 2013


A soup, that is.  One that you will never forget! Promise. 
I had my wisdom teeth removed (ouch) and I'm still recovering.  Needless to say, I'm on blended foods and since it's day 10, I'm really tired of eating the same stuff over and over.  So, today, I said "This is it, I'm making something different!"  Savory and buttery is what I wanted....And I could have had a gallon of this... It's simply orgasmic!


Thai-Inspired Creamy Veggie Soup
Ingredients:
(Makes about a quart to serve 1, maybe 2)
1 small red bell pepper
1/2 stalk of celery
1 slender (stalk) lemongrass
1/4 of small red onion (or use 1-2 green onions)
1/2 carrot (or a tiny one)
3 cloves of garlic
ginger to taste (I only used a piece the size of a raisin)
1 tiny hot pepper/jalapeno
2 heaping tbsp coconut butter
pinch of ground cayenne pepper
1/2 - 1 tsp (to taste) salt 
cilantro (no more than what you can tear off a bunch with three fingers)
~ 3 cups water

Optional: pinch of turmeric, honey (not vegan) or other sweetener, soy or shoyu sauce


To Prepare:
1. Warm the water on the stove top carefully, to desired temperature. (You definitely don't want to bring it to a boil if you chose to stick with eating raw)
2. In the meantime, chop all vegetables into chunks and place them in a blender with the lemongrass (pealed back and the core chopped fine; a bit of a tough task) and the spices you are using along with the coconut butter.
3. Add the water and whirl it all up, adding the cilantro only for the last few seconds of blending.
4. Taste test. Some people like it saltier, some prefer it sweeter.
5. Garnish and serve immediately.

It's savory, warming, and incredibly flavorful and satisfying. Enjoy! : )

♥♥♥

Dita


Corn Off The Cob

Sunday, September 23, 2012


In my mind it's still summer time and seeing the abundance of beautiful fruits and veggies at the farmers market just adds to that feeling. End of the season also means there's fresh corn available and if you're lucky you may find some that's organic (which would ensure that it's non-GMO). If you've established a relationship with vendors you can trust you can just ask them and you may find that theirs is pesticide-free and they do NOT use Monsato's seeds, and / or that their corn is an heirloom variety.


Corn Nutrition...You Might Be Surprised!
While the pearl-like white/yellow/red/blue kernels are notorious for being high in carbohydrates they really shouldn't be on your "do not eat" list. First of all, carbohydrates are not evil at all. They're very important, and contrary to what some believe (probably because of misleading media), will NOT make you fat. And that's not all. Corn is especially high in vitamin A, B vitamins, pantothenic acid, folate, and all minerals, even the harder-to-get  manganese, magnesium, and selenium. Surely, it deserves some respect! On top of all this it's very rich in fiber...in summary, this cereal crop takes the trophy for its health benefits. Eat it to help maintain good vision, to add anti-oxidants to your diet, for its qualities in aiding digestive health, providing you with folate, an essential vitamin if you're planning on getting pregnant, for maintaining strong bones, preventing anemia, etc.....doesn't it seem like a never-ending list? So don't be afraid of corn, unless it's GMO, of course ; )


Summer Corn Salad
(Serves 1 for lunch / 2 as a side dish / more as one of several dishes)
2-3 Ears of corn
Handful of cherry tomatoes
Wedge of red onion
Few sprigs of cilantro / parsley / dill
Juice of 1/2 or 1 lime
Splash of olive oil
pinch or two of salt
optional: sprinkle of black pepper or cayenne

* completely different flavors but I'm aware that some don't like one or the other and this salad is great with any one of those so use whichever you prefer : )

Preparations:
0. Husk the corn and, if you prefer, place in hot (but not boiling) water for a few minutes. Let the corn cool.
1. Cut the kernels off the cobs (be ready, they're going to fly all over the place) and put them in your mixing bowl.
3. Add quartered cherry tomatoes, thinly sliced onion, chopped herbs, lime juice, olive oil, and seasoning to taste.
4. Toss and serve immediately as a side dish, with soup or crackers, or pack some for lunch.

This is a great dish for summer gatherings too. I don't think you have to be a raw foodie to like this, and it's always a great opportunity to introduce the crowd to a simple but delicious salad along with some raw soup and / or crackers! Bon Appetite : )


Rawsagna Made Easy

Wednesday, September 12, 2012


My fridge was still full of zucchini a while back (yes, I know, I didn't have the chance to put this up before now) and so all I needed was some mushrooms because, as you probably agree, the rest of the ingredients are regulars in every raw foodie's pantry. Lasagna is definitely not an everyday dish at my home but it's great food for entertainment. Even guests who are not familiar with raw food will appreciate it. And the best part: it's sooo easy to make, you will not spend all day in the kitchen.


Rawsagna
(Serves 2)
1 large zucchini, for the "pasta"

Filling:
~10 button mushrooms
1/4 red onion
shoyu sauce
optional: bell pepper, other veggies

Sauce:
6 sundried tomatoes
1 large heirloom (or other kind) tomato
chunk of onion
2 cloves garlic
few leaves of fresh basil
1-3 tbsp shoyu sauce
2 tbsp olive oil
sea salt

Nut Cheese:
1/2 cup Brazil nuts
sliver of onion/clove of garlic
optional: salt


Preparations:
1. Start by soaking the sundried tomatoes in a bowl of water for several hours (or at least as much time as you have).
2. Chop the mushrooms and the onion into small pieces. In a bowl, mix them with shoyu sauce and marinate your filling in the dehydrator for a couple of hours.
3 Peel and then slice the zucchini lengthwise into thin, lasagna pasta-like sheets. Place them on a mesh tray and dehydrate them for an hour or two but check on them every so often to make sure they don't dry out.
4. Blend all of the sauce ingredients until it reaches a smooth consistency, taste test and add more seasoning if necessary.
5. An hour before serving time, spread layers of the marinated mushroom, thinly sliced vegetables (if you're using any) and some sauce on the zucchini sheets (except for a couple top layers) and dehydrate them further for an hour at 118 °F (48 °C). Spread only tomato sauce on the top layers. 
6. For each serving, layer 3 sheets with filling and top with a layer of zucchini with the sauce only. 
7. Grind the Brazil nuts, onion/garlic, and salt in a spice grinder or make a larger batch and then you can use a food processor. The extra nut "cheese" you'll have will last several days in the refrigerator. 
8. Sprinkle the lasagna servings with the "cheese" crumbs and decorate them with fresh basil leaves.

It sounds like a lot "to do" but it really is effortless and worth the while. If you want to make a savory dish for lunch, dinner, to impress guests you have over, or to take to work the next day....you might just want to make this.


From Basil to "HemPesto"

Wednesday, August 22, 2012


A few days ago a dear colleague of mine surprised me with some freshly picked zucchini squashes from his garden. Yes, I know, I work with such nice people : )
Well, that meant I had to get to work and go out of my way to make something other than a salad for once... And since it's basil season too, here's the outcome. 

HemPesto
(Makes about 1/2 cup)
 large bunch of fresh basil
1/4 cup hemp seeds
1/4 cup walnuts
2-3 cloves garlic
splash of olive oil
salt to taste

Remove the basil leaves from the stems and process them with just half the hemp seeds and half the walnuts, a splash of olive oil, the garlic, and salt. Depending on how thick/runny you prefer your sauce (runny is easier to mix with pasta) add more nuts/seeds or oil to the mixture. Taste test and add some salt if needed. 
To make zucchini pasta just cut grooves all the way lengthwise the zucchinis and then shave them into pastaCheck out the Pad Thai recipe for more details on this...
In a large bowl, toss the pasta in the sauce, cut up some tomatoes to go with it and decorate the servings with basil leaves. Hmmm, sooo satisfying...


Basil Nutrition
This lovely herb has anti-inflammatory and antioxidant properties, it's high in vitamin K and A, and the bone strengthening mineral, manganese. It can provide relief from arthritis and protect you from cancer.
Yes, the bursting aroma is not all...

Serving Suggestion
Needless to say, pasta is not the only way to enjoy pesto. Serve this as a dip with crackers or veggie sticks. Spread it on canapés, sandwiches, or pizza. You can even make it really liquidy and use it as a salad dressing. So good so many ways...


Move Over, Raspberries!...

Sunday, July 29, 2012


As if raspberries were not "cool" enough anymore, right? No. Of course that's not the case. But... Yes, there's a BUT. Why would I get raspberries to make dressing when I live in Fairyland where all I have to do is just step outside of the house and I find myself surrounded with wild blackberry bushes?! I have been awaiting the season, watching them bloom and later show the green berries for weeks...and for the past two weeks they've had tons of fruit...mmm. I realize I probably end up with a bunch of haters, or jealous audience, but hey, I just moved here recently and I have to brag. If for no other reason, then because it's definitely a raw foodie's heaven and I'm a bit enthusiastic. You can't blame me for that. : )

So what did I do with the berries I just picked? I've made blackberry vinaigrette that's to die for!


Wild Blackberry Vinaigrette Salad with Millet Crackers
(Serves 2 people or 1 hungry raw foodie)

For the Dressing
Blend* the following ingredients:
~ 1 cup of blackberries (you may thaw out some frozen berries as an alternative)
~ 1 tsp mustard
~ 2 tbsp vinegar ( I used apple cider this time)
~ 2-3 tbsp oil (I used olive oil)
maple syrup (not raw) or honey (not vegan) or other sweetener to taste
pinch of salt
optional: pinch of cayenne pepper

*Berries have a lot of seeds. I prefer to keep them in there but if you rather have a smoother dressing then press them through a sieve first and add your berry paste to the rest of the ingredients and blend.

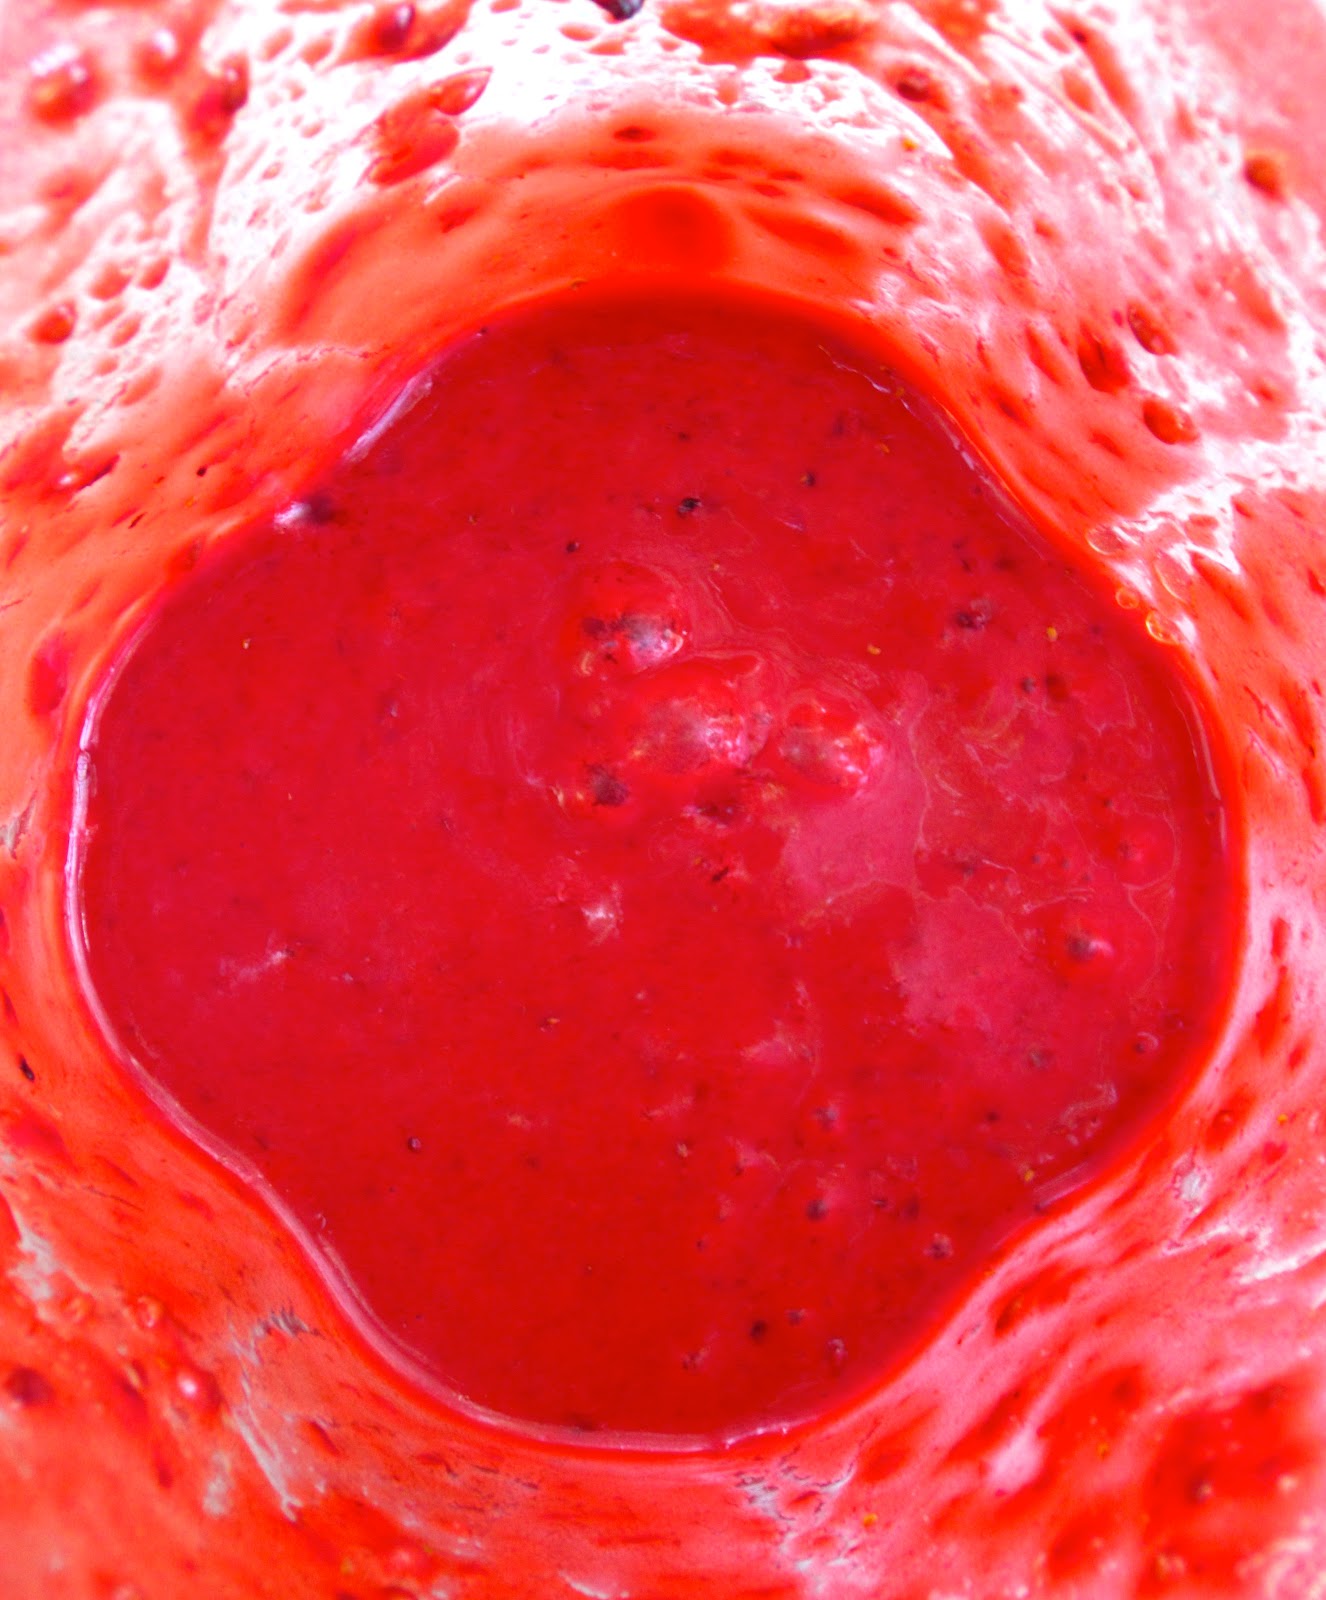
Look at the color of this!...


As for the salad, I like to keep it simple when the dressing is such an extraordinary one so this is all mine had but of course you can go as crazy as you wish:

mixed greens (or chop up a large head of romaine lettuce)
peas removed form 3-4 pods of English peas
a chunk of thinly sliced red onion
1 small Persian cucumber, sliced diagonally

Add avocado or nuts for a more filling meal.

1. Toss the ingredients with the dressing and pile some on individual serving plates along with some crackers.
2. Excuse yourself (or not) and lick the blender before sitting down to enjoy your plate of Heaven!

Aren't we so spoiled???


Blackberries are antioxidant stars!
Anthocyanins, the antioxidants that give these berries their dark color, have antiinflammatory and anti-cancer qualities as well. Being exceptionally nutritious, high in vitamins C and K, and very rich in manganese and fiber, means they contribute to your heart health and good eyesight, help keep your bones strong and support your digestive system.


Taco Time

Tuesday, July 24, 2012


What else could you use baby collards for? It's Summer time (on the Northern hemisphere anyway) and  I didn't want to juice such fresh, crisp leaves. So I made tacos. Being about as large as the palm of my hand they're the perfect size and the perfect shape. Folded them into halves and filled them with sprouted goodness to end up with an enviable lunch.

Baby Collard Tacos
(Makes 6 tacos)
For the filling:
1/2 cup sunflower seeds 
sliver of red onion
1/2-1 jalapeno
juice of half a lemon/lime
cumin, cayenne, salt

handful of chopped cilantro
1 small tomato
and collard leaves to act as taco shells..


Directions:
1. Soak the sunflower seeds for 6 hours or overnight.
2. In a food processor, combine and pulse just a couple of times the seeds, the onion, jalapeno, lemon juice, and the spices.
3. Mix in the cilantro.
4. Fill your collard leaves with a few spoonfuls of the filling and top each with chopped tomatoes.
5. To top it all, drizzle nut/seed cheese on them if you wish.

This is great when you have people over and it takes just a couple of minutes to make. Yes, it's always good to have soaked seeds in the fridge; you never know when they come in handy...especially if you eat them often so they will never go to waste.

Sunflower seed nutrition
As the main ingredient here, replacing minced meat and what not, who knows what...they deserve some attention. Guess what, these seeds are full of nourishing goodness. They're very high in protein (the kind that's easily digestible), rich in B vitamins and a very good source of minerals too. They're exceptionally high in vitamin E, come out as winners as a matter of fact, yep, they've taken a trophy for it. So eat them! Your eyes, your heart, your bones, your hair, and your skin will thank you for it. They're good for your nerves, have anti-cancer properties, and are a good anti-inflammatory. All that in tiny seeds????!!!

This is fast food...not as you've known it... Enjoy and share!


California Rawlls

Friday, June 29, 2012


For seven years I made and delivered california rolls to a health food co-op. They were made with rice and tofu though. I hardly ever ate them myself, probably because I already had to make them constantly and didn't feel like preparing any for home.
Well, I had to come up with raw versions because they're so delicious and quick to make. This literally takes a couple of minutes as long as you have soaked nuts and have practiced the rolling itself. True, rolling up a pile that's about to fall apart can take some time to figure out but once you got it it's routine. Make it into a Japanese themed lunch by serving soy sauce/shoyu sauce and wasabi (Japanese horse radish you can find in a powder form and make a paste out of by adding water to it) on the side along with a bowl of miso soup.

Savory Nori Rolls
(For 2 rolls)
2 nori sheet
1 cup soaked almonds or other nuts ground for nut "rice"*
1/2 avocado, sliced
1 small carrot, shaven/shredded/julienned
2 green onions, split lengthwise
a handful of sunflower/alfalfa/other sprouts
little bit of shredded horseradish
1 small cucumber, sliced lengthwise
umeboshi plum paste**
forkful of sauerkraut per roll
anything else you like...

* Nut rice: You may grind up your soaked nuts with garlic, salt and herbs added to further enhance flavors. I used a mixture of almonds and brazil nuts, added a bit of hemp seeds, salt and garlic and ground them coarsely the size of half a grain of rice. Adding a few drops of water to the ground nuts and mixing helps them stick somewhat.

** Use the paste sparingly as it's quite high in salt.


Directions:
Have a very sharp knife and a small bowl/cup of water ready to wet your fingers and the knife as necessary.
1. Lay out the nori sheets and spread a little umeboshi plum paste on half the area of each to help the nut "rice" stick better.
2. Take half of the nut "rice" and pack it down firmly and evenly with the back of a spoon.
3. Layer the vegetable shreds/slices you're using and top them with some sauerkraut and sprouts. Ready to roll?


4. Dip your fingers in water and dampen the upper 1-inch edge of a sheet and carefully lifting the other edge while holding down your pile of ingredients, start rolling it as tightly as you can manage. The wet end will serve as a seal. Make sure to press that edge against the other surface. Put this roll aside and repeat the roll-up procedure with the other.
5. Wet your sharpest kitchen knife and either slice the rolls into about 1-inch thick bites or cut them in halves diagonally.
6. If you'd like a dip, mix some soy/shoyu sauce with some wasabi. The wasabi paste is easily made by mixing some powder with a touch of water. For miso soup, look here.

Voilà, lunch is served. Enjoy!


Chill Out, Cherries Are In Season!

Tuesday, June 19, 2012


My dearest Grandma always made this for Summer-time picnics or on hot days at home when we were kids. She makes the best fruit soups, of course. I'm just trying to imitate or reinvent her recipes and make raw versions of her magical creations. She uses sour cherries, the really dark (and sour, as the label suggest) cherries that are ever-so-popular in Europe but not quite so easy to come across in the States. At least, I have never seen any at any of the farmers' markets or stores. Anybody out there has had any luck???

So using "regular" cherries this would probably come out sweeter, hence the lemon juice. It can be warmed up in a dehydrator or gently warmed on the stove top but for hot days such as we've been having here (106 °F /  41°C over the weekend) in the Bay Area, "chilled" is the name of the game for sure.

Chilling Cherry Soup
(Serves 2...maybe)
2 handfuls of red cherries (plus extra for garnish)
4-4 cups nut mylk (or ~3/4 cup nuts and 3 cups water)*
juice of 1 lemon
1-3 tbsp coconut nectar / honey (not vegan) or other sweetener
lemon zest
1/2 tsp cinnamon
pinch or two of ground cloves
optional: vanilla

* I recommend almond/cashew/macademia mylk (or using almonds/cashews/macademias and water) because they have a more neutral flavor. If you're using nuts and water you might want to make the mylk first by blending them and maybe even straining it if you prefer a really smooth mylk with no fiber. If you do not mind the nut pulp in your soup (I sure don't) then don't bother to make the mylk separately first. While almonds are better used when soaked for 4-8 hours beforehand, cashews and macademias do not need to be soaked at all.

Directions
Remove the pits from the cherries and throw everything in a blender. Gradually increasing the speed, blend it all until you have a very smooth consistency. Taste test and adjust ingredients. Give it a whirl again.
Serve immediately or chill for a while first. Pour into serving bowls and garnish with the remaining cherries, nut crumbs, maybe coconut sugar or maple crystals (not raw), etc.
Chill out...


Simply Goddess Salad

Sunday, May 20, 2012


Quick, simple, delicious, and super nourishing. Sold? So am I. I must be because I had this two days in a row and I get bored with things fast. Well, except for salads. I can't seem to get tired of them but you gotta vary the dressing, right? ...And the rest of the ingredients, which I try to remember once in a while. Well, here's the dressing of today's (and yesterday's) salad:

Goddess Avocado Dressing*
(Makes about 2 cups)
1 1/2 avocado
2 cloves garlic
juice of 1 small lemon
~1 tsp salt
1/2-1 tsp fresh ground pepper 
1 1/4 - 1 1/2 cups water
Optional: pinches of cayenne pepper and/or oregano

Blend all of the ingredients until smooth. Add more water if not easily pourable. Taste test and add seasoning if necessary. Remember to start with less, you can always add more but can't take any salt/pepper, or even water, out. 

Chop up some lettuce or other greens and veggies of your desire. I kept it very simple. This time it was romaine lettuce, cucumber, red cherry bomb pepper, tomato, green onion, and radishes. That's it. Add slices of avocado, shredded cabbage/carrots/beets, red onions, green apples, nuts, seeds, etc. if you wish. Smother with a generous amount of dressing, mix and serve.

*Nutrition
The main ingredient of this dressing, avocado, has a laundry-list of health benefits. Chances are you already know this, but it's always good to be reminded of such wonderful things...
These unique fruits are very rich in vitamins such as C, E, K, B6, and folate (B9) and minerals like potassium, copper, magnesium, and manganese. They're loaded with fiber and very rich in monounsaturated fat, that is the good kind of fat you want to eat, and they're among foods with the highest lutein content. All this translates to a delicious addition to salads and side-dishes that can help protect you from cardiovascular disease, different types of cancers, boost your body's nutrient absorption capabilities, and support your eyes by preventing macular degeneration and cataract formation. 

Happy Summer (if you live on the Northern Hemisphere), Happy Winter otherwise!


Gazpacho & Breadsticks

Saturday, March 17, 2012


Breadsticks and bread were already in the "oven". Their aromas were filling up all corners of the house and I was like a little kid checking on them every half an hour to see if they were ready to eat. Be ready for your home to smell at least as lovely as your favorite bakery that you walk into on a Saturday morning when the crisp, baked-to-perfection pastries and rolls, etc. are just taken out of the oven. I promise I'll post the bread recipe next. So much rain and gloomy skies (and my lack of lighting) make it a bit difficult to take pictures so if you're inpatient, talk to Mother Nature and put in an order for some sunshine in the Bay Area, thanks! While it's been pretty chilly lately, last weekend's temperatures still allowed for some cold soup. As I said, breadsticks were already in the making and I had to make something to eat them with, right? So I did, and here are the recipes.
Back in August, when I was in Barcelona, I couldn't get enough of the tomato based veggie soup, Gazpacho. I just love that stuff. In a bowl, a cup, out of a bottle, served up any way I'll have it all. I've experimented with it over that past few months and it's really fun to change it up with different herbs added. Here are the approximate proportions for the version I love the most:


Gazpacho
(Serves maybe 2)
2 large tomatoes
1/2 cucumber
1 small carrot
1/4 red bell pepper 
1 green onion / chunk of onion
1 clove of garlic (optional)
1 stalk celery
salt & pepper
oregano
1 tbsp olive oil
1.5 cup water
optional*

*Add some berbere (typical Ethiopian spice mix) to turn up the heat on this savory bowl of blended veggies.
Blend all the ingredients until you get the smoothest juice-like soup, just as it's served traditionally.
Alternative: I sometimes run the blender for a shorter period and let the soup stay somewhat chunky. I told you I like to experiment with it and I really like it with the rougher texture too. Good for days when you feel like chewing ; )
Pour the soup into serving bowls, drizzle some olive oil on top and offer breadsticks (recipe follows) or crackers/chips with it. Oh so good.


Breadsticks
1 cup buckwheat groats*
½ cup sunflower seeds
½ cup flax seeds 
  2 stalks green onion
1 stalk fresh spring garlic / 1 clove garlic
 splash of olive oil
 ~ ½ tsp (or more) salt
basil, oregano to taste

*The buckwheat groats need to be soaked overnight and then sprouted for a day. Then, you can use the "buckwheaties" to make the breadsticks....so plan ahead!
Process all of the ingredients until they're evenly mixed. Taste test your mixture, add more herbs, salt, other ingredients, if needed, and process a little longer, then spread it out about half an inch (1.2-1.5 cm) thick on a teflex sheet. Score it to get sticks of the desired width and dehydrate at 115 ˚F (46˚C) for a couple of ours before flipping it onto a screen and dehydrating it 1-3 hours longer. Dehydration times depend on so many things so just keep checking on the sticks or if you're away don't worry because leaving them in there for a couple of hours longer will not hurt them. It will at least keep them warm. They're the best fresh out of the "oven"! These are great with salads and to take them along for a snack at work/school or when you're on the road, so you might wanna make an extra batch or too. The truth is, you'll probably end up with half as much as what you put in the dehydrator, especially if you have a big family and many walk by the "oven" every now and then. Good luck and enjoy! : )


Onion Rings with Chipotle Mayonnaise

Sunday, December 18, 2011


Just like the ones you're used to...they're crunchy but soft, they're oily but in a satisfying way. Here is one that's not quite quick and not so easy but may be well worth your time and effort! I guess there are two cases when you would "bother to" make these: one is if you really want some onion rings and two, if you have guests coming, especially those that haven't been introduced to raw food, this would be a great finger food or something that would balance out a salad...besides getting them hooked ; ) on raw foods, right? I must say though, making these onion rings will easily result in a huge mess and they're the most delicate things and are so fragile to touch once they're done....but I'll share my trick with you. I've been "suffering" from OCD ever since I can remember and when I was little I was always the one who breaded pieces of chicken - yes, chicken! :(  - or mushrooms or whatever my beloved grandma was getting ready to fry for a Sunday dinner. Here's what I always did and I still remembered to do today: use both hands for breading the rings but make sure to never mix them! Keep one hand for working with the dry mix and one with the wet mix. Also, every time before you transfer a ring from one batter to the other tap it against either the next ring in that bowl or the side of the bowl. That's all! You will not make a huge mess and your mixes will not mix and become something gooey. This makes it possible to coat the onion rings without your fingers ending up three times as big because of batter accumulating on them. So roll up your sleeves and make the batters:

Onion Rings
Ingredients:
(Serves 2-3 for a snack)
1 onion (as round as you can find)

Dry batter:
1 1/2 cup flax golden seeds (you might need to make more as it gets harder to coat the rings when     there's hardly any left)
paprika
salt
Grind the flax seeds as fine as possible and mix all the ingredients.

Wet batter:
olive oil
water
salt
Mix oil and water in about a 2 to 1 ratio and add some salt.

Directions:
1. Slice the onion as thick as you wish (mine are about 1/3-1/2 in or ~1 cm)  and gently separate the slices into rings.
2. Dip each ring into the dry batter first. They will pick up a bit of the flax seed mixture. Then dip them into the wet batter and finish with the dry.
3. Place them on a screen and dehydrate them at 115ºF (46º) until they're crisp. This will take several hours so if you'd like them for a late lunch you could do it early in the morning. If you need them earlier you can make them in the evening and dehydrate them overnight. They can sit on the trays for a day or two without spoiling. I kept mine there for two days and went back to snack on them whenever I felt like it.


I think I would prefer onion rings with some kind of tomato based dip such as ketchup but since it's not tomato season, I made this:

Chipotle Mayo
(Makes about a half a cup)
1/4 cup cashews
1/4 cup sunflower seeds
1 clove of garlic
juice of 2 lemons (or 1 lemon and some water)
splash of nama shoyu (or salt)
splash of umeboshi  vinegar
chipotle powder 

Blend all the ingredients until you get a very smooth consistency. Taste test it and adjust flavoring if necessary. Serve with the onion rings.

Onions have tons of health benefits.  They are a strong anti-inflammatory and can boost your immune system, help get rid of mucus and prevent colds (perfect timing for the winter months when at any given time there's someone with a cold around us, right?). They're also a good anti-coagulant so if you or someone you know were warned to watch your/their cholesterol levels then onions should be on the menu often... Enjoy!


Believe It or Not, I've made Curry!

Saturday, December 10, 2011

rawthaigreencurry


Going raw shouldn't mean giving up on your favorite cuisines such as Indian, Thai, Mexican, etc., right? I keep experimenting with dishes that I really enjoy and I would love to have from time to time, not to mention adding variety to my daily menu! Speaking of variety, this week was finals week, which means I've been living on tons of nuts and chocolate for days so I'm especially ready for a treat, and I wanted to make a new dish. This was so delicious...I will have to make a second batch tomorrow : )
I've already talked about the health benefits of mushrooms and cilantro but there's a main ingredient in this flavorful bowl that is more than worthy of praise...yes, you guessed right, I'm talking about coconut. Whole coconut, coconut water, coconut butter, coconut oil...it doesn't matter what you consume, they're all very good for you. Coconuts are high in fat, but it's the good kind of saturated fat that's really easy to digest and is readily available for energy. Besides the healthy fat, they have a myraid of other health benefits such as being high in easily digested protein, supporting thyroid health and helping with kidney issues. To top it all, they have antiviral, antibacterial, antiparasitic, and antifungal properties. Sorry diamonds, coconuts are my best friend!

Warm-You-Up Thai Green Curry
(Ingredients / serving!)
For the marinade:
3-4 crimini mushrooms
1 small baby bok choy
1 green onion or 2 slices of red onion
couple of slices red bell pepper
a pinch of grated ginger 
2 tbsp nama shoyu (this is NOT soy free!)
2 tbsp water
few slices of hot pepper (I used serrano)

For the sauce:
3.5 on (7 tbsp) coconut butter (you will need to melt it!)
1 tsp (or more) Thai green curry paste*
1/4 cup (or as needed) warm water
1 tbsp nama shoyu
1 tsp coconut sugar (or your favorite sweetener)
Optional: little crushed garlic (I didn't add any and it was plenty flavorful without it)

For garnish:
cilantro
sliced green onion

*I used a paste that comes in a jar and the worst part is that it's loaded with table salt. Well, hopefully there isn't that much in there...it doesn't taste really salty. If you're near a great Asian market where you can get all the ingredients for it then you can make your own paste! Make sure to get some galangal (Thai ginger), lemongrass, and kaffir lime.


Directions:
1. Slice thinly or chop all of the marinade ingredients (or whatever vegetables you may be using) and place them in a bowl. Mix them with the shoyu sauce and water and place the bowl in the dehydrator to warm for a couple of hours or as much time as you have on hand. If your coconut butter is in solid state then put that in the dehydrator (in a separate bowl) as well to let it melt.
2. Once the butter is melted you can make the curry base by mixing all the sauce ingredients. Do a taste test and add shoyu, sweetener, etc. if necessary.
3. Add the sauce to the marinade and stick it back in the dehydrator for a while.
4. Garnish with cilantro and/or green onions just before serving.
5. Thank the universe for all the wonderful ingredients : )


"Better Than" Pad Thai

Tuesday, October 25, 2011

rawpadthaipastawithpeanutsauce

What do you do when pasta is on the menu at home?
With a large batch of my favorite peanut sauce already made I had to figure out what to put it on! It didn’t take long to get some zucchini out and go on a raw pasta adventure. I had been wanting to try zucchini pasta but haven't figured out what kind to make first….until now. It was the first time but definitely not the last, in fact, I admit that I’ve made this dish several times in the past two weeks already! Yes, it’s that good.

Raw Zucchini Pasta
Zucchini makes perfect pasta because it doesn’t have an overpowering flavor and it has quite the right texture to replace the strings of dough we’re all used to. If you have a spiralizer or some kind of a magic machine to make pasta, lucky you, your task just got somewhat easier. If you’re like me and even your mandolin is in storage somewhere and all you have to work with is a knife then do this: cut grooves all the way lengthwise the peeled zucchinis but be careful to not cut through the other side. With a peeler go down the grooves you’ve made and shave your squashes into pasta. It takes some work but I must say I didn’t expect to like the outcome as much as I do now and it’s so worth it. Pile some on plates and put your pasta servings in the dehydrator for a warmer dish at about 130 °F (54 °C) while you make the sauce.

rawzucchinipastaandpeanutsauce

Peanut Sauce*
Ingredients:
(Serves 2-3)
1 ½ cup peanuts (or a shallow cup of peanut butter)**
optional: 3-4 tbs soy sauce/nama shoyu 
~½ cup water added a spoonful at a time (you may add less or more depending on how watery you prefer the sauce)
2 cloves garlic
handful of cilantro
optional: 2 tbsp of your favorite sweetener
optional: 1 jalapeno (makes it spicy)

* If you happen to end up with leftovers this makes a great dip to go with apples or veggies.
** For this recipe I used lightly toasted Valencia peanuts, which are not raw. I’ve talked about raw Jungle peanuts vs. roasted peanuts here and in this case I think these are a better choice. Decide for yourself. If you want to go for both the flavor and the improved digestibility then I recommend using lightly toasted Valencias. If you insist on 100% raw go for the Jungle ones and maybe adjust your seasoning.

Directions:
If you’re using peanuts, grind them in a food processor until they’re starting to clump together and little by little add some water. Add the soy sauce/nama shoyu, garlic, jalapeno, cilantro and sweetener of your choice. Mix evenly and taste. Adjust the seasoning and add more water if it doesn’t have the consistency of a sauce to pour on pasta. If you’re starting with peanut butter you don’t even need to use a food processor just mix it with water and the rest of the ingredients but use already pressed garlic and chop the cilantro finely.

Assembly:
Get your pasta out of the dehydrator and mix each serving with some peanut sauce and place back into the dehydrator to warm up for a little while longer. Slice some bell pepper and some green onions, and chop some more peanuts to top each plate before serving. Add some chili flakes for an extra spicy finish dig in!
Put zucchinis on your shopping list because from now on you’ll want to have “pasta” on hands at all times.

rawpadthaicloseup


From Farmers' Market to Salad Bowl

Saturday, October 8, 2011

rawfreshsalad

One of my favorite things to do is to go to the Santa Monica Farmers’ Market and visit my favorite growers to see what they have just harvested. There’s nothing like seasonal, fresh, organic food, grown by caring people. Of course, I would love to grow my own fruits and veggies, that would be ideal, but where I currently live I’m only able to “raise” strawberries, chili peppers, and some herbs. “City living”, as we call it, only allows for a “garden” that consists of five little planter boxes. So farmers' market it is…

santamonicafarmersmarket

I went, I grazed, I picked, I bought, I carried, and brought home some fruit and such delicious ingredients for a salad that it really didn’t even need any dressing. The French are right: it’s all in the ingredients! Some of the goodies I picked up are French plums, a variety of heirloom tomatoes and even wild arugula!
There’s no such thing as coming home from the market with the fresh, crisp greens and not making a salad. They are the only types of dishes where I don’t mind combining lots of ingredients. They’re still all vegetables. No matter what, a salad can’t be that hard on you!
So I layered romaine lettuce, wild arugula, cucumber, red onions, red radishes, bell pepper, pineapple heirloom tomatoes and made just the simplest dressing to go with it.

rawsaladdressing

Basic Salad Dressing 
(for salads that are too good to be drenched in an overpowering “sauce”)
Juice of 1 lemon
¼ cup olive oil
salt to taste

Variations
Sometimes we don’t have the best ingredients on hand or just want a more flavorful dressing or want to make something to impress… So here are some other combinations that I love to dress my salads with:

Garlic and Herbs Dressing
Juice of 1 lemon
¼ cup olive oil
½ tsp mustard
1-2 cloves garlic (pressed)
chopped fresh (or dry) herbs such as oregano, basil, or your favorite(s)
salt to taste

Honey-Mustard Dressing
Juice of 1 lemon
¼ cup olive oil
½ tsp mustard
1-2 cloves garlic (pressed)
½ tsp honey (NOT vegan, but you can substitute agave or maple syrup, which is not raw)
salt to taste

Whisk together all of the ingredients with a fork or shake it all up in a jar, pour over the salad, mix, and that's it! You've got a bowl full of antioxidants, anti-cancer qualities, fiber, copper, folate and the list goes on....it's a pile of vitamins and minerals "thrown" together in minutes!  It can't really get any healthier or more eco-friendly...

Pizza For Dinner

Tuesday, September 27, 2011

My recent European Adventures inspired me to create some more complicated dishes especially because I’m anticipating the days to turn cooler, when we all feel like eating “heavier” or more substantial foods. Also, people’s interest in raw foods is ever-growing and so does the need for transitional* foods on my blog! I had the best raw pizza at a restaurant in Copenhagen, which I wanted to duplicate ever since.

bestrawpizza

This pizza is even more amazing than I imagined it could be. The end result is just absolutely delicious cold and when put in the dehydrator for 20 minutes to 2 hours your guests might not even be able to tell that they're served a raw dinner!

*Transitional raw foods are those that help you convert to a raw (or high raw) lifestyle by their resemblance to cooked dishes. They usually have more ingredients, are more complicated to create, heavier on nuts and/or seeds, and very often dehydrated and/or even served warm straight out of the dehydrator. It is often very helpful to rely on foods as such for the first days/weeks/months (or however long it may take) because of the satisfaction and fullness they provide.

Raw Pizza Crust
(Makes 6 pieces)
1 cup buckwheat groats
½ cup sunflower seeds
1/6 of an onion (or garlic, if preferred)
splash of olive oil
splash of water
~ ½ tsp salt
basil, oregano to taste
½ cup flax seeds

rawpizzacrust

Soak the buckwheat for a few hours or overnight. Rinse and drain them. Grind the flax seeds until fine. Using a food processor, combine all of the ingredients but the flax seeds. Salt to taste and transfer ingredients into a mixing bowl. Fold in the flax seeds and mix well. Spread the mixture on a teflex sheet (you will get just enough to cover one sheet at a thickness of about 1/3 in or 8 mm). Score as desired (I made it into six triangular slices) and dehydrate at ~130 °F (54 °C) for about an hour then lower the temperature to 115 °F (46 °C) and keep dehydrating until you can flip them over to a mesh sheet. Dehydrate for a few more hours to pizza crust-like consistency.
Now that you have the base, you can store them in the fridge (or freezer) to use later, or you can assemble pizza right away using the recipes that follow.

rawpizzamarinarasauce

Raw Marinara (Pizza Sauce)
 (Makes about a cup)
Blend the following ingredients:
½ cup sundried tomatoes*
2 small tomatoes
juice of half a lemon
couple of slices of red onion
2 cloves of garlic
salt to taste/splash of soy sauce
splash of olive oil
basil, oregano

*soaking the sundried tomatoes beforehand helps a lot, especially if you (just like me) don’t have a high-speed blender

rawpizzawithherbedwalnuts

Raw Seed Cheese
Ingredients:
(Makes about a cup)
1 cup sunflower seeds
juice of half a lemon
2 cloves of garlic
3 tbsp soy sauce/nama shoyu/1 tbsp umeboshi vinegar + some water (if you avoid soy)
optional: dash of turmeric for color

Directions:
Grind the seeds as finely as you can. Blend the rest of the ingredients and add the seed “meal” to the blender. Add some water if necessary for desired consistency. I like it more runny than thick but everybody’s different.

Both, the pizza sauce and the seed cheese will keep in the refrigerator just like the crust, so guess what, once you prepare them all you'll have some grab-and-throw-together lunch waiting for you for days!

rawpizzamushroomsspinach

Toppings
This is where you can go as simple or as crazy as you wish! I put spinach, tomatoes, and marinated mushrooms on these (above), and the first image shows the one with herbed walnuts and lemon boy tomatoes. You may put pineapple for Hawaiian or pesto for a green pizza. It’s hard to go wrong…

So grab a piece of crust, spread some pizza sauce on it, add your favorite toppings, and drizzle with some seed cheese. You may put the assembled pizza slice(s) into the dehydrator for a few minutes to warm up or for a couple of hours for more of a “baked” feeling.

rawpizzamushrooms

Dinner is served!

What are YOUR favorite toppings??


Wrap 'em Up!

Sunday, July 31, 2011

mushroomcollardwrap

It all started with mushrooms, again. I’m pretty sure I reached for them this morning at the store for a reason. I knew that I was going to marinate them…the rest was spontaneity in action.

The truth is, I grabbed some collard greens for a smoothie, but then I wanted to use some sprouts too to make a high protein meal sans nuts. So came the idea of making a mushroom-veggie roll. This time I went for crimini mushrooms. Their nutritional profile is nearly identical to that of the portabello’s and they’re both so healthy. The health benefits of criminis stand out when we look at selenium content, which is even higher than that of its giant cousin’s. Also, criminis are a more complete protein source and they make a good post workout food for vegans as their protein to carbs ratio is 3:4!

oliveoilmushroomsherbs

Rosemary has a laundry list of benefits
…among which are the following characteristics: antiseptic, antidepressant, anti-inflammatory, expectorant, antiviral, aphrodisiac, disinfectant. In other words, it can protect you from disease causing microorganisms, elevate your mood, help clear mucus build up when you have a cold, etc. It also stimulates bile secretion and provides an all around support for digestion. In aromatherapy it is used to help with fatigue, sadness, anxiety, and to ensure a restful sleep.
I admit, while the benefits sound wonderful, I only used it for its savory resinous flavor!  

Marinated Crimini Collard Wrap
Ingredients for the mushroom marinade:
(Serves 1-2)
½ lbs (0.2 kg) crimini mushrooms
~4 tbsp olive oil
finely chopped leaves of a 2 in (5 cm) piece of rosemary sprig
2 cloves of minced/finely chopped garlic
salt to taste
optional: you may add any other spices/herbs you love

To make the wraps:
2 collard leaves
1 small tomato
handful of clover/any other sprouts

criminimushroomsandrosemary

Directions:
Brush off the mushrooms (do NOT wash them), halve the caps, then slice them. Place in a bowl and add the olive oil , the rosemary, the garlic, and salt to taste. Mix it well and give it a few stirs. If you have time, let it sit for 30-45 minutes. The oil will “cook” the mushrooms and the whole marinade becomes juicy as the mushrooms release water due to the salt. You’ll find that you end up with a handful of mushroom “stew” without cooking and killing all the nutrients!

Grab the collard leaves and partially remove the stems, so that they’re flush with the rest of the leaf.

removecollardstems

This will allow you to have a large wrapper that’s easy to roll. (If you cut the stems out, you will have very small surface areas that are much harder to work with!) Spoon some of your mushroom marinade on the back side of the leaves,

layervegetablesforcollardwrap

layer sliced tomato and sprouts, or anything else you’d like (cucumber, bell pepper, olives, slices of radish or avocado) on top and just roll it up…..and that’s a wrap!

marinatedmushroomsandcollardwarp
Reference: http://www.liveandfeel.com/medicinalplants/rosemary.html