RAW Food for Truth Living foods lifestyle. Nutritious, raw, vegan recipes. Meals & tips for natural healing. Allergen-free, organic dishes. Courses you can prepare in no time. Meal-planning for those "on a budget". Discovering wild edibles. Eco-friendly, conscious, healthy living. . . . at home, in the office, and on the road.
Showing posts with label buckwheat. Show all posts

Carob Buckwheat gRAWnola

Saturday, December 8, 2012


Cooler weather calls for warming foods. Does that mean you have to give up on your raw lifestyle? Absolutely not. There are plenty of foods out there with great warming energy. Buckwheat is one of  them. So why not use some buckwheat in recipes this season? Aside from its warming energy buckwheat has many health benefits. It's very high in minerals in general, especially such as manganese, magnesium, copper and phosphorous and some of those minerals are hard to get enough of. At least it seems that a large percentage of the population is deficient in magnesium, for example.
These seeds (buckwheat is actually a seed, not a grain) happen to have a very high fiber content, and are a complete protein too, not to mention their high niacin (vitamin B3) content, which is a natural antidepressant. Another food that's good for your bones, your skin, might help reverse gray hair, benefits your digestive tract and might even elevate your mood besides being an exceptional source of healthy protein (can you believe you'll get more protein from a 100g of raw buckwheat than cooked beef, for example?!!) A pretty good choice for breakfast or a snack and combined with the rest of the ingredients below you can make delicious winter granola with it. If you're feeding more than 1-2 people you might want to make a double batch so you don't need to do it twice a week : )

Raw Carob Buckwheat gRAWnola
2 cups buckwheat
1/2 cup sunflower seeds
1 tbsp golden flax seeds
1 tbsp sesame seeds
1/2 cup (or more) raisins
1/2 cup (or more, to taste) carob powder
handful of coconut shavings / 3 tbsp shredded coconut
3-4 tbsp melted coconut oil / other oil of your preference
cinnamon
salt
Add your favorite sweetener, nuts, different dried fruits, additional spices, etc.

Directions:
1. Soak the buckwheat for 8 hours or overnight rinsing it a couple of times thoroughly. If you have time  you can sprout them too before using them in this recipe.
2. Grind the sunflower, flax, and sesame seeds briefly, just enough that they're coarsely "chopped".
3. Chop the raisins and other dried fruits you're using into smaller pieces.
4. Mix all the ingredients really well so that the salt and all the flavors are evenly distributed.
5. Taste test your batch and add more sweetener, etc. if necessary
6. Spread on two trays and dehydrate them for a couple of hours at 140˚F then lower the temperature to 115˚F and dehydrate for several hours longer.

Your house will smell unbelievably heavenly, I promise!
Serve while still warm with your favorite nut mylk or dry, as is. I never liked my food soaked so I always eat muesli, granola, and cereals dry and crunchy.
Pack some into your lunch box, or take on travel. This is a great warming and high energy food.
Happy gRAWnola making!

P.S: Have you noticed the ladybug?? : )


Soft & Crunchy Carob Energy Bars

Wednesday, November 14, 2012


There's a Bio store (organic health food grocery store) in Budapest that carries some cookies that are filled with a carob-sesame-honey filling. I lived on those for a while when I was there. Aside from the honey, they're vegan and whole grain and organic but of course not raw. That was perfect for me back then when I was a vegan whole foods enthusiasts and had not even heard of the strange concept ; ) of eating raw yet. So I was in heaven when they had them and was quite upset whenever they were out. They sold like hotcakes so you had to be on top of things and learn when they were delivered and be there shortly after. But that was then....and THIS is now.

It's been long overdue that I combined the above described flavors and created a raw delicacy and without further ado I'll share with you the "rawsome" outcome of my trial-and-error snack bars.


Crunchy Carob Energy Bars
(Makes 5 bars)
1/4 cup and 2 tsp carob powder
1/4 cup sesame seeds
1/4 cup buckwheaties*
2 tsp lucuma powder
1/4 cup and 3 tsp tahini
3 tsp honey (not vegan) or maple syrup (not raw) or agave syrup
juice of 1 small carrot and a 1 in (~2 cm) piece ginger

For coating: cinnamon or extra carob powder or lucuma powder

* Buckwheaties are sprouted and dehydrated buckwheat. You could just soak and dehydrate them to be qicker. I usually make a big batch to have them around whenever I need to use them in a recipe.

Directions
1. Optional: grind the sesame seeds just a little bit to break them up.
2. Using a fork, mix all of the ingredients in a bowl adding the juice little by little.
3. Add more juice if the mixture is too dry to handle and add more carob powder if it gets too wet. Taste test and add more sweetener if desired.
4. Form bars or any other shapes out of the mixture. It will be a sticky experience but it's so worth it. Roll each bar into cinnamon or carob powder.
5. Store them in the fridge if you prefer them firm, leave them out for a softer snack.

Carob's benefits
This caffein-free bean that's commonly used instead of cacao in desserts is very rich in calcium, practically fat-free, has no oxalic acid to interfere with absorption of nutrients, and is naturally sweet so you'll probably use less sweetener in your recipes when using carob.

Buckwheat and ginger have warming energy, a perfect cold-weather food. Sesame seeds and tahini are extremely rich in minerals and B-vitamins and will nourish your bones, your hair and skin.

That's right, these bars are not only yummy but quite nourishing as well. I took one a day with me to work last week and looked forward to my after-lunch dessert more than ever :) They're great for traveling too. Enjoy!


How About a Loaf of Bread?

Sunday, April 1, 2012


No, this is not April Fools', I'm serious. I've been raw (on and off) for over a year and for the past month, for several reasons, more off then on. : ( That also means having eaten loaves of bread in one sitting every now and then! Yes, again, I'm serious! But this wonderful creation is so dense that even I can stop myself after two slices. Bread-making is not so common in raw kitchens. Raw chips and crackers are much more the mainstream substitute for everything that's normally made out of wheat flour. I thought I would change that, in my kitchen anyway, and try to come up with something that even looks like bread and can be used for sandwiches, etc. This is a version that is great for breakfast or an afternoon snack just because it's not savory with herbs or spices, which is what I would make for a veggie sandwich. The result is incredible. Perfect with nut butter and jam for a "peanut butter and jelly" sandwich. I happened to use almond butter and goji berries (excellent for the brain), a wonderful harmony, but I love it with just walnut butter (also perfect brain food) on it, yum.
If you find cardamon too strong then just skip it. It's unique enough that I imagine some of you might not be big fans. You'll still get your "cinnamon toast" out of this. It couldn't really get any better than that, right?


Raw Cardamon-Date-Cinnamon Bread
(Makes 7-8 slices)
1 cup buckwheat groats
1/2 cup sunflower seeds
1/2 cup golden flax seeds
6-7 medjool dates
cinnamon
3-4 pods cardamon
pinch of salt
optional: add your favorite sweetener to taste


Directions:
1. Soak the buckwheat overnight then sprout for a day or two. The goal is not to end up with little tails but to make sure they're in the edible stage. Don't rinse them right before you use them. They'll have just enough moisture for the dough with a perfect texture.
2. Grind the flax seeds and the cardamon pods (if you're using them) in a spice grinder.
3. Place all the ingredients in a food processor and mix them until it all clumps together forming a ball of dough. You might need to scrape down the sides a couple of times to make sure everything is mixed in.
4. Shape your dough into a cube or whatever form you prefer. With a sharp knife, cut into ~1/4 in (6 mm) thick slices.
5. Gently place your slices onto a teflex sheet and dehydrate them for 1-2 hours at 115 ˚F (46˚C) then flip them onto a screen and continue dehydrating them for several hours.
6. Spread your favorite nut butter/coconut butter/cacao spread/jam/fruit paste, etc on it. I like to sprinkle with extra cinnamon too. It's a great snack to have around or to pack into a lunch box.


I'm so inspired.....It's time to make a savory loaf, or a sourdough imitation. After all, I live in the Bay Area....It should be famous for RAW sourdough too, right? : )
The sun is out so I'm off to harvest some vitamin D! Whoever decided to send some sunshine my way, thanks! See, I promised I would post this recipe once there's enough light for photos...
Enjoy!


Gazpacho & Breadsticks

Saturday, March 17, 2012


Breadsticks and bread were already in the "oven". Their aromas were filling up all corners of the house and I was like a little kid checking on them every half an hour to see if they were ready to eat. Be ready for your home to smell at least as lovely as your favorite bakery that you walk into on a Saturday morning when the crisp, baked-to-perfection pastries and rolls, etc. are just taken out of the oven. I promise I'll post the bread recipe next. So much rain and gloomy skies (and my lack of lighting) make it a bit difficult to take pictures so if you're inpatient, talk to Mother Nature and put in an order for some sunshine in the Bay Area, thanks! While it's been pretty chilly lately, last weekend's temperatures still allowed for some cold soup. As I said, breadsticks were already in the making and I had to make something to eat them with, right? So I did, and here are the recipes.
Back in August, when I was in Barcelona, I couldn't get enough of the tomato based veggie soup, Gazpacho. I just love that stuff. In a bowl, a cup, out of a bottle, served up any way I'll have it all. I've experimented with it over that past few months and it's really fun to change it up with different herbs added. Here are the approximate proportions for the version I love the most:


Gazpacho
(Serves maybe 2)
2 large tomatoes
1/2 cucumber
1 small carrot
1/4 red bell pepper 
1 green onion / chunk of onion
1 clove of garlic (optional)
1 stalk celery
salt & pepper
oregano
1 tbsp olive oil
1.5 cup water
optional*

*Add some berbere (typical Ethiopian spice mix) to turn up the heat on this savory bowl of blended veggies.
Blend all the ingredients until you get the smoothest juice-like soup, just as it's served traditionally.
Alternative: I sometimes run the blender for a shorter period and let the soup stay somewhat chunky. I told you I like to experiment with it and I really like it with the rougher texture too. Good for days when you feel like chewing ; )
Pour the soup into serving bowls, drizzle some olive oil on top and offer breadsticks (recipe follows) or crackers/chips with it. Oh so good.


Breadsticks
1 cup buckwheat groats*
½ cup sunflower seeds
½ cup flax seeds 
  2 stalks green onion
1 stalk fresh spring garlic / 1 clove garlic
 splash of olive oil
 ~ ½ tsp (or more) salt
basil, oregano to taste

*The buckwheat groats need to be soaked overnight and then sprouted for a day. Then, you can use the "buckwheaties" to make the breadsticks....so plan ahead!
Process all of the ingredients until they're evenly mixed. Taste test your mixture, add more herbs, salt, other ingredients, if needed, and process a little longer, then spread it out about half an inch (1.2-1.5 cm) thick on a teflex sheet. Score it to get sticks of the desired width and dehydrate at 115 ˚F (46˚C) for a couple of ours before flipping it onto a screen and dehydrating it 1-3 hours longer. Dehydration times depend on so many things so just keep checking on the sticks or if you're away don't worry because leaving them in there for a couple of hours longer will not hurt them. It will at least keep them warm. They're the best fresh out of the "oven"! These are great with salads and to take them along for a snack at work/school or when you're on the road, so you might wanna make an extra batch or too. The truth is, you'll probably end up with half as much as what you put in the dehydrator, especially if you have a big family and many walk by the "oven" every now and then. Good luck and enjoy! : )


Buttery Thanksgiving Fruit & Nut Bars

Tuesday, November 22, 2011

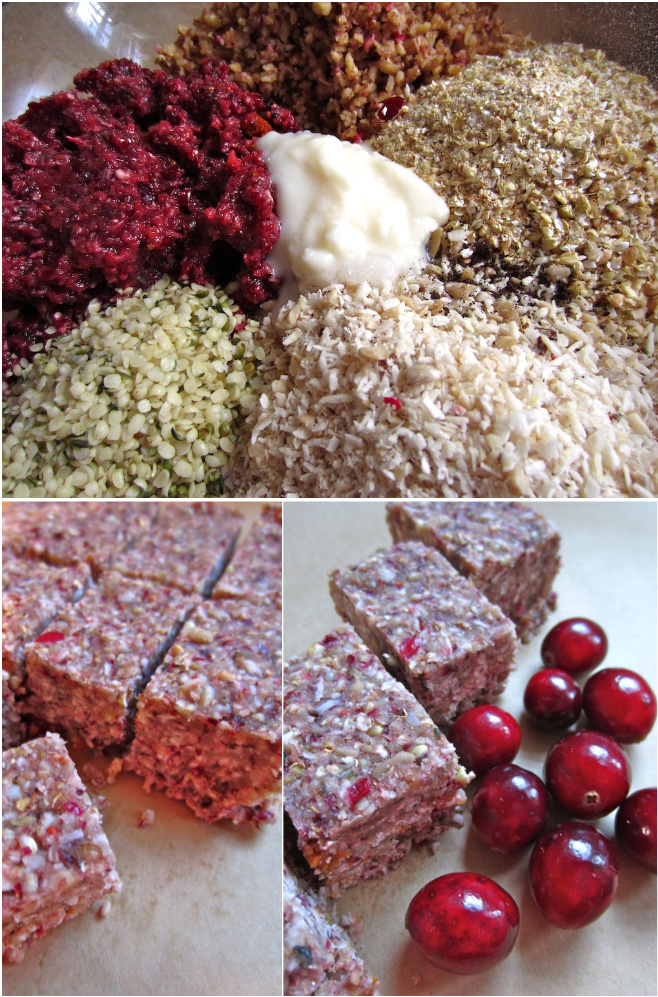
I've never worked with fresh canberries before and since Thanksgiving is around the corner I decided to get some practice with them and use up some of my buckwheaties as well. Buckwheaties are buckwheat that were soaked (at least 6 hours) and dehydrated. I usually make big batches to have them handy whenever I want to make some bread, crackers, or pizza crust, etc.These bars are so rich and flavorful....perfect Fall or Winter dessert.  

Cranberry Nutrition
These tart little pearls are probably most consumed in the form of sauce during holidays and are most known for their ability to provide relief for UTI symptoms. Cranberries are full of antioxidants and rich in vitamin C, manganese, and fiber, which means they may protect you from heart disease, help prevent cancer, keep your bones strong and are good for your digestion. Add to all this the excitement of making dishes with something that you don't eat every single day because they're only available a few weeks a year. Don't you love the changing of seasons?

Raw Crunchy Buttery Buckwheat Bars
Ingredients:
(Makes 8 small bars)
1 cup buckwheaties
1/2 cup walnuts
1/4 cup sunflower seeds
1/4 cup hemp seeds
1/2 cup dried shredded coconut
1/4 tsp ground vanilla bean (or vanilla extract)
pinch of salt
1/2 cup currants/raisins/any dried fruit
3/4 -1 cup cranberries
7 tbs coconut butter (or coconut oil)
2-3 tbs (or to taste) agave syrup/honey (not vegan)/maple syrup (not raw)

Direction:
1. Melt the coconut butter/oil and set it aside
In a food processor:
2. Pulse the buckwheaties a couple of times or grind them to a course meal or as fine as you wish and put them into a mixing bowl
3. Coarsely chop the walnuts and add them to the bowl
4. Pulse the sunflower seeds and add them to the rest of the ingredients along with the hemp seeds, shredded coconut, salt, and vanilla.
5. Grind the cranberries and the dried fruit you're using in to a fine wet mixture and add to the bowl with the coconut butter/oil and sweetener.
6. Mix well with a spoon or your hands
7. Press the mixture into a plastic wrap-lined, flat-bottomed dish chill for a little bit
8. Slice them into desired shapes or bars before serving

Banana Buckwheat Pancakes

Monday, October 17, 2011

rawbananabuckwheatpancakes

Two ingredients is all it takes to have what you thought you couldn’t have if you eat raw! The processed white flour and sugar, the milk, and who knows what else (I’ve never made any common pancakes) have all been replaced by some really popular fruit and less known seeds ground into flour. I’ve talked about the health benefits of buckwheat before but bananas are a different story so here we go…

Bananas’ Health Benefits
Famous for being really rich in potassium, these monkeys’ favorites are also very high in vitamin B6 (pyridoxine) which helps efficient metabolism and prevent heart disease, is important for brain function, and is a “mood lifter”. Wait, does that mean pancakes would help if I’m depressed??? Yep, these kind sure would! That’s not all though, since the most popular fruit in North America is very high in vitamin C, manganese, magnesium, and fiber too. Strong bones, healthy nerves and heart, along with good digestion, are all some of the good side effects of consuming bananas. They’re definitely not an eco-friendly choice if you live in the U.S. because all of them are imported but let’s focus on the positives…it’s still an unprocessed food that comes individually wrapped by nature and ready to hop into your lunch box (or your pancake batter).

Raw Banana Buckwheat Pancakes
Ingredients:
(Makes 2 of the traditional size or 6 mini pancakes)
3 very ripe bananas*
½ cup buckwheat flour
optional:
pinch of salt
sweetener
dash of cinnamon
maple syrup

*A ripe banana is, at a minimum, completely yellow but even better if it has some brown speckles already. There should be no sign of green areas for sure.


Directions:
In a food processor, make a batter by mixing sliced bananas, flour, and salt (and if you choose to, cinnamon and some sweetener). Pour the batter onto a teflex sheet just pouring enough at a time for the size of pancakes you prefer. Dehydrate for a couple of hours at 130 °F (54 °C) then lower the temperature to 115 °F (46 °C) and continue dehydrating for a few more hours. It will take at least three but it depends on how “dry” you would like them. Check periodically and flip them over whenever they peel off the teflex sheet somewhat easily. Be careful doing this, if you’re doing it too early. I didn’t dehydrate mine for too long because I was too impatient : ) so they were barely dry on top when I flipped them. It’s doable but requires care. Or just wait long enough! Good luck with that, when your house smells like a giant cookie or something of that sort…
Once they’re ready, serve them with maple syrup (not raw) or fresh fruit, jam, melted coconut butter, etc. The possibilities are endless. Ready for a raw Sunday brunch? What to serve is taken care of so make a list of friends to invite!

rawbananabuckwheatpancakescloseup


Pizza For Dinner

Tuesday, September 27, 2011

My recent European Adventures inspired me to create some more complicated dishes especially because I’m anticipating the days to turn cooler, when we all feel like eating “heavier” or more substantial foods. Also, people’s interest in raw foods is ever-growing and so does the need for transitional* foods on my blog! I had the best raw pizza at a restaurant in Copenhagen, which I wanted to duplicate ever since.

bestrawpizza

This pizza is even more amazing than I imagined it could be. The end result is just absolutely delicious cold and when put in the dehydrator for 20 minutes to 2 hours your guests might not even be able to tell that they're served a raw dinner!

*Transitional raw foods are those that help you convert to a raw (or high raw) lifestyle by their resemblance to cooked dishes. They usually have more ingredients, are more complicated to create, heavier on nuts and/or seeds, and very often dehydrated and/or even served warm straight out of the dehydrator. It is often very helpful to rely on foods as such for the first days/weeks/months (or however long it may take) because of the satisfaction and fullness they provide.

Raw Pizza Crust
(Makes 6 pieces)
1 cup buckwheat groats
½ cup sunflower seeds
1/6 of an onion (or garlic, if preferred)
splash of olive oil
splash of water
~ ½ tsp salt
basil, oregano to taste
½ cup flax seeds

rawpizzacrust

Soak the buckwheat for a few hours or overnight. Rinse and drain them. Grind the flax seeds until fine. Using a food processor, combine all of the ingredients but the flax seeds. Salt to taste and transfer ingredients into a mixing bowl. Fold in the flax seeds and mix well. Spread the mixture on a teflex sheet (you will get just enough to cover one sheet at a thickness of about 1/3 in or 8 mm). Score as desired (I made it into six triangular slices) and dehydrate at ~130 °F (54 °C) for about an hour then lower the temperature to 115 °F (46 °C) and keep dehydrating until you can flip them over to a mesh sheet. Dehydrate for a few more hours to pizza crust-like consistency.
Now that you have the base, you can store them in the fridge (or freezer) to use later, or you can assemble pizza right away using the recipes that follow.

rawpizzamarinarasauce

Raw Marinara (Pizza Sauce)
 (Makes about a cup)
Blend the following ingredients:
½ cup sundried tomatoes*
2 small tomatoes
juice of half a lemon
couple of slices of red onion
2 cloves of garlic
salt to taste/splash of soy sauce
splash of olive oil
basil, oregano

*soaking the sundried tomatoes beforehand helps a lot, especially if you (just like me) don’t have a high-speed blender

rawpizzawithherbedwalnuts

Raw Seed Cheese
Ingredients:
(Makes about a cup)
1 cup sunflower seeds
juice of half a lemon
2 cloves of garlic
3 tbsp soy sauce/nama shoyu/1 tbsp umeboshi vinegar + some water (if you avoid soy)
optional: dash of turmeric for color

Directions:
Grind the seeds as finely as you can. Blend the rest of the ingredients and add the seed “meal” to the blender. Add some water if necessary for desired consistency. I like it more runny than thick but everybody’s different.

Both, the pizza sauce and the seed cheese will keep in the refrigerator just like the crust, so guess what, once you prepare them all you'll have some grab-and-throw-together lunch waiting for you for days!

rawpizzamushroomsspinach

Toppings
This is where you can go as simple or as crazy as you wish! I put spinach, tomatoes, and marinated mushrooms on these (above), and the first image shows the one with herbed walnuts and lemon boy tomatoes. You may put pineapple for Hawaiian or pesto for a green pizza. It’s hard to go wrong…

So grab a piece of crust, spread some pizza sauce on it, add your favorite toppings, and drizzle with some seed cheese. You may put the assembled pizza slice(s) into the dehydrator for a few minutes to warm up or for a couple of hours for more of a “baked” feeling.

rawpizzamushrooms

Dinner is served!

What are YOUR favorite toppings??


Ginger Snaps

Wednesday, September 21, 2011

rawnutfreegingersnaps

Um, without the sugar, white flour, butter, or baking soda, that is…

I'm back home, which means I'm back in the kitchen. : ) I’ve been busy stocking my cabinets with all kinds of stuff because classes are starting soon, which means two things: I want some already made afternoon snacks to reach for, and I will have less and less time to make anything really creative for the next three months.
I haven’t made anything sweet for a long time because I always get them at the store but I’m determined to change that. It’s time that I made my own desserts as well. Why ginger snaps? I didn’t expect these to come out as wonderful as my grandma’s, of course, after all the only matching ingredients are the spices! However, I love ginger and I knew I would like the results either way.

What’s in ginger?
This spicy root has a long list of health benefits. It’s got anti-inflammatory and anti-cancer properties, it will boost your immune system, it’s an effective digestive aid and can provide heartburn relief, and treat nausea. Ginger is a yang food with warming energy that’s very good for the kidneys and a good spice to use during colder months. So good and so good for you!

Raw Nut-Free Ginger Snaps
Ingredients:
(Somehow, it always makes a baker’s dozen)
Dry:
1 cup buckwheat groats (I used some that were sprouted and dehydrated)
2 tbsp coconut sugar/date sugar/your favorite solid sweetener
½ tsp cinnamon
½ tsp cloves
pinch of salt
pinch of nutmeg
Wet:
2 tbsp flax seeds
3 tbsp water
¼ cup maple syrup (not raw) or your preferred liquid sweetener
~ 1 tbsp grated ginger root*

*if you don’t have any on hand you may use dry powder instead


Directions:
Grind the buckwheat into flour (it’s ok if it’s coarse) and mix with the rest of the dry ingredients. Grind the flax seeds and add the water to it, then the maple syrup, and the grated ginger. Mix the wet and dry ingredients with your hands and add more maple syrup or water if necessary for it to hold together when pressed into your palm. Form balls and flatten them before placing them on a teflex sheet. Dehydrate them for an hour at 130 °F (54 °C) then lower the temperature to 115 °F (46 °C). Turn them over after a couple of hours and place them on just a mesh sheet for quicker “baking”. Dehydrate till the desired texture (several hours) is achieved. Don't forget to share!

The Most Amazing Buckwheat Crackers

Tuesday, July 5, 2011

Making crackers is what was on my agenda on Sunday morning and it was so lovely to get busy in the kitchen with the morning sunlight coming through the window. Since I had run out of everything that resembles bread/chips/crackers, this was an emergency and I couldn’t wait for them to be done. I did not expect them to come out so fabulous though. These are by far my absolute favorite!

amazingbuckwheatcrackers

For the first time in my raw-cracker-making adventures I used garlic. Don’t ask me why it took me so long. Come to think of it…I remember that up until now I was making sure my crispy snacks are more on the “plain” side so that they would go well with anything. Not this time. These are everything but plain, and they can be (and probably will be) devoured just by themselves!
I am not giving all the credit to the garlic either. I also added turmeric and cumin for the first time and the combination of those spices gave it a wonderful hint of Indian-food-like flavor, not to mention the gorgeous color. Flavor and aesthetics are not my priority though. As you may probably know by now, nutrition is at least equally important to me so here’s the breakdown of the goods…

Health Benefits of Turmeric
This ancient spice, commonly used in Indian cuisine, is known for its exceptional anti-inflammatory properties and being an excellent antioxidant, and there’s a whole list of health benefits that go along with that.
Its bright rusty-yellow color, peppery, bitter flavor, and most healing properties lie in the powerful compound, curcumin. Turmeric is a natural detoxifier, has been used in treating cancer and for the prevention of metasteses, can slow the progression of Alzheimer’s disease, and studies suggest that it’s effective at preventing it from developing as well. As an anti-inflammatory, it’s a natural treatment for arthiritis and can also be used to help the skin heal or to treat psoriasis. It’s very rich in iron and manganese and a very good source of vitamin B6, which can keep your homocysteine levels at bay and reduce your risk of heart disease. Manganese is essential for strong bones and healthy nerves, and it can protect your cells from free-radical damage.

Health Benefits of Cumin
Another spice that’s very rich in iron and manganese, cumin is also a good source of calcium and magnesium. It’s a good digestive aid and it can help in nutrient assimilation, but most importantly, it is claimed to have anti-carcinogenic properties, like turmeric.

Just to note, if you have never used either, these spices have quite distinct flavors that will either appeal to you or not the first time around but just give them a try, you might just fall in love with their aroma immediately!

Buckwheat Crackers
Ingredients:
(Makes 250 bite size crackers)
3 cups raw buckwheat groats
1 cup ground flax seeds
½ tsp ground turmeric
½ tsp ground cumin
1 tsp salt
½ cup olive oil
5-6 cloves garlic
your favorite seeds for sprinkling (optional)

Soak the buckwheat groats for a couple of hours and let them sprout for about a day and a half as described in the Guacamole & Buckwheat Chips recipe. Once you have buckwheat sprouts (I let them grow to about ½ inch/6 mm length) it’s time to make crackers! I have to split up the ingredients and run two separate batches because only so much fits in my food processor at a time. 

buckwheatcrackermaking

Directions:
1.    Process all of the ingredients in a food processor until you get a well-mixed, sticky lump.


 2.    Using a butter knife, spread the mixture on teflex sheets (you should have enough for 4 of them) about 3-5 mm thick. Score them to your liking (I made 1.5 in/3-4 cm squares) and sprinkle with your favorite seeds if you like. Dehydrate them at 115 ˚F (46˚C) for a couple of hours before flipping them and then 3-4 hours longer depending on how thick they are and how crisp you like them.


3.    They’re ready whenever the edges and the center of the crackers look evenly dry. The other way to check on them is by stealing one out of there every half an hour…this is the method I use of course : ) but you'll end up with much less in the end!


4.    You can let them cool and store them in airtight containers for a couple of months (they will not last that long though), or serve them immediately. They’re absolutely fabulous fresh out of the “oven” while still warm. Enjoy and let me know how they came out!


Sources: http://www.whfoods.com/


Guacamole & Buckwheat Chips

Thursday, May 19, 2011

Just a few years ago I couldn’t even look at guacamole. I never liked mushy or soft foods and based on its appearance I didn’t think I would enjoy it. Boy, was I wrong!!? That was several years ago. Since then, it has become one of my favorite dishes! I can eat it with a spoon, without any chips or anything…just love it so much!
Well, it’s been quite chilly around here, so spicy, warming foods feel really good to snack on. Both of the following recipes are rather on the spicy side! 

RawGuacamoleandBuckwheatChips

Guacamole*
Ingredients: 
Serves 1, or as many as you’re willing to share it with : )
2 avocados
1 small hot jalapeno
2 slices red onion
handful of cilantro (the leafy part)
salt to taste

Directions:
This couldn’t get any easier…
In a mixing bowl, mash up the avocados. Add some salt and mix well. Chop up the onions, the jalapenos, and the cilantro really fine and add to the rest. Mix well, do a taste test, adjust the amount of salt. Serve immediately with some chips or anything that needs a dip. You can also use it as a spread on sandwiches or in wraps!

*Variations:
There are endless ways to make guacamole. The only common ingredient is probably the avocados! Most people add tomatoes to it. Having been a macrobiotic for so long and avoiding nightshades, I never put tomatoes in it and I still prefer it that way. The reason is because I prefer it as creamy as possible and tomatoes will make it somewhat juicy. You can also use garlic, either in addition to the above ingredients or in place of the onion. If you are a fan of ground black pepper, you can add some of that too. Here are some variations I’ve tried and love…

Macrobiotic
Skip the tomatoes and the jalapeno. You can also skip the salt and use umeboshi paste. Umeboshi is salty and sour and it will give it a rather unique and delicious taste! Add about a half a teaspoon.

New Mexican
If you can get a hold of some roasted green chili (obviously not a raw ingredient) then try it with just onions, green chili, and salt. It’s unbelievable how tasty that is!

Mexican
I’ve had the honor of a friend from Mexico making it for my family once. She made it exactly the way I “knew” it to be original. She used Serrano peppers, tomatoes, onions, garlic, cilantro, limes, and salt. Delicious!

Buckwheat Chips/Crackers
These are the first raw chips I came up with and they’re fabulous! I soaked and sprouted some buckwheat and used carrot pulp from making juice. Finally, I added some flax seeds to help the mixture bind.

RawBuckwheatChips

Why buckwheat?
Buckwheat is gluten free, very high in fiber, protein, riboflavin, niacin, vitamin B6, magnesium, phosphorus, copper, and manganese, but it’s most known for its rutin content and the health benefits that come with it. Rutin keeps your veins in good condition and it helps treating high blood pressure.
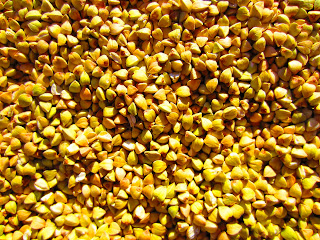
While, often, it’s referred to as a grain, buckwheat is a seed of the plant that belongs in the rhubarb family. The groats have a very distinguished shape and are sold in raw or toasted form. The latter is darker and often labeled “kasha”.

rawbuckwheatgroatsRaw Buckwheat Groats
Sprouted Buckwheat ~ 24 hrs
Here’s what I used:
1 1/2 -2 cup raw buckwheat
carrot pulp of  6 carrots juiced
½ cup ground flax seeds
2-3 tbsp olive oil
2 tsp salt
½ tsp ground cayenne pepper
water as needed

This makes a large amount, probably the equivalent of a family size bag of chips, but it really depends on how thick and large you make the chips. 

RawBuckwheatChips

Preparations:
Soak the buckwheat for a couple of hours or overnight. If you don't get to use them right away make sure to change the water and rinse the seeds thoroughly every 8 hours or so. They will grow in volume significantly, if you let them sprout. Sprouting takes about 24 hrs, so you will need to plan ahead. After soaking and rinsing, spread them out on a flat surface such as a large plate or a tray, and let them sprout for 24 hrs to a couple of days. You'll see them grow little tails that can get quite long, quite fast. Keep checking on them and don't forget to rinse them about three times a day!
When the buckwheat is ready to be used collect some carrot (or vegetable) pulp after making juice. Place all of the ingredients in a food processor (I had to split my batch up into two portions because it was too much all at once) and process until you get a spreadable but still quite solid paste. Add some water if necessary but don’t overdo it. Taste it and adjust the seasoning. Now comes the fun part!
With a soft spatula or a large butter knife, spread the “dough” out on 3-4 teflex sheets about 0.1-0.2 inches (3-5 mm) thick. Score them to your liking. You can make bite size squares or triangles or larger pieces too if you would like to use them as pizza base or for sandwiches. Dehydrate at 115 ˚F  (46˚C) for 8-10 hours and then turn them over and continue dehydrating until they’re crisp, about 4 to 6 hours longer. Store your chips in airtight containers or bags. They would keep for at least a couple of months but, believe me, they won’t last that long! 

RawBuckwheatChips