RAW Food for Truth Living foods lifestyle. Nutritious, raw, vegan recipes. Meals & tips for natural healing. Allergen-free, organic dishes. Courses you can prepare in no time. Meal-planning for those "on a budget". Discovering wild edibles. Eco-friendly, conscious, healthy living. . . . at home, in the office, and on the road.
Showing posts with label dehydrator. Show all posts

Fig Bread Gets Photobombed!!

Sunday, September 28, 2014


Don't you hate when that happens?!?!

That's definitely NOT the case around here. I love living in a place where it does happen : )

I was trying to focus in on the food, which I'm about to share the recipe for with you in a moment…when she just elegantly walked into the picture. Needless to say, I was distracted for a few minutes and decided to watch the deer (there were three of them) around who are most welcome in the yard. But I did get back to work, eventually, so here's a recipe, with some unique photos this time…


I've been making fig bread for the past few weeks and can't get enough, it seems. What started out as an experiment last year, during fig season, continued and developed into a regular production around here….because it's simply delicious. So, I've decided to share this with you while figs are still available AND fresh pumpkin seeds are out too…a nice combination.

Besides the flavor…
This snack food is incredibly rich in minerals (almonds, figs, and pumpkin seeds are all loaded with nutrients good for your bones, heart, skin, and even libido!) and very satisfying and easy to take with you. I have been taking them along for trips I went on lately and even when I'm just out and about…they're nice to carry in your bag so you have something nourishing to reach for wherever you are.

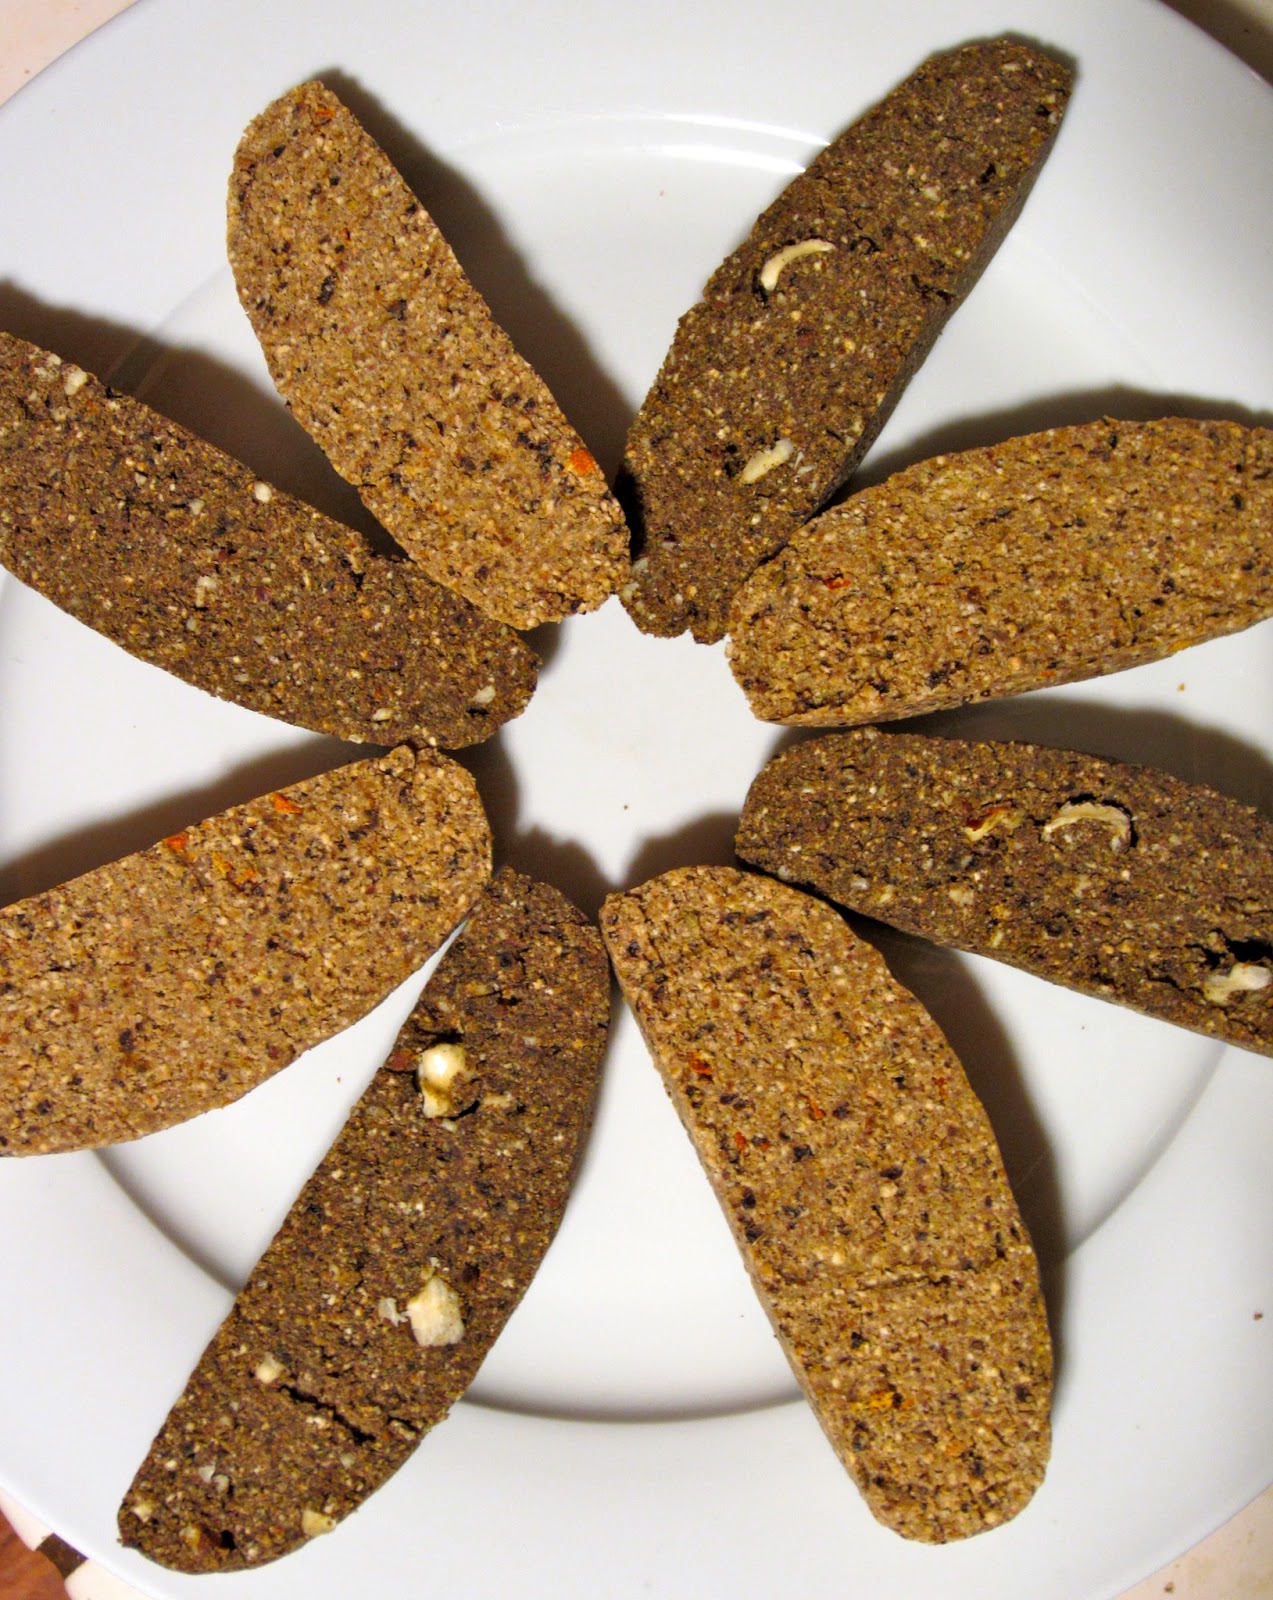
Raw Foodie's "Manna"  - Fig Bread
(Ingredients for 2 trays worth - 72 pieces, the way I cut them)
2 cups almonds
½ cup chia seeds
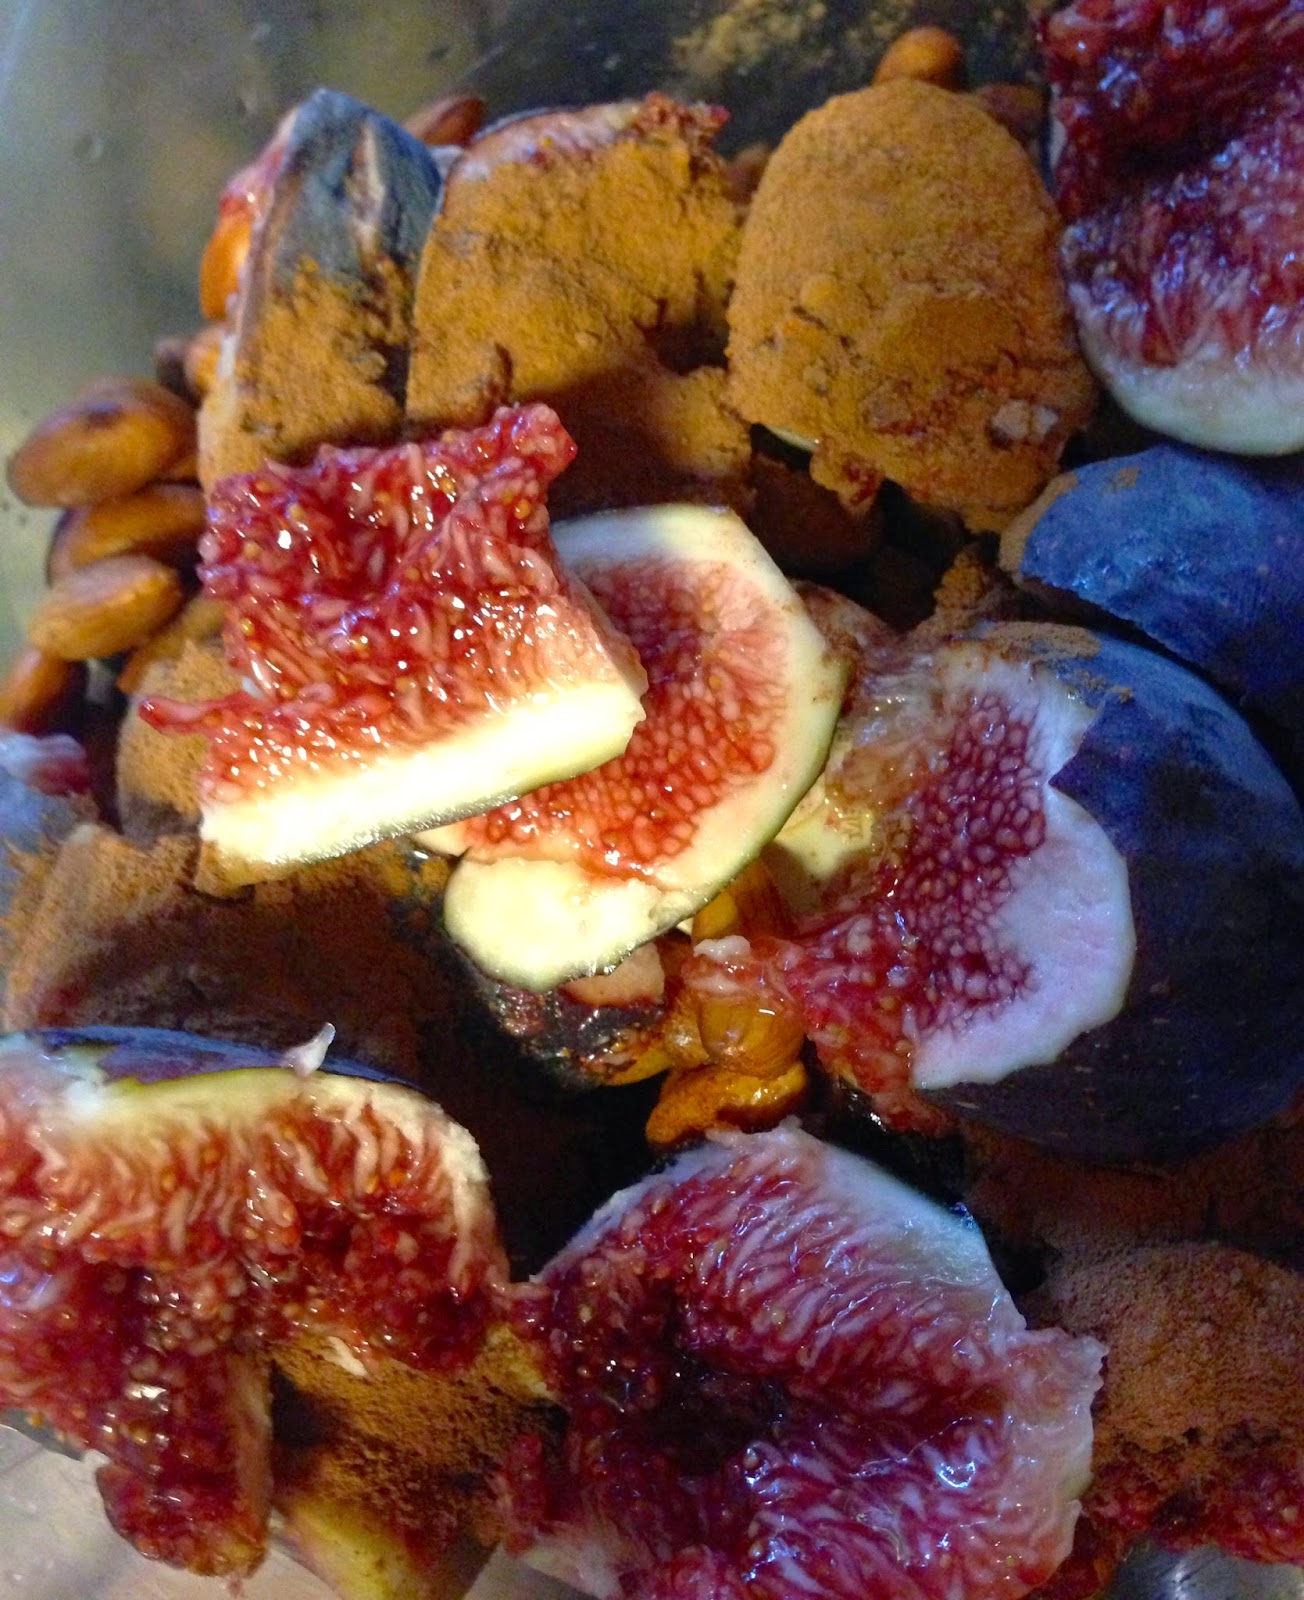
8-10 mission figs*
~1 tbsp cinnamon (fine powder)
pinch of your favorite salt
optional: cayenne pepper to taste, few extra figs for topping

pumpkin seeds for topping 


Directions:
0. If you have time, soak the almonds for up to 8 hours (or overnight)
1. In a food processor, grind the almonds fine and then add 8-10 figs and process further.
2. Grind the chia seeds (if you have a spice grinder or designated coffee grinder, otherwise just use them whole) and add them to the mixture, along with the cinnamon, salt, and cayenne (if you're using any)
3. Spread your batter onto two reflex sheets (about half of your batter on one and half on another) to prepare for dehydration.

Now, this step is optional:

(4.) Process a few more figs into a jam-like consistency (doesn't take much) and spread a thin layer on top of the batter. This will make them look even prettier and provide a nice gooey surface to hold the pumpkin seeds on top.

With "fig jam" layer


Without "fig jam"


5. Score, according to desired shape and size (I usually make square ones, 6 x 6 = 36 per tray).
6. Sprinkle / carefully place pumpkin seeds on top of the squares nicely, pressing them into the batter gently.
7. Place the trays in the dehydrator and dehydrate them for 1-1.5 hours at ~130 °F (54 °C).
8. Carefully flip them onto other trays with screens only, peel the teflex sheets off from the bottom, and  put them back in the dehydrator for several hours (depending on how soft or firm you'd like them to be) longer at 115 °F (46 °C).
9. Devour some of what's left (after coming around and tasting them while "baking") and let the rest cool before putting them in containers for storage. Most of the time I don't even put them away though. If you're not using the dehydrator for something else for a while, you can just leave them in there on the trays to store and get some out to eat / take with you every day (as long as they last).

Enjoy your raw manna! : )


Sesame-Kale Wafers

Sunday, December 30, 2012


The taste (or, rather, the memories) of a batch of similar chips stayed with me for so long that I had to create my own. Boy, was that a good idea! As the last batch of chips/crackers this year, I couldn't possibly imagine a greater new favorite. I had to label them wafers because they came out so thin and delicate and they have a "melt-in-your-mouth" feeling to them. Tart and spicy, green and nourishing, these crackers are light and yet, incredibly satisfying and addictive. Yes, they're hard to quit....hmm, ok that's a downside, but that's about it.

Sesame Seed Nutrition
As the main ingredients, these little seeds deserve some attention. Being so rich in bone-strengthening minerals, especially magnesium, phosphorous and calcium, is not all they have to offer. They're high in good quality protein and antioxidants as well. So tasty and so nutritious....you can't go wrong with them. Enjoy!


Incredible Kale Chips
(Ingredients for two sheets of chips)
1 cup sesame seeds
juice of 5 limes
1-2 cayenne peppers (or substitute powder)
1 large kale leaf
1/2 onion
1/2 tsp salt (or to taste)
your choice of sweetener to taste
water as needed


Directions:
0. Soak the sesame seeds beforehand if you have the time. 4 hours will do.
1. Chop up the pepper(s), onion, and kale into somewhat smaller chunks and process all ingredients in a high-speed blender until creamy. Most likely, you will need to help the blender get started by adding a little bit of water and keep tamping the contents down.
2. Taste test and add salt or sweetener if needed.
3. Pour the mixture onto two teflex sheets and spread it out as thin as you can.
4. Score it for square shape or use a glass or a cookie-cutter to make round shapes or whatever else you might prefer.
5. Dehydrate your batch at 140˚F (~60˚C) for an hour then lower the temperature to 115˚F (~46˚C) and dehydrate for several hours longer, till you have crispy thin wafers.

You're in for a treat!

It's almost the end of this year. Is there anything you'd like to leave behind? Is there anything new you'd like to start with the beginning of the new year?


Biscotti In The Raw

Sunday, December 23, 2012


Having turned vegan at such a young age, there are many recipes I never made, cooked or baked the traditional way. While a vegan lifestyle is well-catered to by restaurants and health-food stores I have never seen and/or tried even vegan biscotti, not to mention raw and living vegan biscotti. For some reason though it popped into my head about two weeks ago when I started brainstorming and trying to figure out what to make during the holidays. And then...everything started late (yes, so late that I just started this morning, two days before Christmas, crazy!) because of long hours at work and our busy little life getting in the way of life. While I haven't seen the sun in our beautiful valley for days and the rain won't stop coming down I was courageous enough to attempt to take some photos of these fresh out of the "oven" and here are the results. A double batch of incredibly flavorful (much more so than I expected) biscotti and pictures that will not hurt the reader's eyes, I hope ('sigh'). It could be worse, right!??
I've made two flavors, the classic, Italian version, of course for one. And I planned on making something else for the other but changed my mind in favor of the Carob-Hazelnut variety. Go ahead and substitute cacao for the carob if you prefer a chocolatey version, I probably would too, normally, but I'm avoiding caffeine this week. Ok, too much unnecessary information...here are the recipes, preceded by a health-note:

Nutrition
Almonds, one of the well-known cancer-fighting miracles of nature, are the main ingredients I'm using. Remember to save your pulp every time you make nut mylk, that's where your cheap, eco-friendly, almond flour will come from. And what better way to use almond flour!?
Anise seeds, like most spices/tiny seeds, are very rich in minerals and most B-vitamins, and they're known to be a digestive aid.
And if you go with carob, as I've mentioned before, this caffein-free bean is very rich in calcium, practically fat-free, has no oxalic acid to interfere with absorption of nutrients, and is naturally sweet so you'll probably use less sweetener in your recipes when using carob.


Classic Biscotti The Raw Way
(Makes 8 slices)
6 cups almond flour
6 tbsp golden flax seeds
2 cups raisins (soak them in orange juice or water beforehand)
sweetener (honey/maple syrup/agave syrup) to taste
optional: ~1 tsp coconut oil
2 tsp anise seeds
zest of 1/2 to 1 orange
little salt
soaking liquid


Raw Carob-Hazelnut Biscotti
(Makes 8 slices)
6 cups almond flour
6 tbsp golden flax seeds
2 cups raisins (soak them in orange juice or water beforehand)
1/2 cup carob powder
sweetener (honey/maple syrup/agave syrup) to taste
optional: ~1 tsp coconut oil
few dashes of cinnamon
little salt
soaking liquid

1/2 cup hazelnuts 


Directions:
1. Soak the raisins beforehand for a little while, half an hour will do. I used orange juice but you can use water just as well. Whatever you're using, save the soaking liquid to add to your batter if needed.
2. Grind the flax seeds and put all ingredients (except for the chopped hazelnut, if you're making that version) in the food processor and run it to get an evenly crumbly mixture. Pinch test it, if it sticks together between your fingers you don't need to add more liquids, otherwise add some but just a spoonful at a time because it's very easy to overdo it with these kind of batters.
3. Pour your mixture into a bowl and by kneading it a couple of times form it into a loaf. If this is not happening because your batter is too crumbly, again, add a little liquid.
4. Place your "loaf" onto a teflex sheet and shape it into a flattened, firm, log. Slice it carefully, on the diagonal, making about half inch or a little thicker (~1.5 cm) slices. 
5. Stand them up on a sheet and dehydrate them for an hour at 140˚F (~60˚C) and then lay them flat on a screen and dehydrate them for a few more hours at 115˚F (~46˚C). 

If you have kids, they'll keep asking you "When are they gonna be done?" so make sure to keep them busy with something else. When they are done, have some fresh, while still warm, with a cup of mylk and/or a fruit spread if desired. Once they're cooled off, consider wrapping some for a Christmas present for someone. There's nothing like a home-made present you put your love into! You might want to save a couple so your kids can put them out there on Christmas Eve for Santa too. You never know...one day he might be inspired to go raw and refuse all the cookies at other households ; )

Happy "Baking"!


Herbed Olive-Walnut Bread

Saturday, December 15, 2012


Not a typical raw food recipe but it still makes it to the scene. Bread is one of the hardest foods to cut out while transitioning to a raw, living lifestyle. This bread is nothing like the fluffy wheat bread you remember vaguely from back in the cooked and baked days. It's kind of a substitute for the already dipped-into-herbed-olive-oil-and-toasted bread. All in one loaf. Seeds, small amount of nuts, olives and herbs create a perfect harmony and it takes but a little "kneading" and shaping and slicing. That's it.

Herbed Olive-Walnut Bread
(Makes 1 small loaf: about 6 slices)
1 cup golden flax seeds
3/4 cup walnuts
6-8 sun-dried olives
1 clove garlic
1 tsp salt
oregano, rosemary
1.5 to 2 tbsp olive oil
5-6 tbsp water

Preparations
1. Grind the flax seeds, chop the olives and the walnuts into small pieces, mince or press the garlic and chop up your herbs very finely.
2. Somehow my intuition was suggesting I should use the greatest method I learned from watching my grandmother making different kinds of pastry dough. Some of those buttery, crumbly mixes require this kind of mixing by hand and it works perfectly for this recipe: In a mixing bowl, combine all ingredients but the water. Scoop up a handful at a time and rub your hands together coating all of the mixture evenly with the oil and herbs.
3. Add water little by little until your dough is starting to hold together when you try to shape it into a loaf. Start folding and kneading the dough by pressing down on it and folding it again...similar to when you're kneading bread dough. This is not an easy task because it will be losing crumbs and constantly wanting to fall apart but just be patient and if you accidentally added too much water you know you can always add some more flax seeds to the mix to save yourself.


4. Once you have your desired shape, place the loaf on a teflex sheet gently and, using your sharpest knife, carefully slice it on the diagonal about an inch or two centimeters thick each. I ended up with six slices and a small corner this way : )
5. Lay out the slices on the sheet and dehydrate for a few hours at 115˚F (~46˚C). You can turn them and even transfer them onto a screen after a little while.

Nutrition
Flax seeds and walnuts are both amazing brain-boosting food, full of Omega-3 fatty acids and very high in fiber of course. Given the high percentage of golden flax seeds, this bread is exceptionally rich in most minerals and very high vitamins B1 (thiamin) and B6. Soothing to the body, nourishing the brain, mineralizing the blood and bones....probably more than you'd expect from bread, isn't it?

Your herbed slices will be perfect with salads and light soups. This holiday break I will have to spend the time to make variations of it. It sure is nice to have around especially when expecting guests! Happy "baking"!


Carob Buckwheat gRAWnola

Saturday, December 8, 2012


Cooler weather calls for warming foods. Does that mean you have to give up on your raw lifestyle? Absolutely not. There are plenty of foods out there with great warming energy. Buckwheat is one of  them. So why not use some buckwheat in recipes this season? Aside from its warming energy buckwheat has many health benefits. It's very high in minerals in general, especially such as manganese, magnesium, copper and phosphorous and some of those minerals are hard to get enough of. At least it seems that a large percentage of the population is deficient in magnesium, for example.
These seeds (buckwheat is actually a seed, not a grain) happen to have a very high fiber content, and are a complete protein too, not to mention their high niacin (vitamin B3) content, which is a natural antidepressant. Another food that's good for your bones, your skin, might help reverse gray hair, benefits your digestive tract and might even elevate your mood besides being an exceptional source of healthy protein (can you believe you'll get more protein from a 100g of raw buckwheat than cooked beef, for example?!!) A pretty good choice for breakfast or a snack and combined with the rest of the ingredients below you can make delicious winter granola with it. If you're feeding more than 1-2 people you might want to make a double batch so you don't need to do it twice a week : )

Raw Carob Buckwheat gRAWnola
2 cups buckwheat
1/2 cup sunflower seeds
1 tbsp golden flax seeds
1 tbsp sesame seeds
1/2 cup (or more) raisins
1/2 cup (or more, to taste) carob powder
handful of coconut shavings / 3 tbsp shredded coconut
3-4 tbsp melted coconut oil / other oil of your preference
cinnamon
salt
Add your favorite sweetener, nuts, different dried fruits, additional spices, etc.

Directions:
1. Soak the buckwheat for 8 hours or overnight rinsing it a couple of times thoroughly. If you have time  you can sprout them too before using them in this recipe.
2. Grind the sunflower, flax, and sesame seeds briefly, just enough that they're coarsely "chopped".
3. Chop the raisins and other dried fruits you're using into smaller pieces.
4. Mix all the ingredients really well so that the salt and all the flavors are evenly distributed.
5. Taste test your batch and add more sweetener, etc. if necessary
6. Spread on two trays and dehydrate them for a couple of hours at 140˚F then lower the temperature to 115˚F and dehydrate for several hours longer.

Your house will smell unbelievably heavenly, I promise!
Serve while still warm with your favorite nut mylk or dry, as is. I never liked my food soaked so I always eat muesli, granola, and cereals dry and crunchy.
Pack some into your lunch box, or take on travel. This is a great warming and high energy food.
Happy gRAWnola making!

P.S: Have you noticed the ladybug?? : )


From Tortillas to Tostadas

Saturday, October 20, 2012


Whether it's Summer or Winter, whether it's breakfast-time or closer to dinner, you can hardly go wrong the Mexican way. The type of cuisine that's known for its freshness, vibrant colors, and fun-loving family gatherings to prepare festive meals together can be made part of a raw household too.  Most of the wonderfully flavorful dishes that, more often than not, rely on simple ingredients can be prepared the raw (or at least highly raw) way to refresh you in the heat or warm you up on colder days. The challenging part for a raw food enthusiast of course is not so much the right combination of fresh vegetables and spices. It's more the chips you eat with salsa or dip into guacamole, the tortillas, tamales, etc.
Making tortillas may seem like an especially intimidating task to embark on because you want them to be firm enough to hold food when you make tacos, but also pliable to make "wraps" or more like burritos and roll them up for single-serve enchiladas, for example. I've already given examples on how to make chips before. Today it's time to make tortillas! Corn ones, that is.

Why Eat Corn?
The pearl-like kernels can help maintain good vision, add anti-oxidants to your diet, aid in digestion, provide fiber, folate, and other essential vitamins and minerals that can even help prevent anemia. In other words, corn is quite nutritious.

Corn Tortillas
(Makes 5 tortillas)
2 ears fresh corn, yellow or white
3-4 tbsp ground golden flax seeds
1 finger-size hot pepper*
juice of 1 lime
salt to taste
pinch of cumin

*Any pepper will do. I grabbed mine from the garden and I forget what kind they are but cerranos and other small peppers will be just fine. If you can find red ones the color will add to the richness of the tortillas.

Preparations
1. Cut the kernels off the cobs and place all ingredients in a high-speed blender.
2. Make a paste as smooth as you prefer (I prefer mine with a good amount of "texture" left) and add a little water if you can't manage without. Some blenders need more liquid to handle the ingredients while others do well with hardly any in there. Note: add as little as possible to save time in the dehydrator.
3. Pour the mixture into 5 little lumps on a teflex sheet and spread them out fairly thin, as thin as you can/prefer but thick enough so that you can still work with them when you make tacos, etc. 0.1 in (or about 3 mm) is a good thickness.
4. Dehydrate them for 1-2 hours at 110-115 °F (43-46 °C) and then flip them onto a screen and dehydrate them for several hours longer, until they resemble the dryness of tortillas and they feel "workable".


Here comes the fun part. Now that you have the base, what yummy stuff you are going to pile on them, fill them with, dip them into is up to you but here's what I chose to make this time.

Tostadas the Raw Way
corn tortillas (recipe at the top of the page)
guacamole (see recipe here)
tomatoes
onions
cilantro

Keeping it so simple by combining such delicious ingredients always works : ) Layer your ingredients in a presentable way and serve immediately. One of those snacks that are great for Summer gathering so if you have people coming over this could be a way to introduce them to the delightfulness of raw foods. Enjoy!


Soup That's Worth the Tears

Sunday, October 7, 2012


As the weather has taken quite a sudden turn and the temperature's dropping the heat's getting turned up in my kitchen. I love my food spicy year round and will enjoy some raw dishes warm during the colder months but this is more than just a warm soup.  

Consider yourself warned: it's one thing that chopping onions will make you cry but this is also a sinus cleanser alright. It would be a great soup on a cold, rainy day when you're wrapped up on the couch in "under the weather" mode. Warm, savory, and memorably strong. I love spicy, hot, pungent, etc, foods but I even think it's quite strong. You may use less of the onions and/or add more water and more tahini (or oil) to cut the sharpness of it all.

Onion's Magic
These tear jerkers are high in vitamins C and B6 (pyridoxine), manganese, a fairly hard-to-get mineral, and rich in fiber. Besides being a strong anti-inflammatory, they're known for their sulfur content and being hosts of the enzyme allinase. This enzyme, also present in garlic, is what gives them their pungent chemicals, makes you "cry" while chopping them, makes you "smell" like onions, and defends the plant from animals that get the idea that they should be their next snack. The B6 helps efficient metabolism and prevent heart disease, is important for brain function, and it's mood-elevating. Sulfur is very good for your liver, will benefit your hair, skin, brain, and bones. Quercitin, a flavonoid you'll find more of in onions than anything else, has a myraid of health benefits. It's what's responsible for the blood-thinning effect of onions, it will help you fight asthma and bronchitis and help with diabetes. It has antibiotic and antiviral characteristics, and provides this vegetable with powerful anti-cancer properties.

So here's what you do for a wonderful-smelling kitchen and a healthy, warming soup:

French Onion Soup
(Serves 3-4)
Ingredients:
1 medium yellow onion
1 clove garlic
1/4 cup shoyu sauce (contains soy!)
1/4 cup olive oil
3 tbsp raw tahini
4-5 cups gently heated (NOT hot or boiling) water
1/4 cup vinegar / lemon juice


Directions:
0. Slice the onion and the garlic as thinly as you can, place them on a plate, drizzle them with the shoyu sauce, and let them marinate in the dehydrator for about an hour at 115°F (46°C).
1. You may follow or skip "step 0" and then, in a high-speed blender, process all (save a little bit of the marinated onions for garnish if you like) ingredients until creamy.
2. Pour small servings in cups or bowls, garnish, and offer crackers, croutons, bread, etc. on the side.
Don't forget the box of tissue either!
...and have a good week : )


Rawsagna Made Easy

Wednesday, September 12, 2012


My fridge was still full of zucchini a while back (yes, I know, I didn't have the chance to put this up before now) and so all I needed was some mushrooms because, as you probably agree, the rest of the ingredients are regulars in every raw foodie's pantry. Lasagna is definitely not an everyday dish at my home but it's great food for entertainment. Even guests who are not familiar with raw food will appreciate it. And the best part: it's sooo easy to make, you will not spend all day in the kitchen.


Rawsagna
(Serves 2)
1 large zucchini, for the "pasta"

Filling:
~10 button mushrooms
1/4 red onion
shoyu sauce
optional: bell pepper, other veggies

Sauce:
6 sundried tomatoes
1 large heirloom (or other kind) tomato
chunk of onion
2 cloves garlic
few leaves of fresh basil
1-3 tbsp shoyu sauce
2 tbsp olive oil
sea salt

Nut Cheese:
1/2 cup Brazil nuts
sliver of onion/clove of garlic
optional: salt


Preparations:
1. Start by soaking the sundried tomatoes in a bowl of water for several hours (or at least as much time as you have).
2. Chop the mushrooms and the onion into small pieces. In a bowl, mix them with shoyu sauce and marinate your filling in the dehydrator for a couple of hours.
3 Peel and then slice the zucchini lengthwise into thin, lasagna pasta-like sheets. Place them on a mesh tray and dehydrate them for an hour or two but check on them every so often to make sure they don't dry out.
4. Blend all of the sauce ingredients until it reaches a smooth consistency, taste test and add more seasoning if necessary.
5. An hour before serving time, spread layers of the marinated mushroom, thinly sliced vegetables (if you're using any) and some sauce on the zucchini sheets (except for a couple top layers) and dehydrate them further for an hour at 118 °F (48 °C). Spread only tomato sauce on the top layers. 
6. For each serving, layer 3 sheets with filling and top with a layer of zucchini with the sauce only. 
7. Grind the Brazil nuts, onion/garlic, and salt in a spice grinder or make a larger batch and then you can use a food processor. The extra nut "cheese" you'll have will last several days in the refrigerator. 
8. Sprinkle the lasagna servings with the "cheese" crumbs and decorate them with fresh basil leaves.

It sounds like a lot "to do" but it really is effortless and worth the while. If you want to make a savory dish for lunch, dinner, to impress guests you have over, or to take to work the next day....you might just want to make this.


Figs In Thumbprints

Tuesday, August 28, 2012


I got figs! My dear colleague keeps bringing me goodies and a few days ago freshly picked black mission figs were hiding at the bottom of the brown bag he walked in with. Can you believe I had never had fresh figs in my life? Somehow, I never felt the urge to try. Well, that's the past. The now is filled with cookies because my very favorite cookies were teff cookies that were filled with figs. I'm still dying to have the recipe but I can't get a hold of the person who made them for a co-op in the Southwest. Oh well, they were not raw anyway. You know what's next, right? One day I'm going to try to recreate them with either teff flour or sprouted teff grains. That's the future. But to concentrate on the "now", I'll share with you these almond based cookies...


Almond-Fig Thumbprint Cookies
(Makes 16 cookies)

Filling:
6 pieces of fresh figs/other seasonal fruit/perhaps rehydrated dried fruit

Aren't they beautiful?!?

Cookie Dough:
2 cups almonds*
1/2 cup shredded coconut
1/4 cup ground golden flax seeds
1-2 tbsp (or more) coconut sugar / other sweetener
1-2 tbsp water
pinch of salt
Optional: seeds from 2 pods of cardamon


* I soaked mine, which adds moisture so if you skip the soaking you'll need to add more water / liquid sweetener. Use your judgement.


Preparations:
1. Process the figs into a jam-like paste, remove from the food processor and put it aside.
2. Without rinsing the processor, place all of the cookie dough ingredients, except for the water, in the processor and make them into a paste. Keep an eye on it while it's being processed and add water as necessary.
3. Roll your dough paste into a ball and divide into quarters, then repeat. This way you'll end up with 16 cookies of the same size. Roll the chunks into balls now and press down at the center of each with your thumb. Do this before transferring them onto the dehydrator screens, that way you can make corrections if a cookie spreads open too much, etc. When done, place them all on a screen.
4. With a tiny spoon, scoop some filling into each dimple.
5. Place cookies in the dehydrator and dehydrate them at 115 °F (46 °C) for a few hours, depending on how moist you like them. They stay very soft on the inside even after 5-6 hours of "baking" but the time depends on your location, machine, how much food you have in there all at once, etc.


In you haven't eaten them all yet while checking on them every now and then...they're great cookies to add to a lunchbox. These cookies are also perfect when having people over who have never tried raw foods. It's time to inspire them.
Enjoy!!! : )

Notes on Nutrition
Both main ingredients, figs and almonds, are high in fiber, rich in antioxidants and minerals, and have anti-cancer properties.
Traditionally, figs are known for enhancing sexual desire but that's not all! They're rich in calcium, magnesium, manganese, and potassium. They will strengthen your bones, keep your eyes healthy, and some claim they even help provide relief from a sore throat. I haven't tried this remedy yet. Have you? If you have, please comment below! Thanks in advance. : )
And, as far as almonds, here's what I wrote about them before: they are among the most nutritious nuts. They have loads of fiber and are especially high in manganese, magnesium, phosphorous, copper, calcium, iron, zinc, vitamin E and riboflavin (vitamin B2). Their high mineral content helps build and maintain strong bones, while the fiber helps in the prevention of colon cancer. B vitamins and vitamin E (an antioxidant), along with calcium, magnesium, and zinc are very important brain foods. A lot of us are deficient in magnesium (do tight muscles or muscle spasms/quivers sound familiar?), which is not so hard to acquire, but it’s a water-soluble mineral so it’s important to replenish your body with adequate amounts on a daily basis! What foods are good sources of magnesium? Good news: nuts and dark chocolate are among the richest sources of this essential mineral! Almonds are high in monounsaturated fats, which will help you keep your heart healthy. They’re a really good snack choice for diabetics too, because they’re high in protein and low in carbohydrates. 


From Basil to "HemPesto"

Wednesday, August 22, 2012


A few days ago a dear colleague of mine surprised me with some freshly picked zucchini squashes from his garden. Yes, I know, I work with such nice people : )
Well, that meant I had to get to work and go out of my way to make something other than a salad for once... And since it's basil season too, here's the outcome. 

HemPesto
(Makes about 1/2 cup)
 large bunch of fresh basil
1/4 cup hemp seeds
1/4 cup walnuts
2-3 cloves garlic
splash of olive oil
salt to taste

Remove the basil leaves from the stems and process them with just half the hemp seeds and half the walnuts, a splash of olive oil, the garlic, and salt. Depending on how thick/runny you prefer your sauce (runny is easier to mix with pasta) add more nuts/seeds or oil to the mixture. Taste test and add some salt if needed. 
To make zucchini pasta just cut grooves all the way lengthwise the zucchinis and then shave them into pastaCheck out the Pad Thai recipe for more details on this...
In a large bowl, toss the pasta in the sauce, cut up some tomatoes to go with it and decorate the servings with basil leaves. Hmmm, sooo satisfying...


Basil Nutrition
This lovely herb has anti-inflammatory and antioxidant properties, it's high in vitamin K and A, and the bone strengthening mineral, manganese. It can provide relief from arthritis and protect you from cancer.
Yes, the bursting aroma is not all...

Serving Suggestion
Needless to say, pasta is not the only way to enjoy pesto. Serve this as a dip with crackers or veggie sticks. Spread it on canapés, sandwiches, or pizza. You can even make it really liquidy and use it as a salad dressing. So good so many ways...


How About a Loaf of Bread?

Sunday, April 1, 2012


No, this is not April Fools', I'm serious. I've been raw (on and off) for over a year and for the past month, for several reasons, more off then on. : ( That also means having eaten loaves of bread in one sitting every now and then! Yes, again, I'm serious! But this wonderful creation is so dense that even I can stop myself after two slices. Bread-making is not so common in raw kitchens. Raw chips and crackers are much more the mainstream substitute for everything that's normally made out of wheat flour. I thought I would change that, in my kitchen anyway, and try to come up with something that even looks like bread and can be used for sandwiches, etc. This is a version that is great for breakfast or an afternoon snack just because it's not savory with herbs or spices, which is what I would make for a veggie sandwich. The result is incredible. Perfect with nut butter and jam for a "peanut butter and jelly" sandwich. I happened to use almond butter and goji berries (excellent for the brain), a wonderful harmony, but I love it with just walnut butter (also perfect brain food) on it, yum.
If you find cardamon too strong then just skip it. It's unique enough that I imagine some of you might not be big fans. You'll still get your "cinnamon toast" out of this. It couldn't really get any better than that, right?


Raw Cardamon-Date-Cinnamon Bread
(Makes 7-8 slices)
1 cup buckwheat groats
1/2 cup sunflower seeds
1/2 cup golden flax seeds
6-7 medjool dates
cinnamon
3-4 pods cardamon
pinch of salt
optional: add your favorite sweetener to taste


Directions:
1. Soak the buckwheat overnight then sprout for a day or two. The goal is not to end up with little tails but to make sure they're in the edible stage. Don't rinse them right before you use them. They'll have just enough moisture for the dough with a perfect texture.
2. Grind the flax seeds and the cardamon pods (if you're using them) in a spice grinder.
3. Place all the ingredients in a food processor and mix them until it all clumps together forming a ball of dough. You might need to scrape down the sides a couple of times to make sure everything is mixed in.
4. Shape your dough into a cube or whatever form you prefer. With a sharp knife, cut into ~1/4 in (6 mm) thick slices.
5. Gently place your slices onto a teflex sheet and dehydrate them for 1-2 hours at 115 ˚F (46˚C) then flip them onto a screen and continue dehydrating them for several hours.
6. Spread your favorite nut butter/coconut butter/cacao spread/jam/fruit paste, etc on it. I like to sprinkle with extra cinnamon too. It's a great snack to have around or to pack into a lunch box.


I'm so inspired.....It's time to make a savory loaf, or a sourdough imitation. After all, I live in the Bay Area....It should be famous for RAW sourdough too, right? : )
The sun is out so I'm off to harvest some vitamin D! Whoever decided to send some sunshine my way, thanks! See, I promised I would post this recipe once there's enough light for photos...
Enjoy!


Gazpacho & Breadsticks

Saturday, March 17, 2012


Breadsticks and bread were already in the "oven". Their aromas were filling up all corners of the house and I was like a little kid checking on them every half an hour to see if they were ready to eat. Be ready for your home to smell at least as lovely as your favorite bakery that you walk into on a Saturday morning when the crisp, baked-to-perfection pastries and rolls, etc. are just taken out of the oven. I promise I'll post the bread recipe next. So much rain and gloomy skies (and my lack of lighting) make it a bit difficult to take pictures so if you're inpatient, talk to Mother Nature and put in an order for some sunshine in the Bay Area, thanks! While it's been pretty chilly lately, last weekend's temperatures still allowed for some cold soup. As I said, breadsticks were already in the making and I had to make something to eat them with, right? So I did, and here are the recipes.
Back in August, when I was in Barcelona, I couldn't get enough of the tomato based veggie soup, Gazpacho. I just love that stuff. In a bowl, a cup, out of a bottle, served up any way I'll have it all. I've experimented with it over that past few months and it's really fun to change it up with different herbs added. Here are the approximate proportions for the version I love the most:


Gazpacho
(Serves maybe 2)
2 large tomatoes
1/2 cucumber
1 small carrot
1/4 red bell pepper 
1 green onion / chunk of onion
1 clove of garlic (optional)
1 stalk celery
salt & pepper
oregano
1 tbsp olive oil
1.5 cup water
optional*

*Add some berbere (typical Ethiopian spice mix) to turn up the heat on this savory bowl of blended veggies.
Blend all the ingredients until you get the smoothest juice-like soup, just as it's served traditionally.
Alternative: I sometimes run the blender for a shorter period and let the soup stay somewhat chunky. I told you I like to experiment with it and I really like it with the rougher texture too. Good for days when you feel like chewing ; )
Pour the soup into serving bowls, drizzle some olive oil on top and offer breadsticks (recipe follows) or crackers/chips with it. Oh so good.


Breadsticks
1 cup buckwheat groats*
½ cup sunflower seeds
½ cup flax seeds 
  2 stalks green onion
1 stalk fresh spring garlic / 1 clove garlic
 splash of olive oil
 ~ ½ tsp (or more) salt
basil, oregano to taste

*The buckwheat groats need to be soaked overnight and then sprouted for a day. Then, you can use the "buckwheaties" to make the breadsticks....so plan ahead!
Process all of the ingredients until they're evenly mixed. Taste test your mixture, add more herbs, salt, other ingredients, if needed, and process a little longer, then spread it out about half an inch (1.2-1.5 cm) thick on a teflex sheet. Score it to get sticks of the desired width and dehydrate at 115 ˚F (46˚C) for a couple of ours before flipping it onto a screen and dehydrating it 1-3 hours longer. Dehydration times depend on so many things so just keep checking on the sticks or if you're away don't worry because leaving them in there for a couple of hours longer will not hurt them. It will at least keep them warm. They're the best fresh out of the "oven"! These are great with salads and to take them along for a snack at work/school or when you're on the road, so you might wanna make an extra batch or too. The truth is, you'll probably end up with half as much as what you put in the dehydrator, especially if you have a big family and many walk by the "oven" every now and then. Good luck and enjoy! : )


Apple-Cinnamon gRAWnola

Saturday, March 3, 2012

I couldn't resist taking advantage of having such a beautiful yard and I decided to take pictures outside in the morning sun.
Sometimes it takes months for me to make a recipe that I come up with. This is one of those cases. For some reason, I never got to it until last weekend. I've been looking forward to making this for two reasons: it's a great snack that's easy to take along and I know that this way I'll eat pumpkin seeds. Don't ask why but I prefer them toasted and I just don't feel like eating any raw, unfortunately, because they're incredibly good for you. Yep, adding pumpkin seeds to my daily menu is the main reason I've been wanting to make this.

Pumpkin Seed Nutrition
Like all nuts and seeds, if you're on the lookout for some high quality protein, these green seeds are an excellent snack to reach for. Very high in protein but it doesn't stop there. Pumpkin seeds are among the most nutritious seeds out there. Manganese, magnesium, phosphorus, iron, copper, zinc, and potassium are all present in incredible amounts. All of these minerals are essential for bone health and as most of us have heard it over and over, zinc plays an important role in keeping your immune system strong and might even play a role in supporting prostate health. If a loved one is fighting arthritis be sure to tell them about the anti-inflammatory properties of pumpkin seeds, or even better, don't start lecturing them just make them a nutritious yummy snack like this gRAWnola or something else they'll be happy to munch on daily. The phytosterols found in pumpkin (and sunflower) seeds also support your immune system, help lower cholesterol, and lessen the development of cancer. Need I say more? Eat your nuts and seeds and don't forget to remove (and eat) those from your pumpkin.   

Apple Cinnamon gRAWnola
Ingredients:
1/2 cup almonds (I used soaked/sprouted ones)
1/2 cup pumpkin seeds (I used soaked/sprouted ones)
1/2 cup sunflower seeds (I used soaked/sprouted ones)
1/4 cup walnuts
1/4-1/2 cup dried currants/raisins (or any dried fruit you prefer)
1 apple
sprinkle of salt
cinnamon to taste
sweetener to taste
optional: vanilla

Preparation:
Put the nuts, seeds, and currants in a bowl. Grate the apple (I didn't peel mine but you may want to) and add to the bowl along with the salt, cinnamon, sweetener, and vanilla if you're using any. Using your hands, mix it well and spread the mixture on a dehydrator sheet. Dehydrate at 115 ˚F (46˚C) for a couple of hours or longer depending on how soft or crunchy you like them.
Store your gRAWnola in a jar or container and if for some reason you don't finish your batch within a few days you might want to put it in the fridge.

Serving suggestions:
For breakfast, serve it dry or with fresh fruit and/or nut mylk added. Store bought cereals out of a box are not the greatest way to start the day. Here's an alternative. Serve it to your little ones because even if it takes adding extra sweeteners to their bowl you started them with a much healthier brekfast. Pack some dry into their lunch box for a mid-afternoon snack.
Another alternative is to add more sweetener to your already somewhat dehydrated mixture and press the gRAWnola into a square dish. Refrigerate it, cut into bars and wrap the individual bars into wax paper or plastic wrap. Voilà, you have gRAWnola bars to pack and send your kids off to school with. Ok, you better get to work now. I hope to give you one of my favorite recipes this weekend. All I'm going to tell you is that it's a dessert! : ) Have a great weekend in your apple-cinnamon-aroma-filled home and stay tuned...

Reference:
http://www.whfoods.com/genpage.php?tname=foodspice&dbid=82

Onion Rings with Chipotle Mayonnaise

Sunday, December 18, 2011


Just like the ones you're used to...they're crunchy but soft, they're oily but in a satisfying way. Here is one that's not quite quick and not so easy but may be well worth your time and effort! I guess there are two cases when you would "bother to" make these: one is if you really want some onion rings and two, if you have guests coming, especially those that haven't been introduced to raw food, this would be a great finger food or something that would balance out a salad...besides getting them hooked ; ) on raw foods, right? I must say though, making these onion rings will easily result in a huge mess and they're the most delicate things and are so fragile to touch once they're done....but I'll share my trick with you. I've been "suffering" from OCD ever since I can remember and when I was little I was always the one who breaded pieces of chicken - yes, chicken! :(  - or mushrooms or whatever my beloved grandma was getting ready to fry for a Sunday dinner. Here's what I always did and I still remembered to do today: use both hands for breading the rings but make sure to never mix them! Keep one hand for working with the dry mix and one with the wet mix. Also, every time before you transfer a ring from one batter to the other tap it against either the next ring in that bowl or the side of the bowl. That's all! You will not make a huge mess and your mixes will not mix and become something gooey. This makes it possible to coat the onion rings without your fingers ending up three times as big because of batter accumulating on them. So roll up your sleeves and make the batters:

Onion Rings
Ingredients:
(Serves 2-3 for a snack)
1 onion (as round as you can find)

Dry batter:
1 1/2 cup flax golden seeds (you might need to make more as it gets harder to coat the rings when     there's hardly any left)
paprika
salt
Grind the flax seeds as fine as possible and mix all the ingredients.

Wet batter:
olive oil
water
salt
Mix oil and water in about a 2 to 1 ratio and add some salt.

Directions:
1. Slice the onion as thick as you wish (mine are about 1/3-1/2 in or ~1 cm)  and gently separate the slices into rings.
2. Dip each ring into the dry batter first. They will pick up a bit of the flax seed mixture. Then dip them into the wet batter and finish with the dry.
3. Place them on a screen and dehydrate them at 115ºF (46º) until they're crisp. This will take several hours so if you'd like them for a late lunch you could do it early in the morning. If you need them earlier you can make them in the evening and dehydrate them overnight. They can sit on the trays for a day or two without spoiling. I kept mine there for two days and went back to snack on them whenever I felt like it.


I think I would prefer onion rings with some kind of tomato based dip such as ketchup but since it's not tomato season, I made this:

Chipotle Mayo
(Makes about a half a cup)
1/4 cup cashews
1/4 cup sunflower seeds
1 clove of garlic
juice of 2 lemons (or 1 lemon and some water)
splash of nama shoyu (or salt)
splash of umeboshi  vinegar
chipotle powder 

Blend all the ingredients until you get a very smooth consistency. Taste test it and adjust flavoring if necessary. Serve with the onion rings.

Onions have tons of health benefits.  They are a strong anti-inflammatory and can boost your immune system, help get rid of mucus and prevent colds (perfect timing for the winter months when at any given time there's someone with a cold around us, right?). They're also a good anti-coagulant so if you or someone you know were warned to watch your/their cholesterol levels then onions should be on the menu often... Enjoy!


"Roasted" Mushrooms with Fennel Salad

Thursday, December 15, 2011

As you probably know by now, I like to keep it simple. I prefer to spend no more than 20 minutes in the kitchen and still create something delicious.This dish is really quick to prepare but you'll need time to leave it in the dehydrator for a while. It's so delicious though that it's really worth waiting for and your house will smell heavenly! The mushrooms are just like roasted mushrooms and are nicely complemented with a simple salad that is not heavy on dressing or overpowering herbs, etc.
As I mentioned before, mushrooms are incredibly healthy and fennel bulbs are very rich in antioxidants and have anti-inflammatory and anti-cancer qualities. They're also a very good source of fiber and some vitamins and minerals such as vitamin C (to boost your immune system), folate (a B vitamin that will help reduce your homocysteine levels and lower your chances of a heart-attack), and potassium (to help  lower high blood pressure). These precious bulbs have other medicinal qualities too. They can improve digestion, help with urinary tract infections (UTI), and even provide relief from migraines! Of course it's always an option to just eat them for their unique flavor...

"Roasted" Mushrooms
Ingredients:
(Serves 2-3)
~20 white button or crimini mushrooms
1/4 red onion
2 in sprig of rosemary
4 tbsp olive oil
4 tbs nama shoyu (contains soy!)
water

Directions:
1. Brush the dirt off the mushrooms, trim the ends of the stems if necessary and quarter each head.
2. Prepare the marinade by mixing the olive oil, shoyu sauce, and a little water.
3. Take the rosemary leaves off the sprig, chop them really fine and mix with the oil and shoyu.
4. Slice the onion and toss everything in a bowl to mix well.
5. Place it all in the dehydrator (leaving them in a relatively flat bowl works best) for a couple of hours at 115ºF (46ºC) and toss them around every 15-20 minutes or so.


Fennel Salad
Ingredients:
(Serves 2-3)
1 apple ( I used a Fuji but I think green apples would work really well. Just use your favorite kind or whatever you have available)
1 fennel bulb and some of the feathery top (that looks a lot like dill)
few slices of red onion
2-3 tbsp of walnut oil
dulse flakes
Optional: chopped walnuts, salt & pepper or herbs of your choice

Directions:
1. Quarter the apple, remove the core, and slice the quarter pieces crosswise and as thin as possible.
2. Slice both the fennel bulb and the onion paper thin (or as thin as you can).
3. In a salad bowl, toss everything with walnut oil, sprinkle with dulse (add salt and pepper if you like) and garnish with some of the feathery parts of the fennel chopped up.

Now the question is, why would you go to a restaurant?


Featured in Funky Raw, UK's raw food magazine