Just a few years ago I couldn’t even look at guacamole. I never liked mushy or soft foods and based on its appearance I didn’t think I would enjoy it. Boy, was I wrong!!? That was several years ago. Since then, it has become one of my favorite dishes! I can eat it with a spoon, without any chips or anything…just love it so much!
Well, it’s been quite chilly around here, so spicy, warming foods feel really good to snack on. Both of the following recipes are rather on the spicy side!
Guacamole*
Ingredients:
Serves 1, or as many as you’re willing to share it with : )
2 avocados
1 small hot jalapeno
2 slices red onion
handful of cilantro (the leafy part)
salt to taste
Directions:
This couldn’t get any easier…
In a mixing bowl, mash up the avocados. Add some salt and mix well. Chop up the onions, the jalapenos, and the cilantro really fine and add to the rest. Mix well, do a taste test, adjust the amount of salt. Serve immediately with some chips or anything that needs a dip. You can also use it as a spread on sandwiches or in wraps!
*Variations:
There are endless ways to make guacamole. The only common ingredient is probably the avocados! Most people add tomatoes to it. Having been a macrobiotic for so long and avoiding nightshades, I never put tomatoes in it and I still prefer it that way. The reason is because I prefer it as creamy as possible and tomatoes will make it somewhat juicy. You can also use garlic, either in addition to the above ingredients or in place of the onion. If you are a fan of ground black pepper, you can add some of that too. Here are some variations I’ve tried and love…
Macrobiotic
Skip the tomatoes and the jalapeno. You can also skip the salt and use umeboshi paste. Umeboshi is salty and sour and it will give it a rather unique and delicious taste! Add about a half a teaspoon.
New Mexican
If you can get a hold of some roasted green chili (obviously not a raw ingredient) then try it with just onions, green chili, and salt. It’s unbelievable how tasty that is!
Mexican
I’ve had the honor of a friend from Mexico making it for my family once. She made it exactly the way I “knew” it to be original. She used Serrano peppers, tomatoes, onions, garlic, cilantro, limes, and salt. Delicious!
Buckwheat Chips/Crackers
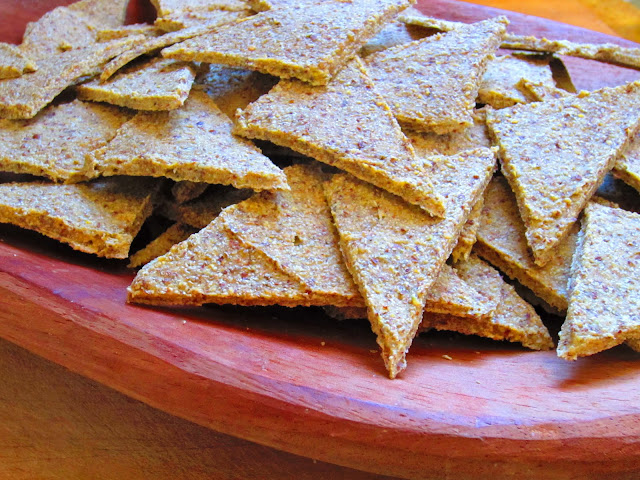
These are the first raw chips I came up with and they’re fabulous! I soaked and sprouted some buckwheat and used carrot pulp from making juice. Finally, I added some flax seeds to help the mixture bind.
 Why buckwheat?
Buckwheat is gluten free, very high in fiber, protein, riboflavin, niacin, vitamin B6, magnesium, phosphorus, copper, and manganese, but it’s most known for its rutin content and the health benefits that come with it. Rutin keeps your veins in good condition and it helps treating high blood pressure.
While, often, it’s referred to as a grain, buckwheat is a seed of the plant that belongs in the rhubarb family. The groats have a very distinguished shape and are sold in raw or toasted form. The latter is darker and often labeled “kasha”.
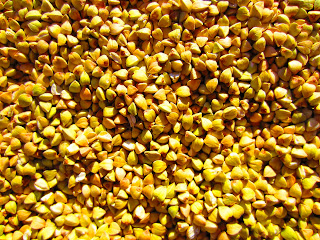
 Raw Buckwheat Groats Raw Buckwheat Groats |
|
 Sprouted Buckwheat ~ 24 hrs Sprouted Buckwheat ~ 24 hrs |
|
Here’s what I used:
1 1/2 -2 cup raw buckwheat
carrot pulp of 6 carrots juiced
½ cup ground flax seeds
2-3 tbsp olive oil
2 tsp salt
½ tsp ground cayenne pepper
water as needed
This makes a large amount, probably the equivalent of a family size bag of chips, but it really depends on how thick and large you make the chips.
Preparations:
Soak the buckwheat for a couple of hours or overnight. If you don't get to use them right away make sure to change the water and rinse the seeds thoroughly every 8 hours or so. They will grow in volume significantly, if you let them sprout. Sprouting takes about 24 hrs, so you will need to plan ahead. After soaking and rinsing, spread them out on a flat surface such as a large plate or a tray, and let them sprout for 24 hrs to a couple of days. You'll see them grow little tails that can get quite long, quite fast. Keep checking on them and don't forget to rinse them about three times a day!
When the buckwheat is ready to be used collect some carrot (or vegetable) pulp after making juice. Place all of the ingredients in a food processor (I had to split my batch up into two portions because it was too much all at once) and process until you get a spreadable but still quite solid paste. Add some water if necessary but don’t overdo it. Taste it and adjust the seasoning. Now comes the fun part!
With a soft spatula or a large butter knife, spread the “dough” out on 3-4 teflex sheets about 0.1-0.2 inches (3-5 mm) thick. Score them to your liking. You can make bite size squares or triangles or larger pieces too if you would like to use them as pizza base or for sandwiches. Dehydrate at 115 ˚F (46˚C) for 8-10 hours and then turn them over and continue dehydrating until they’re crisp, about 4 to 6 hours longer. Store your chips in airtight containers or bags. They would keep for at least a couple of months but, believe me, they won’t last that long!


