RAW Food for Truth Living foods lifestyle. Nutritious, raw, vegan recipes. Meals & tips for natural healing. Allergen-free, organic dishes. Courses you can prepare in no time. Meal-planning for those "on a budget". Discovering wild edibles. Eco-friendly, conscious, healthy living. . . . at home, in the office, and on the road.
Showing posts with label turmeric. Show all posts

Need A Drink?

Thursday, July 10, 2014


Maybe it's just one of those days?!
How about one that will not only give you temporary pleasure only to make you feel "blah" later but also might just...

- make you feel refreshed
- ease your aches and pains
- help digest your dinner
- help balance your blood sugar levels
- relieve nausea

Well, I've got one for you that could do all that and much more because of the incredible medicinal qualities of the ingredients...Oh, and let's not forget to mention that it's also delicious!

Ready for a refreshing summer drink?

More good news: you can make this in minutes and store a pitcherful in the fridge to have within reach on hot summer days when the numbers are around 100˚F (~38˚C) on the thermometer!

You might wanna make a double-batch to have enough around to share with others!


Better-Than-Ginger-Ale
Ingredients:
~ 0.75 L Sparkling spring water (or your favorite water)
1 lemon 
~ 2 in piece (or more, for a strong flavor) fresh ginger root
~ 1 in piece (or more, for a strong flavor) fresh turmeric root
optional: Sweetener of your choice (honey/maple syrup/agave syrup/coconut palm sugar)


To prepare:
1. Juice the lemon, the ginger, and the turmeric and strain the liquid if you wish. It may be a little foamy and if you don't strain it you can just get the foam off the top to end up with a "cleaner" drink.
2. Add your freshly juiced ingredients and the sweetener of your choice to the spring water. Chill if you prefer it cold.

Serve chilled, with or without any ice or at room temperature. It's delicious any way.

Note: being flexible is an important aspect of a healthy, balanced life. Try to experiment with recipes and rely on what you have available. Don't worry about having to substitute some of the ingredients.

For example:
1. Don't have any lemons but you desire the sour taste? Maybe you have raw apple cider vinegar at home!? If so, use a splash of that to make your drink a bit tangy AND you'll have added health benefits from the malic acid and the enzymes in the vinegar, which is also great for helping with balancing your blood sugar levels and it has wonderful cleansing qualities.

2. Don't want to add / or don't have any sweetener? Juice some fruit, a couple of oranges or apples or something else you have around, to add to your drink for a sweeter taste to help offset the bitterness of the turmeric.

Cheers! : )

xo

Dita


Thai-Inspired Creamy Bowl of Deliciousness

Friday, October 25, 2013


A soup, that is.  One that you will never forget! Promise. 
I had my wisdom teeth removed (ouch) and I'm still recovering.  Needless to say, I'm on blended foods and since it's day 10, I'm really tired of eating the same stuff over and over.  So, today, I said "This is it, I'm making something different!"  Savory and buttery is what I wanted....And I could have had a gallon of this... It's simply orgasmic!


Thai-Inspired Creamy Veggie Soup
Ingredients:
(Makes about a quart to serve 1, maybe 2)
1 small red bell pepper
1/2 stalk of celery
1 slender (stalk) lemongrass
1/4 of small red onion (or use 1-2 green onions)
1/2 carrot (or a tiny one)
3 cloves of garlic
ginger to taste (I only used a piece the size of a raisin)
1 tiny hot pepper/jalapeno
2 heaping tbsp coconut butter
pinch of ground cayenne pepper
1/2 - 1 tsp (to taste) salt 
cilantro (no more than what you can tear off a bunch with three fingers)
~ 3 cups water

Optional: pinch of turmeric, honey (not vegan) or other sweetener, soy or shoyu sauce


To Prepare:
1. Warm the water on the stove top carefully, to desired temperature. (You definitely don't want to bring it to a boil if you chose to stick with eating raw)
2. In the meantime, chop all vegetables into chunks and place them in a blender with the lemongrass (pealed back and the core chopped fine; a bit of a tough task) and the spices you are using along with the coconut butter.
3. Add the water and whirl it all up, adding the cilantro only for the last few seconds of blending.
4. Taste test. Some people like it saltier, some prefer it sweeter.
5. Garnish and serve immediately.

It's savory, warming, and incredibly flavorful and satisfying. Enjoy! : )

♥♥♥

Dita


Are you ready for the 3-minute "Ice Dream" ?!

Monday, June 3, 2013


94 degrees (34 ˚C) calls for a frozen treat and that's where the thermometer sat the other day so...this is how it went down in the kitchen...

I had to make up something like ice cream but without the less-than-good stuff in there, of course.... What do we know ice cream for? Its sweetness, creaminess, and icy, cooling effects. So I grabbed ingredients that meet and surpass those qualities..

mango - for flavor, and the creaminess it provides
banana - for choline, because chances are you don't get enough if you're a raw vegan, eating only whole foods (I'm not into supplements / pills)
coconut butter (or oil) - for more creaminess and healthy fat
hemp protein - for Omega 3 and healthy protein

selection of herbs, etc. - for the "super" aspects of it :)
ginkgo biloba - for brain power, why not
maca - excellent hormone-balancer that also adds creaminess
cayenne - to spice it up and deliver nutrition
turmeric - not for the color but for its amazing anti-inflammatory power

Here's the trick to ensure you're able to make such instant treats any time you feel like it:
1. keep glass(es) in the freezer for serving cold treats
2. have frozen fruit readily available at all times. I always try to keep a variety of berries / mangoes cut in chunks / sliced bananas, etc. in the freezer and here are the exact quantities if you wish to follow along:

Mango Ice Dream
(Serves 1-2 lucky people)
1 banana (sliced and frozen beforehand)
1 large mango (cut into chunks and frozen beforehand)
1 heaping tbsp coconut butter
sweetener of your choice: I used raisins
handful of ice cubes - I have small hand :)
1/2 cup water (maybe a little more if your blender is struggling)

optional:
1 tbsp hemp protein powder
1/4 tsp maca powder
1/4 tsp turmeric
pinch or two of gingko biloba
cayenne
1/4 tsp bee pollen (you can use more if you're used to it)

Add as little water as you can start with and blend all ingredients in a high-powered blender, using the tamper. Keep pushing down the contents and add a bit of water if it's a struggle (don't kill your blender) but keep it on the low end with the water so that you do get ice cream instead of shake. Serve in chilled ice cream cups, devour, enjoying every bit of it, and give thanks : )

♥♥♥

Dita


Just Beet It!

Tuesday, January 15, 2013


What have I been up to lately? Lots of things. Some of them are a surprise for now but I'll be sharing with you all in the upcoming posts, promise. First off, I started juicing more so I'll be taking notes of my favorite combinations for you. Here's the first one:

I wasn't targeting a liver cleanse or doing a detox at all, it just so happens that the ingredients combined here could be used for the housekeeping of this precious organ.

The Earthy Liver Cleanser
(Serves 1)
5 stalks celery
1 cucumber (or use a half and add 1 green apple)
1 peeled lemon
1 small beet
1 in (~2.5 cm) piece ginger root
2 leaves of kale (or other dark green leaves like dandelion, which is especially good for liver cleansing)

Feed them through your juicer and drink it up.

Fruits and vegetables to juice for a liver cleanse: dandelion leaves, lemon, burdock root, carrot, beets, apples, garlic, turmeric root, etc.

Happy Juicing! : )


Creamy Celery Root Soup

Wednesday, November 16, 2011


Yes, I know, my last post was soup too. Well, I've been on a soup-creating marathon and this is just the beginning. There's nothing like a bowl of tasty, warm soup on a cool day. Celery root soup is one I always liked cooked so I had to come up with a raw version and voilĂ , here it is. It couldn't have come out better...

Health Benefits of Celery
The list is quite long so you will thank yourself for using it. Celery is at least as good for you as it is aromatic and flavorful. The root is more commonly used in European countries but it's available at grocery stores in the U.S. too, and through all seasons. It is very high in fiber and happens to be a great weight-loss food due to its low calorie content. It's full of antioxidants, high in vitamin C, and K, and calcium, which boils down to its abilities to boost your immune system, to help prevent cancer, and to strengthen your bones. Its anti-inflammatory qualities provide relief from joint pain so they are a very good vegetable to snack on if you have arthritis. It can help diminish migraines and calm your nerves ....and the list goes on. It's a good idea to make friends with this crunchy vegetable if you haven't yet done so.

Raw Creamy Celery Root Soup
Approximate Ingredients:
(Makes 1 good size bowl)
1 small carrot
1/2 celery root
2 green onions
1 clove garlic
2 tbsp (or more) tahini or a generous handful of cashews
1.5-2 cups (or as needed) warm water
1/2 tsp salt 
little turmeric (if you like it)
cayenne pepper, black pepper, and cumin to taste


Directions:
It's so simple that I could just say: "Peel, chop, blend, and you're done" but I will break it down:
1. Peel the celery root and the garlic (to avoid having to peel the garlic put the whole cloves into a garlic press to squeeze them out...the peel will be left behind)
2. Chop all the ingredients into smaller pieces to help your blender
3. Place everything (with only some of the water) in the blender and whirl it up
4 Taste test it and add more salt, spices and water as necessary
5. Pour into bowl(s) immediately, drizzle with olive oil if you'd like and garnish with your favorite herbs/spices, etc. Enjoy and be grateful for every spoonful! : )

P.S: I have a new favorite that I will be posting soon! Have I mentioned that I love soups???

Pizza For Dinner

Tuesday, September 27, 2011

My recent European Adventures inspired me to create some more complicated dishes especially because I’m anticipating the days to turn cooler, when we all feel like eating “heavier” or more substantial foods. Also, people’s interest in raw foods is ever-growing and so does the need for transitional* foods on my blog! I had the best raw pizza at a restaurant in Copenhagen, which I wanted to duplicate ever since.

bestrawpizza

This pizza is even more amazing than I imagined it could be. The end result is just absolutely delicious cold and when put in the dehydrator for 20 minutes to 2 hours your guests might not even be able to tell that they're served a raw dinner!

*Transitional raw foods are those that help you convert to a raw (or high raw) lifestyle by their resemblance to cooked dishes. They usually have more ingredients, are more complicated to create, heavier on nuts and/or seeds, and very often dehydrated and/or even served warm straight out of the dehydrator. It is often very helpful to rely on foods as such for the first days/weeks/months (or however long it may take) because of the satisfaction and fullness they provide.

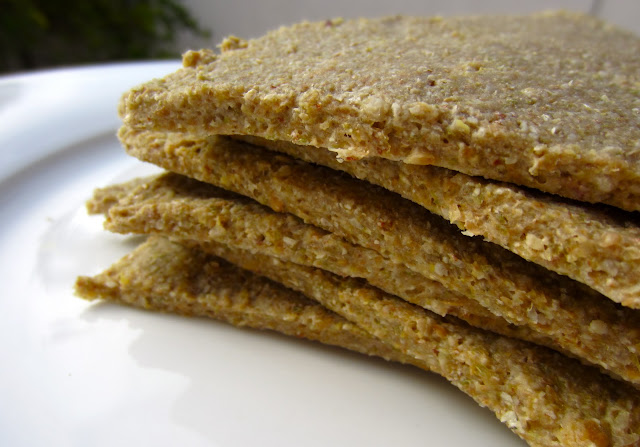
Raw Pizza Crust
(Makes 6 pieces)
1 cup buckwheat groats
½ cup sunflower seeds
1/6 of an onion (or garlic, if preferred)
splash of olive oil
splash of water
~ ½ tsp salt
basil, oregano to taste
½ cup flax seeds

rawpizzacrust

Soak the buckwheat for a few hours or overnight. Rinse and drain them. Grind the flax seeds until fine. Using a food processor, combine all of the ingredients but the flax seeds. Salt to taste and transfer ingredients into a mixing bowl. Fold in the flax seeds and mix well. Spread the mixture on a teflex sheet (you will get just enough to cover one sheet at a thickness of about 1/3 in or 8 mm). Score as desired (I made it into six triangular slices) and dehydrate at ~130 °F (54 °C) for about an hour then lower the temperature to 115 °F (46 °C) and keep dehydrating until you can flip them over to a mesh sheet. Dehydrate for a few more hours to pizza crust-like consistency.
Now that you have the base, you can store them in the fridge (or freezer) to use later, or you can assemble pizza right away using the recipes that follow.

rawpizzamarinarasauce

Raw Marinara (Pizza Sauce)
 (Makes about a cup)
Blend the following ingredients:
½ cup sundried tomatoes*
2 small tomatoes
juice of half a lemon
couple of slices of red onion
2 cloves of garlic
salt to taste/splash of soy sauce
splash of olive oil
basil, oregano

*soaking the sundried tomatoes beforehand helps a lot, especially if you (just like me) don’t have a high-speed blender

rawpizzawithherbedwalnuts

Raw Seed Cheese
Ingredients:
(Makes about a cup)
1 cup sunflower seeds
juice of half a lemon
2 cloves of garlic
3 tbsp soy sauce/nama shoyu/1 tbsp umeboshi vinegar + some water (if you avoid soy)
optional: dash of turmeric for color

Directions:
Grind the seeds as finely as you can. Blend the rest of the ingredients and add the seed “meal” to the blender. Add some water if necessary for desired consistency. I like it more runny than thick but everybody’s different.

Both, the pizza sauce and the seed cheese will keep in the refrigerator just like the crust, so guess what, once you prepare them all you'll have some grab-and-throw-together lunch waiting for you for days!

rawpizzamushroomsspinach

Toppings
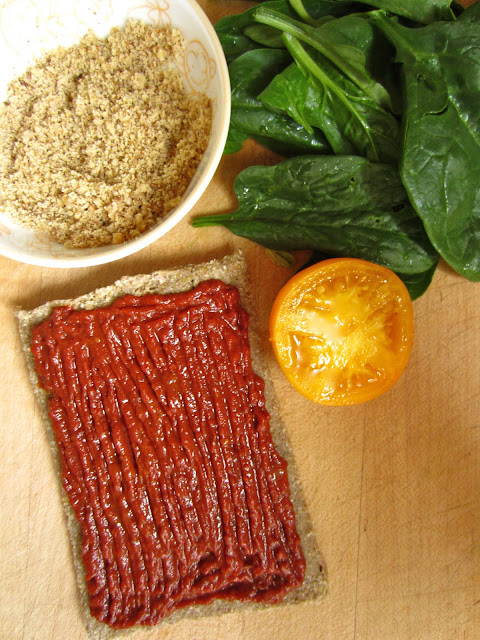
This is where you can go as simple or as crazy as you wish! I put spinach, tomatoes, and marinated mushrooms on these (above), and the first image shows the one with herbed walnuts and lemon boy tomatoes. You may put pineapple for Hawaiian or pesto for a green pizza. It’s hard to go wrong…

So grab a piece of crust, spread some pizza sauce on it, add your favorite toppings, and drizzle with some seed cheese. You may put the assembled pizza slice(s) into the dehydrator for a few minutes to warm up or for a couple of hours for more of a “baked” feeling.

rawpizzamushrooms

Dinner is served!

What are YOUR favorite toppings??


The Most Amazing Buckwheat Crackers

Tuesday, July 5, 2011

Making crackers is what was on my agenda on Sunday morning and it was so lovely to get busy in the kitchen with the morning sunlight coming through the window. Since I had run out of everything that resembles bread/chips/crackers, this was an emergency and I couldn’t wait for them to be done. I did not expect them to come out so fabulous though. These are by far my absolute favorite!

amazingbuckwheatcrackers

For the first time in my raw-cracker-making adventures I used garlic. Don’t ask me why it took me so long. Come to think of it…I remember that up until now I was making sure my crispy snacks are more on the “plain” side so that they would go well with anything. Not this time. These are everything but plain, and they can be (and probably will be) devoured just by themselves!
I am not giving all the credit to the garlic either. I also added turmeric and cumin for the first time and the combination of those spices gave it a wonderful hint of Indian-food-like flavor, not to mention the gorgeous color. Flavor and aesthetics are not my priority though. As you may probably know by now, nutrition is at least equally important to me so here’s the breakdown of the goods…

Health Benefits of Turmeric
This ancient spice, commonly used in Indian cuisine, is known for its exceptional anti-inflammatory properties and being an excellent antioxidant, and there’s a whole list of health benefits that go along with that.
Its bright rusty-yellow color, peppery, bitter flavor, and most healing properties lie in the powerful compound, curcumin. Turmeric is a natural detoxifier, has been used in treating cancer and for the prevention of metasteses, can slow the progression of Alzheimer’s disease, and studies suggest that it’s effective at preventing it from developing as well. As an anti-inflammatory, it’s a natural treatment for arthiritis and can also be used to help the skin heal or to treat psoriasis. It’s very rich in iron and manganese and a very good source of vitamin B6, which can keep your homocysteine levels at bay and reduce your risk of heart disease. Manganese is essential for strong bones and healthy nerves, and it can protect your cells from free-radical damage.

Health Benefits of Cumin
Another spice that’s very rich in iron and manganese, cumin is also a good source of calcium and magnesium. It’s a good digestive aid and it can help in nutrient assimilation, but most importantly, it is claimed to have anti-carcinogenic properties, like turmeric.

Just to note, if you have never used either, these spices have quite distinct flavors that will either appeal to you or not the first time around but just give them a try, you might just fall in love with their aroma immediately!

Buckwheat Crackers
Ingredients:
(Makes 250 bite size crackers)
3 cups raw buckwheat groats
1 cup ground flax seeds
½ tsp ground turmeric
½ tsp ground cumin
1 tsp salt
½ cup olive oil
5-6 cloves garlic
your favorite seeds for sprinkling (optional)

Soak the buckwheat groats for a couple of hours and let them sprout for about a day and a half as described in the Guacamole & Buckwheat Chips recipe. Once you have buckwheat sprouts (I let them grow to about ½ inch/6 mm length) it’s time to make crackers! I have to split up the ingredients and run two separate batches because only so much fits in my food processor at a time. 

buckwheatcrackermaking

Directions:
1.    Process all of the ingredients in a food processor until you get a well-mixed, sticky lump.


 2.    Using a butter knife, spread the mixture on teflex sheets (you should have enough for 4 of them) about 3-5 mm thick. Score them to your liking (I made 1.5 in/3-4 cm squares) and sprinkle with your favorite seeds if you like. Dehydrate them at 115 ˚F (46˚C) for a couple of hours before flipping them and then 3-4 hours longer depending on how thick they are and how crisp you like them.


3.    They’re ready whenever the edges and the center of the crackers look evenly dry. The other way to check on them is by stealing one out of there every half an hour…this is the method I use of course : ) but you'll end up with much less in the end!


4.    You can let them cool and store them in airtight containers for a couple of months (they will not last that long though), or serve them immediately. They’re absolutely fabulous fresh out of the “oven” while still warm. Enjoy and let me know how they came out!


Sources: http://www.whfoods.com/