RAW Food for Truth Living foods lifestyle. Nutritious, raw, vegan recipes. Meals & tips for natural healing. Allergen-free, organic dishes. Courses you can prepare in no time. Meal-planning for those "on a budget". Discovering wild edibles. Eco-friendly, conscious, healthy living. . . . at home, in the office, and on the road.
Showing posts with label dips. Show all posts

One Savory, One Sweet..

Saturday, December 7, 2013

Thank the Universe for laptops and Wi-Fi!  I'm sitting at the airport in Las Vegas, waiting for mechanics to replace a part on the airplane I'm supposed to take home….and I've decided to use this time to share an experience…

Yay for high-resolution phone cameras...I even got some usable photos! :)


While on a business trip, I stayed with my best friend who was more than enthusiastic about learning to prepare some raw foods.  We had lots of fun making 2 - 4 dishes a day (!) and one of the days she had guests over so we even got to introduce others to the magic of this way of eating.

Truth be told, I had no idea whether they would even want to touch raw foods but I wasn't worried about it because my friend was planning on cooking a big pot of veggie soup as well… Except, she didn't end up to...

So, what was initially planned to be a "tea party", later changed to being a girls' night in with dinner, ended up being a raw finger food sampling experience...


***
Oops, new update, they've just announced that this plane can NOT be repaired, so I got plenty of time to give you this recipe, or at least, finish it sooner than later : )
***


So what did we make? As you know, I believe in keeping things simple. I don't think there is a better way to inspire people than showing them how easy it is to prepare delicious, healthy dishes. We made some savory bites and some dessert to top them off.


Savory Walnut Pâté Bell Pepper Boats
Ingredients:
2 - 3 bell peppers (I like using red and orange but it would look really nice to have all colors, yellow and green as well)
2 cups walnuts (you may soak them if you have time)
1 small shallot (or half a medium size purple onion)
6 - 8 leaves of fresh sage
juice of 1 large lemon
1/2 tsp (or to taste) salt
few sprigs of parsley for garnish
optional: 1 clove of garlic and some parsley added to your ingredients

To prepare:
1. Place walnuts into the food processor and grind them until they're fine but not so much that they start becoming a nut butter.
2. Chop the shallot, the sage leaves, and the garlic and parsley (if using some in the pâté) really fine, into tiny pieces
3. Add the chopped ingredients and salt to the lemon juice, stir, and add the mixture to the walnuts.
4. Mix your ingredients well and add more lemon juice / olive oil to your pâté if it's on the dry side. Ideally, you'd like it to have a spreadable texture. Set it aside.
5. Cut up the bell peppers into quarters (try cutting along the veins, where the "dimples" are, that way you'll end up with "boats" that will hold the pâté nicely. Then cut the quarters in halves again.
6. Fill each pepper boat with a couple of spoonfuls of the pâté, arranged them alternating the colors you have on a plate or tray and garnish each with a leaf of parsley or other herb of your choice.
Serve immediately.

Note: This recipe can be made into a dip as well and served as part of a crudité. Add more lemon juice and/or oil of your choice to make it into a softer, more liquidy, consistency and serve it with a variety of chopped up veggies.

For dessert, I intended to make macaroons, because they're so easy but our guests were already there and starved when I haven't even finished the pâté so by the time I got to start on the sweets I decided to quickly roll them into balls and we served them right away as well.


Snowballs
Ingredients:
2 cups dry shredded coconut (plus some extra to roll the balls in)
1/2 cup almond meal (or ground almonds)
1/2 cup honey/agave syrup/sweetener of your choice
1/4 cup coconut butter/oil (I used about half of each for a total of 1/4 cup)
1/2 - 1 tsp ground vanilla
tiny pinch of salt
optional: few tbsp of cacao powder to add to half the mixture if you wish

To prepare:
1. Grind the shredded coconut in a food processor so that it's finer
2. Combine the dry ingredients: the coconut, the almond meal, and the vanilla, in a mixing bowl
3. To melt the coconut butter/oil and honey (if necessary), place your jars in hot water. As an alternative, you can measure them in the unmelted form and place them all in a small bowl that is sitting inside another bowl with hot water in it. Stir your wet ingredients and the salt until melted and homogenous and add this mixture to the dry ingredients.
4. Combine everything till your mixture holds together and you are able to form balls by rolling a spoonful of it at a time between your palms. Roll each ball in the shredded coconut and place them on a serving platter. About half way through, add a few spoonfuls of cacao powder to the mixture (if you want two colors and flavors) and finish up making balls the same way.

It's probably not much of a surprise that all of the pepper boats and snowballs were gone in no time so they've been tested…you can make these for someone who might have not had a chance to try raw foods yet. They're quick, easy an delicious. What else would you need?

I just wish we had taken photos of all of us! We even had the honor of having a beautiful baby entertain us but no pictures…hmmm…oh well, next time.

Some Nutrition Facts 
The two main ingredients, walnuts and coconut, in the above menu, are both "brain foods". They both contain very healthy fats. Walnuts are high in Omega-6, and even more importantly, Omega-3 fatty acids. Coconut is high in saturated fat (yes, it's good for you!), is a good "hormone precursor", especially when it comes to the production of testosterone and progesterone, and coconut oil supports the thyroid and weight-loss.
Bell peppers are high in vitamin C and antioxidants. If you are using red ones you are getting more antioxidants, overall, more health benefits but it's good to eat a "rainbow diet" and include as many colors as possible, if not in every dish, throughout the day. Herbs (used in the pâté) are loaded with minerals and vitamins and sage is particularly known for improving memory and helping those with Alzheimer's disease (Did I mention coconut oil does the same? If you know someone who needs help in this department, I definitely encourage you to look into this and maybe give it a try, say, start with a  spoonful of coconut oil mixed into a breakfast dish, whatever that may be for you, or the person to be helped.) and it has high levels of antioxidants and anti-inflammatory qualities. How many foods / dishes are there that do all this? : )
Enjoy!


When Sweet & Tangy Unite...

Tuesday, April 9, 2013


The perfect combination of sweet and tangy comes in this tiny, oval-shaped citrus fruit I love. They're so delicious but so rare. I wonder what the reason is? I sure haven't seen them at the market until a couple of weeks ago, and when I did I pretty much screamed, and probably looked like the happiest kid in Disneyland. I have a radar for treasures like this at the market. They haven't been around since, so I'm grateful to have caught them the one time they were there.  These olive-sized treats are great by themselves or added to salad, desserts, and dressings. Here's the lovely dressing I make with them. Tangy, sweet, and sour....so delicious.


Kumquat Dressing
~1/2 cup (I used 7 pieces) kumquats
1/2 avocado or 3-4 tbsp oil
1 clove garlic
piece of shallot (about the size of a garlic clove)
4-5 tbs apple cider vinegar
1/4 cup water (to start, you might add more)
1/2 tsp sea salt
1/2 tsp ground cayenne / small chunk of jalapeno / other hot pepper


To prepare:
1.  Do not attempt to peel the kumquats, the entire fruit is used. They might have a lot of seeds (mine were full of them) but they will blend well. Just remove the tiny stems and leaves and leave the rest intact.
2. Blend all of the ingredients, taste test, adjust salt, water, etc. and pour over some mixed greens.


Storage
You can store this dressing for days in the fridge if you happen to have any leftovers. I generally finish them off. Fresh dressings are just so yummy. : ) If it separates, just give it a stir, if it thickens, just add water/vinegar/lemon juice to it. Either way, make sure you taste it before pouring it all over a large bowl of greens.


Now, onto the health benefits..
As you might have guessed, similar to all citrus fruits, these olive-sized treasures are loaded with vitamin C, and provide a moderate amount f vitamin A along with minerals, such as manganese, calcium, iron, magnesium, and copper. They're also a very good source of fiber but if I were to eat them for their nutritional value I would really concentrate on the (1) antioxidants they provide due to the high amounts of vitamin C in them and (2) the phytonutrients in the peel. Phytonutrients such as limonene are in citrus peel that most of us throw away on a regular basis. Ironically, they have exceptional cancer-fighting and antiviral qualities, so we're putting medicine in the trash. The good news is, kumquats are eaten with the peel, meaning you're really eating a whole food, with all of its nutrients working together to help your body prevent or fight disease! Aren't we so blessed?!?
Enjoy!

♥♥♥

Dita

2 For 1: To Dress Your Salads

Tuesday, November 20, 2012


Most of us have our favorite dressings, I admit I'm no exception. In fact, I usually vary two different kinds for a period of time before I set out to create new versions. I guess a period has just ended because I recently came up with a couple of new ones. Here they are. You get two recipes today. They're both rich and creamy and they're both quick and easy to make.

Creamy Green Goodness 
Approximate ingredients:
1 avocado
generous handful of cilantro
1/2 cup apple cider vinegar
splash or two of olive oil
1/4 hot sauce*
1 tbsp mustard
2 cloves of garlic
1/2-1 tsp salt 
ground black pepper to taste
water as needed

* I use some of my homemade hot sauce. If you don't have any handy, you can substitute half a jalapeno and some water.
Blend all of the ingredients, taste test, adjust seasoning, and add more vinegar or water if it's too thick. Use on your favorite salad ingredients.


Horseradish Ranch Dressing
1/2 cup hemp seeds
1/2 cup sunflower seeds (soak beforehand for a few hours if possible)
3/4 cup olive oil
3/4 cup water
1/4 cup apple cider vinegar
juice of 1 lemon (about 1/4 cup of juice)
2 tbs tamari / soy sauce 
2 cloves of garlic
2 tbs shredded horseradish
1 small jalapeno chopped up
sprigs of fresh dill
1/2-1 tsp salt
ground black pepper

Blend the above ingredients until you get a very smooth consistency, taste test, adjust seasoning, and add more vinegar or water if needed.
Another tip: If you see a good amount of your dressing stuck to the bottom or the walls of your blender, rinse it out with some water or vinegar and add whatever you save that way to your batch. Nothing wasted :)
I haven't talked about hemp seeds and what good they have to offer so let's touch on their health benefits.

Hemp Hearts (Shelled Hemp Seeds) for your Heart
These precious seeds are a very good source of complete protein and are extremely rich in minerals like magnesium, zinc, and iron. A very good source of essential fatty acids, they're a good addition to your diet for a healthier heart and skin as well.

Horseradish
The spicy, fibrous root will spice up your kitchen but that's not all. It's high in vitamin C and rich in antioxidants, has antibiotic properties, cancer-preventing characteristics, and sure can come to the rescue when one is suffering from a stuffy nose, respiratory/chest congestion, etc. and you need such a small amount to get these benefits. It is truly are a wonderful food to try out, experiment with, and add to recipes. You might shed some tears while shredding some but it's worth it. I promise! : )


From Basil to "HemPesto"

Wednesday, August 22, 2012


A few days ago a dear colleague of mine surprised me with some freshly picked zucchini squashes from his garden. Yes, I know, I work with such nice people : )
Well, that meant I had to get to work and go out of my way to make something other than a salad for once... And since it's basil season too, here's the outcome. 

HemPesto
(Makes about 1/2 cup)
 large bunch of fresh basil
1/4 cup hemp seeds
1/4 cup walnuts
2-3 cloves garlic
splash of olive oil
salt to taste

Remove the basil leaves from the stems and process them with just half the hemp seeds and half the walnuts, a splash of olive oil, the garlic, and salt. Depending on how thick/runny you prefer your sauce (runny is easier to mix with pasta) add more nuts/seeds or oil to the mixture. Taste test and add some salt if needed. 
To make zucchini pasta just cut grooves all the way lengthwise the zucchinis and then shave them into pastaCheck out the Pad Thai recipe for more details on this...
In a large bowl, toss the pasta in the sauce, cut up some tomatoes to go with it and decorate the servings with basil leaves. Hmmm, sooo satisfying...


Basil Nutrition
This lovely herb has anti-inflammatory and antioxidant properties, it's high in vitamin K and A, and the bone strengthening mineral, manganese. It can provide relief from arthritis and protect you from cancer.
Yes, the bursting aroma is not all...

Serving Suggestion
Needless to say, pasta is not the only way to enjoy pesto. Serve this as a dip with crackers or veggie sticks. Spread it on canapés, sandwiches, or pizza. You can even make it really liquidy and use it as a salad dressing. So good so many ways...


Simply Goddess Salad

Sunday, May 20, 2012


Quick, simple, delicious, and super nourishing. Sold? So am I. I must be because I had this two days in a row and I get bored with things fast. Well, except for salads. I can't seem to get tired of them but you gotta vary the dressing, right? ...And the rest of the ingredients, which I try to remember once in a while. Well, here's the dressing of today's (and yesterday's) salad:

Goddess Avocado Dressing*
(Makes about 2 cups)
1 1/2 avocado
2 cloves garlic
juice of 1 small lemon
~1 tsp salt
1/2-1 tsp fresh ground pepper 
1 1/4 - 1 1/2 cups water
Optional: pinches of cayenne pepper and/or oregano

Blend all of the ingredients until smooth. Add more water if not easily pourable. Taste test and add seasoning if necessary. Remember to start with less, you can always add more but can't take any salt/pepper, or even water, out. 

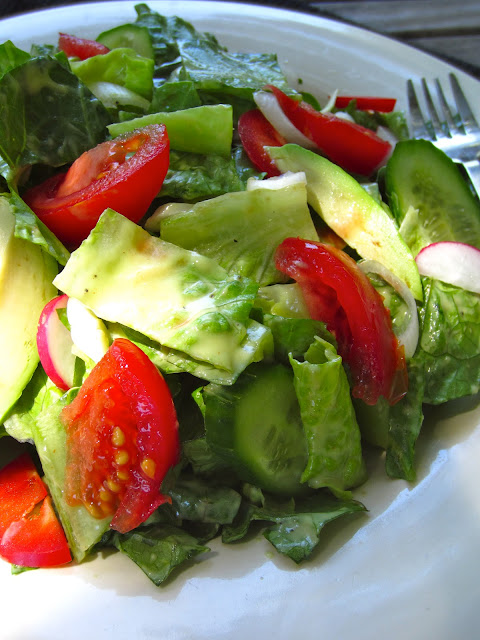
Chop up some lettuce or other greens and veggies of your desire. I kept it very simple. This time it was romaine lettuce, cucumber, red cherry bomb pepper, tomato, green onion, and radishes. That's it. Add slices of avocado, shredded cabbage/carrots/beets, red onions, green apples, nuts, seeds, etc. if you wish. Smother with a generous amount of dressing, mix and serve.

*Nutrition
The main ingredient of this dressing, avocado, has a laundry-list of health benefits. Chances are you already know this, but it's always good to be reminded of such wonderful things...
These unique fruits are very rich in vitamins such as C, E, K, B6, and folate (B9) and minerals like potassium, copper, magnesium, and manganese. They're loaded with fiber and very rich in monounsaturated fat, that is the good kind of fat you want to eat, and they're among foods with the highest lutein content. All this translates to a delicious addition to salads and side-dishes that can help protect you from cardiovascular disease, different types of cancers, boost your body's nutrient absorption capabilities, and support your eyes by preventing macular degeneration and cataract formation. 

Happy Summer (if you live on the Northern Hemisphere), Happy Winter otherwise!


Onion Rings with Chipotle Mayonnaise

Sunday, December 18, 2011


Just like the ones you're used to...they're crunchy but soft, they're oily but in a satisfying way. Here is one that's not quite quick and not so easy but may be well worth your time and effort! I guess there are two cases when you would "bother to" make these: one is if you really want some onion rings and two, if you have guests coming, especially those that haven't been introduced to raw food, this would be a great finger food or something that would balance out a salad...besides getting them hooked ; ) on raw foods, right? I must say though, making these onion rings will easily result in a huge mess and they're the most delicate things and are so fragile to touch once they're done....but I'll share my trick with you. I've been "suffering" from OCD ever since I can remember and when I was little I was always the one who breaded pieces of chicken - yes, chicken! :(  - or mushrooms or whatever my beloved grandma was getting ready to fry for a Sunday dinner. Here's what I always did and I still remembered to do today: use both hands for breading the rings but make sure to never mix them! Keep one hand for working with the dry mix and one with the wet mix. Also, every time before you transfer a ring from one batter to the other tap it against either the next ring in that bowl or the side of the bowl. That's all! You will not make a huge mess and your mixes will not mix and become something gooey. This makes it possible to coat the onion rings without your fingers ending up three times as big because of batter accumulating on them. So roll up your sleeves and make the batters:

Onion Rings
Ingredients:
(Serves 2-3 for a snack)
1 onion (as round as you can find)

Dry batter:
1 1/2 cup flax golden seeds (you might need to make more as it gets harder to coat the rings when     there's hardly any left)
paprika
salt
Grind the flax seeds as fine as possible and mix all the ingredients.

Wet batter:
olive oil
water
salt
Mix oil and water in about a 2 to 1 ratio and add some salt.

Directions:
1. Slice the onion as thick as you wish (mine are about 1/3-1/2 in or ~1 cm)  and gently separate the slices into rings.
2. Dip each ring into the dry batter first. They will pick up a bit of the flax seed mixture. Then dip them into the wet batter and finish with the dry.
3. Place them on a screen and dehydrate them at 115ºF (46º) until they're crisp. This will take several hours so if you'd like them for a late lunch you could do it early in the morning. If you need them earlier you can make them in the evening and dehydrate them overnight. They can sit on the trays for a day or two without spoiling. I kept mine there for two days and went back to snack on them whenever I felt like it.


I think I would prefer onion rings with some kind of tomato based dip such as ketchup but since it's not tomato season, I made this:

Chipotle Mayo
(Makes about a half a cup)
1/4 cup cashews
1/4 cup sunflower seeds
1 clove of garlic
juice of 2 lemons (or 1 lemon and some water)
splash of nama shoyu (or salt)
splash of umeboshi  vinegar
chipotle powder 

Blend all the ingredients until you get a very smooth consistency. Taste test it and adjust flavoring if necessary. Serve with the onion rings.

Onions have tons of health benefits.  They are a strong anti-inflammatory and can boost your immune system, help get rid of mucus and prevent colds (perfect timing for the winter months when at any given time there's someone with a cold around us, right?). They're also a good anti-coagulant so if you or someone you know were warned to watch your/their cholesterol levels then onions should be on the menu often... Enjoy!


Chips and Dips

Saturday, December 3, 2011


Yes, that is the true color of these chips. They're not the product of photoshop or any kind of other trick. Nope, they're nature's magic! Aren't they BEAUTIFUL!? Purple corn doesn't just have the most gorgeous color but it comes with amazingly powerful antioxidants too...as you might have guessed!
Most of us have been told that berries, especially blueberries, have the highest antioxidant content...that is until superfoods came along. But a lot of sources claim that purple corn tops the list in the department! I don't know about you but I was sold by the color itself and after hearing about the health benefits I pretty much wanted purple corn to be one of my staples. These chips are so savory and a great snack by themselves, or with a dip, or as crackers for a soup, or with any spread next to a salad, etc...
Take note: this recipe requires some planning because the corn needs to be soaked at least overnight (I soaked mine for two days though because I couldn't get around to making them so there's no such thing as oversoaking)!
 

Purple Corn Chips/Crackers
Ingredients:
(Makes about the same amount as a medium size bag of chips)
1 cup purple corn (I used dry kernels that you'll probably find in the bulk section of your store)
1/4 cup flax seeds
2-3 tbsp hemp seeds
2-3 tbsp sesame seeds
few slices of red bell pepper
1/2 jalapeno
1 green onion (or a chunk of any kind of onion)
juice of half a lime
~ 1/4 cup (or as needed) of water/soaking liquid
1 tsp salt
1/2 tsp cumin
optional: cayenne pepper or any other spice you may wish to add


Directions:
1. In a food processor, combine all of the ingredients and make a spreadable batter adding as much soaking liquid/water as needed for the desired consistency. A dryer paste is harder to spread but takes a shorter amount of time to dehydrate and of course the wetter the mixture is the easier it is to handle but the longer it takes to end up with chips. 
2. Spread the mixture evenly on a teflex sheet and score them to your liking. The amount for this recipe fit on one sheet exactly and I got fairly thick chips that way, which were perfect for dipping..
3. Dehydrate at 115 ˚F (46˚C) for a couple of hours and then turn them and dehydrate them for another 3 to 4 hours, depending on your batter. They're the best fresh out of the "oven"!
....while the crackers are turning crisp you have plenty of time to make a dip:

Creamy Cashew-Lemon Dip*
(Makes almost a cup)
Ingredients:
juice of 2 lemons (or 1 and add extra water)
1 small clove of garlic
1/4 cup cashews
1/4 cup sunflower seeds
splash of umeboshi plum vinegar
~ 1/4 tsp salt
water as needed for a smooth and creamy consistency
*Add spices and herbs of your choice to get something similar to the popular "Ranch" flavor.
  Add extra water to make it into salad dressing.

Blend all the ingredients until very smooth. Taste test and add salt, etc. Blend again if you added anything and you're done...

These chips are incredibly yummy, full of antioxidants, have anti-inflammatory qualities, and on the long list of benefits are also cancer-fighting qualities, the ability to lower blood pressure and help those with diabetes or people who struggle with obesity...oh and have I mentioned they're pretty and RAW?

Storage:
The chips/crackers would keep for quite a while in a container if you had any leftovers.
If you have some of the dip left you can save it in the fridge for a few days.

"Better Than" Pad Thai

Tuesday, October 25, 2011

rawpadthaipastawithpeanutsauce

What do you do when pasta is on the menu at home?
With a large batch of my favorite peanut sauce already made I had to figure out what to put it on! It didn’t take long to get some zucchini out and go on a raw pasta adventure. I had been wanting to try zucchini pasta but haven't figured out what kind to make first….until now. It was the first time but definitely not the last, in fact, I admit that I’ve made this dish several times in the past two weeks already! Yes, it’s that good.

Raw Zucchini Pasta
Zucchini makes perfect pasta because it doesn’t have an overpowering flavor and it has quite the right texture to replace the strings of dough we’re all used to. If you have a spiralizer or some kind of a magic machine to make pasta, lucky you, your task just got somewhat easier. If you’re like me and even your mandolin is in storage somewhere and all you have to work with is a knife then do this: cut grooves all the way lengthwise the peeled zucchinis but be careful to not cut through the other side. With a peeler go down the grooves you’ve made and shave your squashes into pasta. It takes some work but I must say I didn’t expect to like the outcome as much as I do now and it’s so worth it. Pile some on plates and put your pasta servings in the dehydrator for a warmer dish at about 130 °F (54 °C) while you make the sauce.

rawzucchinipastaandpeanutsauce

Peanut Sauce*
Ingredients:
(Serves 2-3)
1 ½ cup peanuts (or a shallow cup of peanut butter)**
optional: 3-4 tbs soy sauce/nama shoyu 
~½ cup water added a spoonful at a time (you may add less or more depending on how watery you prefer the sauce)
2 cloves garlic
handful of cilantro
optional: 2 tbsp of your favorite sweetener
optional: 1 jalapeno (makes it spicy)

* If you happen to end up with leftovers this makes a great dip to go with apples or veggies.
** For this recipe I used lightly toasted Valencia peanuts, which are not raw. I’ve talked about raw Jungle peanuts vs. roasted peanuts here and in this case I think these are a better choice. Decide for yourself. If you want to go for both the flavor and the improved digestibility then I recommend using lightly toasted Valencias. If you insist on 100% raw go for the Jungle ones and maybe adjust your seasoning.

Directions:
If you’re using peanuts, grind them in a food processor until they’re starting to clump together and little by little add some water. Add the soy sauce/nama shoyu, garlic, jalapeno, cilantro and sweetener of your choice. Mix evenly and taste. Adjust the seasoning and add more water if it doesn’t have the consistency of a sauce to pour on pasta. If you’re starting with peanut butter you don’t even need to use a food processor just mix it with water and the rest of the ingredients but use already pressed garlic and chop the cilantro finely.

Assembly:
Get your pasta out of the dehydrator and mix each serving with some peanut sauce and place back into the dehydrator to warm up for a little while longer. Slice some bell pepper and some green onions, and chop some more peanuts to top each plate before serving. Add some chili flakes for an extra spicy finish dig in!
Put zucchinis on your shopping list because from now on you’ll want to have “pasta” on hands at all times.

rawpadthaicloseup


Pizza For Dinner

Tuesday, September 27, 2011

My recent European Adventures inspired me to create some more complicated dishes especially because I’m anticipating the days to turn cooler, when we all feel like eating “heavier” or more substantial foods. Also, people’s interest in raw foods is ever-growing and so does the need for transitional* foods on my blog! I had the best raw pizza at a restaurant in Copenhagen, which I wanted to duplicate ever since.

bestrawpizza

This pizza is even more amazing than I imagined it could be. The end result is just absolutely delicious cold and when put in the dehydrator for 20 minutes to 2 hours your guests might not even be able to tell that they're served a raw dinner!

*Transitional raw foods are those that help you convert to a raw (or high raw) lifestyle by their resemblance to cooked dishes. They usually have more ingredients, are more complicated to create, heavier on nuts and/or seeds, and very often dehydrated and/or even served warm straight out of the dehydrator. It is often very helpful to rely on foods as such for the first days/weeks/months (or however long it may take) because of the satisfaction and fullness they provide.

Raw Pizza Crust
(Makes 6 pieces)
1 cup buckwheat groats
½ cup sunflower seeds
1/6 of an onion (or garlic, if preferred)
splash of olive oil
splash of water
~ ½ tsp salt
basil, oregano to taste
½ cup flax seeds

rawpizzacrust

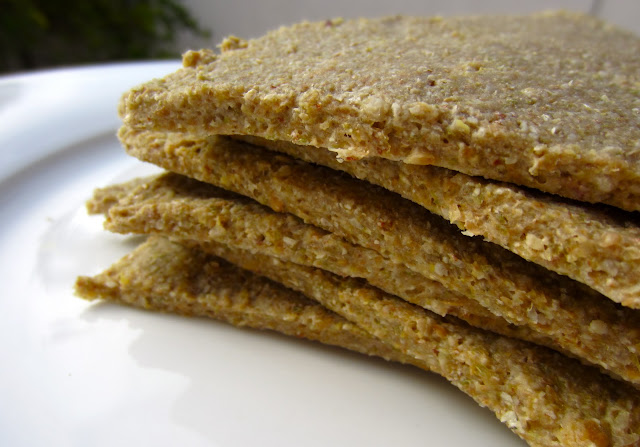
Soak the buckwheat for a few hours or overnight. Rinse and drain them. Grind the flax seeds until fine. Using a food processor, combine all of the ingredients but the flax seeds. Salt to taste and transfer ingredients into a mixing bowl. Fold in the flax seeds and mix well. Spread the mixture on a teflex sheet (you will get just enough to cover one sheet at a thickness of about 1/3 in or 8 mm). Score as desired (I made it into six triangular slices) and dehydrate at ~130 °F (54 °C) for about an hour then lower the temperature to 115 °F (46 °C) and keep dehydrating until you can flip them over to a mesh sheet. Dehydrate for a few more hours to pizza crust-like consistency.
Now that you have the base, you can store them in the fridge (or freezer) to use later, or you can assemble pizza right away using the recipes that follow.

rawpizzamarinarasauce

Raw Marinara (Pizza Sauce)
 (Makes about a cup)
Blend the following ingredients:
½ cup sundried tomatoes*
2 small tomatoes
juice of half a lemon
couple of slices of red onion
2 cloves of garlic
salt to taste/splash of soy sauce
splash of olive oil
basil, oregano

*soaking the sundried tomatoes beforehand helps a lot, especially if you (just like me) don’t have a high-speed blender

rawpizzawithherbedwalnuts

Raw Seed Cheese
Ingredients:
(Makes about a cup)
1 cup sunflower seeds
juice of half a lemon
2 cloves of garlic
3 tbsp soy sauce/nama shoyu/1 tbsp umeboshi vinegar + some water (if you avoid soy)
optional: dash of turmeric for color

Directions:
Grind the seeds as finely as you can. Blend the rest of the ingredients and add the seed “meal” to the blender. Add some water if necessary for desired consistency. I like it more runny than thick but everybody’s different.

Both, the pizza sauce and the seed cheese will keep in the refrigerator just like the crust, so guess what, once you prepare them all you'll have some grab-and-throw-together lunch waiting for you for days!

rawpizzamushroomsspinach

Toppings
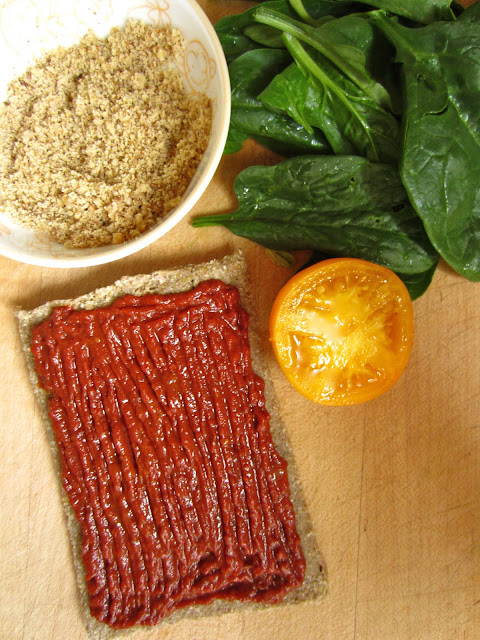
This is where you can go as simple or as crazy as you wish! I put spinach, tomatoes, and marinated mushrooms on these (above), and the first image shows the one with herbed walnuts and lemon boy tomatoes. You may put pineapple for Hawaiian or pesto for a green pizza. It’s hard to go wrong…

So grab a piece of crust, spread some pizza sauce on it, add your favorite toppings, and drizzle with some seed cheese. You may put the assembled pizza slice(s) into the dehydrator for a few minutes to warm up or for a couple of hours for more of a “baked” feeling.

rawpizzamushrooms

Dinner is served!

What are YOUR favorite toppings??


Savory Midafternoon Snack

Saturday, July 23, 2011

I've been using this season's fresh fruits, veggies, and herbs to create new recipes but today I balanced them with something more filling: a succulent portobello mushroom. Since I made it to the farmer’s market this week, I also had the sweetest, ripest, and juiciest tomatoes on hand. Of course I had to make something using some so I made pico de gallo to go with the mushroom “steak”. It took less than five minutes to prepare and the house smelled so good for hours!  
rawportobellomushroomsteak

If you are already into mushrooms then you’ll be glad to hear that they’re not only yummy but good for you too! If you haven’t made friends with them, today might be a good day for your first rendezvous.

Health Benefits of Portobello Mushrooms
The dense and velvety texture of the beautiful caps are sure palatable but how well do they score in the nutrition department?
It may sound unbelievable but this mushroom's protein to carbohydrates ratio is nearly 50:50! They’re high in fiber and they almost qualify to be called a B vitamin complex. As an exceptionally high source of niacin (B3), riboflavin (B2), copper, selenium, pantothenic acid, phosphorous, potassium, and a very good source of thiamin (B1), folate (B9), vitamin B6, zinc, magnesium, and manganese, they’re just an absolute gold mine for vitamins and minerals. They’ll help strengthen your immune system, help protect your nerves and build or maintain strong bones, and safeguard against many types of cancer! Oh, and don't forget the copper's power to fight gray hair! There's more of this trace element in a serving of this mushroom than in a serving of molasses!!! I think that deserves at least an A-, right?


rawherbedportobellomushroomHerbed Mushroom “Steak”
Ingredients:
(per mushroom)*
1 portobello mushroom (cap only)
2-3 tbsp olive oil
1 generous pinch of finely chopped rosemary
1 clove of garlic
salt to taste (you may use nama shoyu or soy sauce, if you’re ok with soy products, and skip the salt)

*I recommend you make 2-3 mushrooms per person.  Multiply the listed amounts by the number of mushrooms you have.


Directions:
Clean the mushrooms just by brushing them off with your fingers (do NOT wash them). They’re pretty delicate so be careful not to chip/break them. Place them with the gills facing up on a dehydrator tray. Crush the garlic and mix all the marinade ingredients in a small bowl and drizzle it on the mushrooms. Dehydrate for 3-4 hours at 115 ˚F (46˚C). (If you prefer cooking them, you may place them in an oiled pan and bake them at ~375˚F (190˚C) for 45 minutes.)


picodegallo
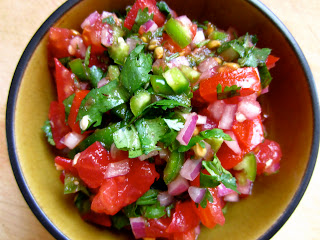
Pico de Gallo
Ingredients:
(Serves 1-2)
1 tomato
1 jalapeno
couple of slices of red onion
a little cilantro
salt to taste
optional: you may add some lime and/or black pepper

Directions:
Chop and mix all ingredients and place in a serving bowl.

This is just what I decided to do but either of these will go well with other dishes, as a side. Yumm! : )

Mint Chutney

Sunday, June 26, 2011

mintchutneyrecipeandcracker
Indian food has always been on my “favorites” list and that includes the main dishes, the naan, the condiments…..you name it. Chutneys are so easy and quick to prepare and they can be raw so, unless I decide to go back to consuming cooked legumes or grains, an occasional side dish is what’s left for me.
Like all the dishes in India, I’m sure this has dozens of variations to it as well. Every family has their own recipes for preparing dhal and condiments, and whether something is made in the northern half of the country or down south, will further enhance the uniqueness of the plate. My dear friend from India says just to make sure to include something sour and something spicy! This recipe is a simple one with more common ingredients but you could use tamarind paste instead of lemon juice, you could add ginger for an extra kick, and if you must leave out the garlic, I suppose you could use onions.

Mint Chutney
Ingredients:
(Makes ~¾ cup)
Juice of 1 lemon
1 large bunch of cilantro (aka coriander)
few leaves/handful of fresh mint
1 sliced serrano pepper
2 cloves peeled garlic
sea salt to taste
ground cayenne pepper (if you like it spicy)
splash of water (to help the blender get going)

Directions:
Cut up the cilantro into smaller pieces and place everything in a blender. Process the ingredients until the mixture becomes smooth and no chunks of veggies are left.

Serve it as a dip with chips or crackers, or as a side dish to go with dinner. If you eat fish, this would be a good condiment to have on the table because cilantro has very powerful chelating properties. Seafood can contain high levels of mercury and other heavy metals, which coriander can help excrete from your body.
What do I do? I'm sure you know by now that I keep it simple…I just grab a pile of my favorite crackers and scoop it all up in a minute! It is such a yummy, spicy, and green snack!
 
mintchutneyrecipe

Featured in Funky Raw, UK's raw food magazine