RAW Food for Truth Living foods lifestyle. Nutritious, raw, vegan recipes. Meals & tips for natural healing. Allergen-free, organic dishes. Courses you can prepare in no time. Meal-planning for those "on a budget". Discovering wild edibles. Eco-friendly, conscious, healthy living. . . . at home, in the office, and on the road.
Showing posts with label transitional. Show all posts

Oatmeal...A New Way

Sunday, June 28, 2015


This might take me forever to type but, who knows, maybe someone else is healing a broken bone. 

I’m healing a broken finger….so, I will make this short, because I haven’t mastered typing with one hand and it is quite challenging.


One of many important nutrients most people don’t get enough of is silica. And silica happens to be crucial for strong bones. If you believed it was calcium and that you get that from milk, sorry, that’s simply not the truth. By the way, if you know someone who is suffering from Alzheimer's or even better, would like to prevent it ;) silica-rich foods should be on their menu!....and you might wanna share this with someone with anemia as well.


Where do you get silica from?


More common ways (especially when following a raw, vegan lifestyle) are simply consuming sunflower seeds, cucumbers, green leafy vegetables, etc.

But there are some foods and herbs that are incredibly rich in silica, such as Horsetail, Oatstraw…and OATS!!!
I have been making horsetail infusions as well (and WILL tell you all about it) but after years of not consuming any grains, the other day I opted for oats in the “raw” form…..if we can say that, I kind of doubt it….let’s call it “raw-ish”, ha!….oatmeal. As far as preparing it, I did NOT cook it though. THAT much I CAN say : )


And, I might as well mention, that this makes an absolutely delicious and satisfying meal.

So here we go. Here’s what I did:

“Raw” Whole Oat Groat Meal (Oatmeal)
Ingredients:
1/2 cup “raw” oat groats* 
1-2 pinches vanilla (ground bean)
hot water / almond milk for blending
optional: pinch of salt

Toppings I used: maple syrup, cacao nibs, cinnamon, goji berries
More topping ides: fresh berries, sliced bananas, walnuts, coconut sugar, whatever you love with oatmeal


*make sure it’s not the toasted variety…..they’re commonly sold in bulk in health food stores


To prepare:
1) rinse the oats and soak them in pure water overnight (or for just a few hours if that’s all you have)
2) strain and rinse the soaked oats and blend them in a high-speed blender with all of the ingredients above (except the toppings)….blend in sweetener too if you desire a sweeter meal
3) serve in a warmed up / hot (but safe to touch) bowl and add your favorite toppings

Enjoy this heart-warming meal for breakfast on a cool morning or as an afternoon meal, like I did, following a salad…..Always eat your greens in first! ;)

To be honest, I don’t think I would have ventured for this if it wasn’t for a broken bone. So, thank you, finger! : )

As yummy as it is, from now on this will be a go-to “dish” on cooler days, for sure. 


Happy Summer days!….and if you live on the Southern hemisphere, I hope you still have plenty of sunshine! : )


Will be in touch soon!


Dita


Cinnamon-y Rolls

Wednesday, October 2, 2013


This recipe might as well be dedicated to my dearest sister, not only because today is her birthday but also because she will surely appreciate it. The traditional pastry version of these were one of our childhood favorites. I remember how excited we were whenever we stopped by a bakery and got to pick out whatever we felt like, which, quite often, was a cinnamon roll made of phyllo-dough. But that's a different story...

I had my dearest friends over for an afternoon to share some vegan and some raw foods with them under the red woods in the yard.  Since they're neither into a vegan nor a raw lifestyle, it was nerve-racking enough to come up with something that, hopefully, they'd like.  And lo and behold, she couldn't have coconut butter or honey!  You know what that means when it comes to making raw desserts (which I was in charge of creating, of course)....constraints, to say the least! :)  I had already planned on making certain sweets when I found out and had to figure out something completely new since my original recipes contained both the ingredients she avoids.  So, I ended up making a much healthier version of an all time favorite.

Cinnamon-y Rolls
1 cup almond flour
1 cup ground yellow flax seeds
a dozen dates
2 handfuls of (crimson) raisins
bit of coconut oil (just have some ready)
pinches of salt
cinnamon
handful of pecans or walnuts

Preparation:
1.  Make a "sauce" by blending all of the dates (pits removed, of course), a handful of raisins, dashes of cinnamon, and a pinch of salt with a little bit of water.  Make sure you end up with a thick and smooth date paste by starting with very little water and adding more as needed.  You will probably have to give it a whirl several times and scrape down what ends up on the walls of your blender.
2.  In a mixing bowl, combine the almond flour, the flax seeds, salt, and a dash of cinnamon. Add some of the date paste and a tad bit of (start with a half a teaspoon) coconut oil and work your mix into a somewhat sticky dough.
3.  Roll the dough into a ball and then spread it out, using a bottle or a rolling pin with oil on it, on a teflex sheet.  Roll it into about a half-inch thick sheet, as close to a square shape as you can manage.
4.  Here comes the first test: try rolling it up to see if it breaks. You need a pliable dough that will not break and/or stick to the surface it is on. If you have trouble with it you might need to add a bit more oil and work the dough a little longer before you roll it out again. This takes practice so be patience.
5.  Once you're confident your dough will work, spread the rest of your date paste on top of it, sprinkle it with nuts that you have chopped up into tiny pieces, and sprinkle it with more cinnamon, to taste.
6.  And now, the really tricky part: roll up your dough carefully and as tightly as you can.
7.  Cut the rolled up "pastry" into about 1 inch (2.5 cm) thick slices and lay the slices flat on a teflex sheet.
8.  Dehydrate them for a few hours, depending on how much time you have or how crisp you prefer them.
9.  Serve them warm by themselves or with ice cream (that's what I did this time)


Have a sweet and lovely day!

Love and Blessings!


Drumroll, please...Winner of free coaching contest announcement!

Friday, March 15, 2013


For the very first time, I decided to give away free coaching for one lucky person who is determined to take it to the next level. If you've missed out on this opportunity, don't worry, there will be more in the future. I already know that...
The winner of this contest has been playing with raw foods for a while and is now ready to get on the fully raw path. I can not wait to connect with her! Please send her good vibes as she continues on her journey. Thanks, everyone! : )

...And without further ado, this lucky, special person is Filiz, from North Dakota!!! Congratulations, Filiz!!!

♥♥♥


"It's never too late to be who you might have been."
                                                                     ~ George Eliot


Special Announcement: Free Coaching For One Lucky Person!

Monday, February 25, 2013


Have you noticed the new header? There will be more changes made around here to honor my two year anniversary of choosing the raw path. February also happens to be my birthday month and I'd like to celebrate all this by extending a helping hand to one lucky person!
I know of the hardships of transitioning to and adopting a new lifestyle. I was raised on all kinds of food that included everything (many things I didn't even want to touch) and only after leaving my nest I turned to vegetarian, then vegan, then macrobiotic, then came raw foods. I know the hardships of transitioning alone and having no support whatsoever. While I had nobody holding my hands throughout these times, I had times when I wished I had someone around for support, or to answer my questions, or help me avoid mistakes. We are very emotional creatures and a lot of times the foods we eat are tied, in one way or another, to the types of foods we crave and can't seem to be able to let go of. This is true no matter what kind of a lifestyle/diet we adopt. We try to create dishes that are similar to ones we love but have ingredients we no longer eat. We long for steaming plates of freshly prepared favorites made from scratch by grandma, etc. We've all been there.
In my 16+ years experience, research, and talking to people going through challenging times and struggling to make these changes I am yet to meet an individual who had a smooth ride. Lifestyle changes take a serious decision, commitment, willpower, and usually a good reason that will keep you going. Sometimes you find a person or a book inspiring but that's not always enough to start you or  keep you on the path.
It is you who will have to do the work.....and I will help. Whether you are just playing with the idea of eliminating dairy from your diet, or need help with grocery shopping and how to read labels, maybe you've been on a 50% raw path and would like to take it to the next level...it doesn't matter where you are... This is for anyone who wants to feel better and is ready to take another step forward.

Why am I doing this?
Besides the fact that I'm so aware of the challenges of such transition, I'm also aware that not everyone has a friend, acquaintance, or any source helping him/her. Also, at the going rates of $50+/hr for health coaching most people can not afford to get help from an experienced person.
This has been the most amazing experience of my life and it is time for me to give back.

Who may enter?
Anyone who is interested in changing his/her lifestyle and improving his/her diet by incorporating more raw foods. This offer is not restricted to those wanting to go 100% raw at all. Whether you're just ready to give up coffee or hamburgers or coke...it doesn't matter as long as you're willing to change something that hasn't been working. All I ask for is desire and commitment on your part.
I do NOT ask that you subscribe to or "like" my page or anything of that sort.
This is open to all, however, if you're under the age of 18, I need a written consent from your parents.

How to enter?
There are three ways to enter.
1. E-mail me at rawfoodfortruth@gmail.com. Tell me about why you've decided to make this transition, why you think you're the one who should get the free coaching, why you need the support, etc. Provide an e-mail address and/or phone number (if you live in the U.S), and/or Skype contact info (especially if you live outside the U.S. and prefer chatting over e-mail).
2. Comment below and tell your story the same way I just described above.
3. Comment on this post and/or send me a message through the facebook page  http://www.facebook.com/rawfoodfortruth?ref=hl and tell your short story there.
Note: I will absolutely not share ANY of your information with anyone.
Submit your paragraph by March 11.

How is the winner selected and when is the winner announced?
I will select one lucky person based on the stories submitted so be sure to explain why it is you who needs the support more than anyone else and what the reason is for your wanting to transition and/or what it is you're struggling with.
I will announce who the lucky person is on March 15. Good luck!!! : )

♥♥♥

Herbed Olive-Walnut Bread

Saturday, December 15, 2012


Not a typical raw food recipe but it still makes it to the scene. Bread is one of the hardest foods to cut out while transitioning to a raw, living lifestyle. This bread is nothing like the fluffy wheat bread you remember vaguely from back in the cooked and baked days. It's kind of a substitute for the already dipped-into-herbed-olive-oil-and-toasted bread. All in one loaf. Seeds, small amount of nuts, olives and herbs create a perfect harmony and it takes but a little "kneading" and shaping and slicing. That's it.

Herbed Olive-Walnut Bread
(Makes 1 small loaf: about 6 slices)
1 cup golden flax seeds
3/4 cup walnuts
6-8 sun-dried olives
1 clove garlic
1 tsp salt
oregano, rosemary
1.5 to 2 tbsp olive oil
5-6 tbsp water

Preparations
1. Grind the flax seeds, chop the olives and the walnuts into small pieces, mince or press the garlic and chop up your herbs very finely.
2. Somehow my intuition was suggesting I should use the greatest method I learned from watching my grandmother making different kinds of pastry dough. Some of those buttery, crumbly mixes require this kind of mixing by hand and it works perfectly for this recipe: In a mixing bowl, combine all ingredients but the water. Scoop up a handful at a time and rub your hands together coating all of the mixture evenly with the oil and herbs.
3. Add water little by little until your dough is starting to hold together when you try to shape it into a loaf. Start folding and kneading the dough by pressing down on it and folding it again...similar to when you're kneading bread dough. This is not an easy task because it will be losing crumbs and constantly wanting to fall apart but just be patient and if you accidentally added too much water you know you can always add some more flax seeds to the mix to save yourself.


4. Once you have your desired shape, place the loaf on a teflex sheet gently and, using your sharpest knife, carefully slice it on the diagonal about an inch or two centimeters thick each. I ended up with six slices and a small corner this way : )
5. Lay out the slices on the sheet and dehydrate for a few hours at 115˚F (~46˚C). You can turn them and even transfer them onto a screen after a little while.

Nutrition
Flax seeds and walnuts are both amazing brain-boosting food, full of Omega-3 fatty acids and very high in fiber of course. Given the high percentage of golden flax seeds, this bread is exceptionally rich in most minerals and very high vitamins B1 (thiamin) and B6. Soothing to the body, nourishing the brain, mineralizing the blood and bones....probably more than you'd expect from bread, isn't it?

Your herbed slices will be perfect with salads and light soups. This holiday break I will have to spend the time to make variations of it. It sure is nice to have around especially when expecting guests! Happy "baking"!


How About a Loaf of Bread?

Sunday, April 1, 2012


No, this is not April Fools', I'm serious. I've been raw (on and off) for over a year and for the past month, for several reasons, more off then on. : ( That also means having eaten loaves of bread in one sitting every now and then! Yes, again, I'm serious! But this wonderful creation is so dense that even I can stop myself after two slices. Bread-making is not so common in raw kitchens. Raw chips and crackers are much more the mainstream substitute for everything that's normally made out of wheat flour. I thought I would change that, in my kitchen anyway, and try to come up with something that even looks like bread and can be used for sandwiches, etc. This is a version that is great for breakfast or an afternoon snack just because it's not savory with herbs or spices, which is what I would make for a veggie sandwich. The result is incredible. Perfect with nut butter and jam for a "peanut butter and jelly" sandwich. I happened to use almond butter and goji berries (excellent for the brain), a wonderful harmony, but I love it with just walnut butter (also perfect brain food) on it, yum.
If you find cardamon too strong then just skip it. It's unique enough that I imagine some of you might not be big fans. You'll still get your "cinnamon toast" out of this. It couldn't really get any better than that, right?


Raw Cardamon-Date-Cinnamon Bread
(Makes 7-8 slices)
1 cup buckwheat groats
1/2 cup sunflower seeds
1/2 cup golden flax seeds
6-7 medjool dates
cinnamon
3-4 pods cardamon
pinch of salt
optional: add your favorite sweetener to taste


Directions:
1. Soak the buckwheat overnight then sprout for a day or two. The goal is not to end up with little tails but to make sure they're in the edible stage. Don't rinse them right before you use them. They'll have just enough moisture for the dough with a perfect texture.
2. Grind the flax seeds and the cardamon pods (if you're using them) in a spice grinder.
3. Place all the ingredients in a food processor and mix them until it all clumps together forming a ball of dough. You might need to scrape down the sides a couple of times to make sure everything is mixed in.
4. Shape your dough into a cube or whatever form you prefer. With a sharp knife, cut into ~1/4 in (6 mm) thick slices.
5. Gently place your slices onto a teflex sheet and dehydrate them for 1-2 hours at 115 ˚F (46˚C) then flip them onto a screen and continue dehydrating them for several hours.
6. Spread your favorite nut butter/coconut butter/cacao spread/jam/fruit paste, etc on it. I like to sprinkle with extra cinnamon too. It's a great snack to have around or to pack into a lunch box.


I'm so inspired.....It's time to make a savory loaf, or a sourdough imitation. After all, I live in the Bay Area....It should be famous for RAW sourdough too, right? : )
The sun is out so I'm off to harvest some vitamin D! Whoever decided to send some sunshine my way, thanks! See, I promised I would post this recipe once there's enough light for photos...
Enjoy!


"Better Than" Pad Thai

Tuesday, October 25, 2011

rawpadthaipastawithpeanutsauce

What do you do when pasta is on the menu at home?
With a large batch of my favorite peanut sauce already made I had to figure out what to put it on! It didn’t take long to get some zucchini out and go on a raw pasta adventure. I had been wanting to try zucchini pasta but haven't figured out what kind to make first….until now. It was the first time but definitely not the last, in fact, I admit that I’ve made this dish several times in the past two weeks already! Yes, it’s that good.

Raw Zucchini Pasta
Zucchini makes perfect pasta because it doesn’t have an overpowering flavor and it has quite the right texture to replace the strings of dough we’re all used to. If you have a spiralizer or some kind of a magic machine to make pasta, lucky you, your task just got somewhat easier. If you’re like me and even your mandolin is in storage somewhere and all you have to work with is a knife then do this: cut grooves all the way lengthwise the peeled zucchinis but be careful to not cut through the other side. With a peeler go down the grooves you’ve made and shave your squashes into pasta. It takes some work but I must say I didn’t expect to like the outcome as much as I do now and it’s so worth it. Pile some on plates and put your pasta servings in the dehydrator for a warmer dish at about 130 °F (54 °C) while you make the sauce.

rawzucchinipastaandpeanutsauce

Peanut Sauce*
Ingredients:
(Serves 2-3)
1 ½ cup peanuts (or a shallow cup of peanut butter)**
optional: 3-4 tbs soy sauce/nama shoyu 
~½ cup water added a spoonful at a time (you may add less or more depending on how watery you prefer the sauce)
2 cloves garlic
handful of cilantro
optional: 2 tbsp of your favorite sweetener
optional: 1 jalapeno (makes it spicy)

* If you happen to end up with leftovers this makes a great dip to go with apples or veggies.
** For this recipe I used lightly toasted Valencia peanuts, which are not raw. I’ve talked about raw Jungle peanuts vs. roasted peanuts here and in this case I think these are a better choice. Decide for yourself. If you want to go for both the flavor and the improved digestibility then I recommend using lightly toasted Valencias. If you insist on 100% raw go for the Jungle ones and maybe adjust your seasoning.

Directions:
If you’re using peanuts, grind them in a food processor until they’re starting to clump together and little by little add some water. Add the soy sauce/nama shoyu, garlic, jalapeno, cilantro and sweetener of your choice. Mix evenly and taste. Adjust the seasoning and add more water if it doesn’t have the consistency of a sauce to pour on pasta. If you’re starting with peanut butter you don’t even need to use a food processor just mix it with water and the rest of the ingredients but use already pressed garlic and chop the cilantro finely.

Assembly:
Get your pasta out of the dehydrator and mix each serving with some peanut sauce and place back into the dehydrator to warm up for a little while longer. Slice some bell pepper and some green onions, and chop some more peanuts to top each plate before serving. Add some chili flakes for an extra spicy finish dig in!
Put zucchinis on your shopping list because from now on you’ll want to have “pasta” on hands at all times.

rawpadthaicloseup


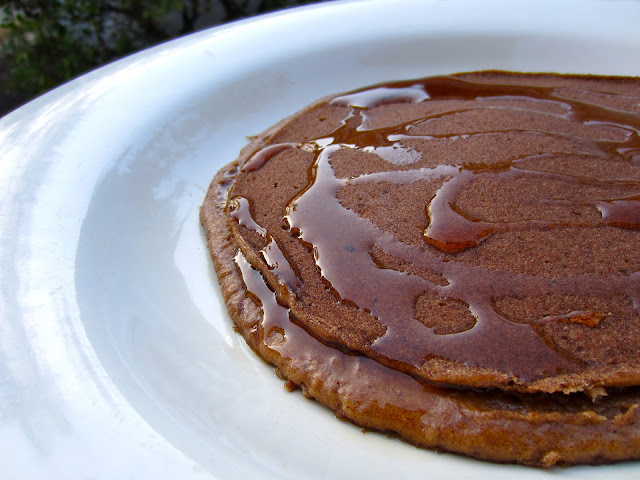
Banana Buckwheat Pancakes

Monday, October 17, 2011

rawbananabuckwheatpancakes

Two ingredients is all it takes to have what you thought you couldn’t have if you eat raw! The processed white flour and sugar, the milk, and who knows what else (I’ve never made any common pancakes) have all been replaced by some really popular fruit and less known seeds ground into flour. I’ve talked about the health benefits of buckwheat before but bananas are a different story so here we go…

Bananas’ Health Benefits
Famous for being really rich in potassium, these monkeys’ favorites are also very high in vitamin B6 (pyridoxine) which helps efficient metabolism and prevent heart disease, is important for brain function, and is a “mood lifter”. Wait, does that mean pancakes would help if I’m depressed??? Yep, these kind sure would! That’s not all though, since the most popular fruit in North America is very high in vitamin C, manganese, magnesium, and fiber too. Strong bones, healthy nerves and heart, along with good digestion, are all some of the good side effects of consuming bananas. They’re definitely not an eco-friendly choice if you live in the U.S. because all of them are imported but let’s focus on the positives…it’s still an unprocessed food that comes individually wrapped by nature and ready to hop into your lunch box (or your pancake batter).

Raw Banana Buckwheat Pancakes
Ingredients:
(Makes 2 of the traditional size or 6 mini pancakes)
3 very ripe bananas*
½ cup buckwheat flour
optional:
pinch of salt
sweetener
dash of cinnamon
maple syrup

*A ripe banana is, at a minimum, completely yellow but even better if it has some brown speckles already. There should be no sign of green areas for sure.


Directions:
In a food processor, make a batter by mixing sliced bananas, flour, and salt (and if you choose to, cinnamon and some sweetener). Pour the batter onto a teflex sheet just pouring enough at a time for the size of pancakes you prefer. Dehydrate for a couple of hours at 130 °F (54 °C) then lower the temperature to 115 °F (46 °C) and continue dehydrating for a few more hours. It will take at least three but it depends on how “dry” you would like them. Check periodically and flip them over whenever they peel off the teflex sheet somewhat easily. Be careful doing this, if you’re doing it too early. I didn’t dehydrate mine for too long because I was too impatient : ) so they were barely dry on top when I flipped them. It’s doable but requires care. Or just wait long enough! Good luck with that, when your house smells like a giant cookie or something of that sort…
Once they’re ready, serve them with maple syrup (not raw) or fresh fruit, jam, melted coconut butter, etc. The possibilities are endless. Ready for a raw Sunday brunch? What to serve is taken care of so make a list of friends to invite!

rawbananabuckwheatpancakescloseup


Pizza For Dinner

Tuesday, September 27, 2011

My recent European Adventures inspired me to create some more complicated dishes especially because I’m anticipating the days to turn cooler, when we all feel like eating “heavier” or more substantial foods. Also, people’s interest in raw foods is ever-growing and so does the need for transitional* foods on my blog! I had the best raw pizza at a restaurant in Copenhagen, which I wanted to duplicate ever since.

bestrawpizza

This pizza is even more amazing than I imagined it could be. The end result is just absolutely delicious cold and when put in the dehydrator for 20 minutes to 2 hours your guests might not even be able to tell that they're served a raw dinner!

*Transitional raw foods are those that help you convert to a raw (or high raw) lifestyle by their resemblance to cooked dishes. They usually have more ingredients, are more complicated to create, heavier on nuts and/or seeds, and very often dehydrated and/or even served warm straight out of the dehydrator. It is often very helpful to rely on foods as such for the first days/weeks/months (or however long it may take) because of the satisfaction and fullness they provide.

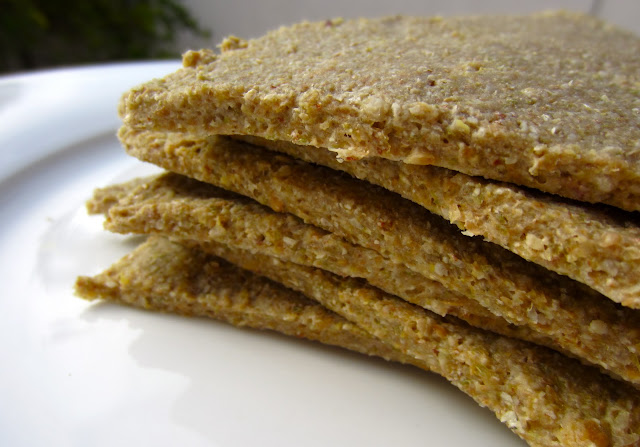
Raw Pizza Crust
(Makes 6 pieces)
1 cup buckwheat groats
½ cup sunflower seeds
1/6 of an onion (or garlic, if preferred)
splash of olive oil
splash of water
~ ½ tsp salt
basil, oregano to taste
½ cup flax seeds

rawpizzacrust

Soak the buckwheat for a few hours or overnight. Rinse and drain them. Grind the flax seeds until fine. Using a food processor, combine all of the ingredients but the flax seeds. Salt to taste and transfer ingredients into a mixing bowl. Fold in the flax seeds and mix well. Spread the mixture on a teflex sheet (you will get just enough to cover one sheet at a thickness of about 1/3 in or 8 mm). Score as desired (I made it into six triangular slices) and dehydrate at ~130 °F (54 °C) for about an hour then lower the temperature to 115 °F (46 °C) and keep dehydrating until you can flip them over to a mesh sheet. Dehydrate for a few more hours to pizza crust-like consistency.
Now that you have the base, you can store them in the fridge (or freezer) to use later, or you can assemble pizza right away using the recipes that follow.

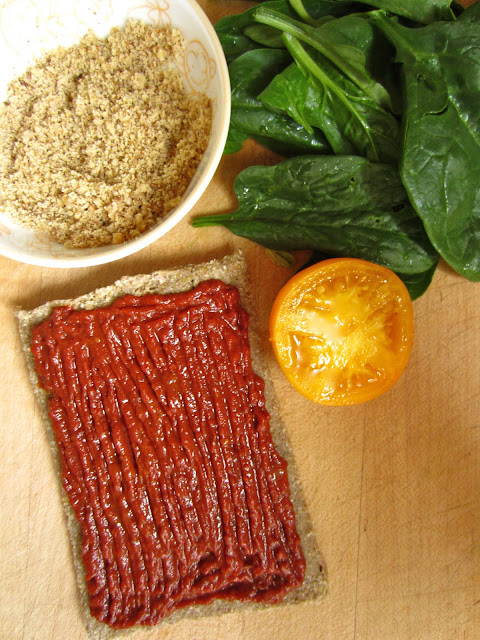
rawpizzamarinarasauce

Raw Marinara (Pizza Sauce)
 (Makes about a cup)
Blend the following ingredients:
½ cup sundried tomatoes*
2 small tomatoes
juice of half a lemon
couple of slices of red onion
2 cloves of garlic
salt to taste/splash of soy sauce
splash of olive oil
basil, oregano

*soaking the sundried tomatoes beforehand helps a lot, especially if you (just like me) don’t have a high-speed blender

rawpizzawithherbedwalnuts

Raw Seed Cheese
Ingredients:
(Makes about a cup)
1 cup sunflower seeds
juice of half a lemon
2 cloves of garlic
3 tbsp soy sauce/nama shoyu/1 tbsp umeboshi vinegar + some water (if you avoid soy)
optional: dash of turmeric for color

Directions:
Grind the seeds as finely as you can. Blend the rest of the ingredients and add the seed “meal” to the blender. Add some water if necessary for desired consistency. I like it more runny than thick but everybody’s different.

Both, the pizza sauce and the seed cheese will keep in the refrigerator just like the crust, so guess what, once you prepare them all you'll have some grab-and-throw-together lunch waiting for you for days!

rawpizzamushroomsspinach

Toppings
This is where you can go as simple or as crazy as you wish! I put spinach, tomatoes, and marinated mushrooms on these (above), and the first image shows the one with herbed walnuts and lemon boy tomatoes. You may put pineapple for Hawaiian or pesto for a green pizza. It’s hard to go wrong…

So grab a piece of crust, spread some pizza sauce on it, add your favorite toppings, and drizzle with some seed cheese. You may put the assembled pizza slice(s) into the dehydrator for a few minutes to warm up or for a couple of hours for more of a “baked” feeling.

rawpizzamushrooms

Dinner is served!

What are YOUR favorite toppings??