RAW Food for Truth ♥ Living foods lifestyle. Nutritious, raw, vegan recipes. Meals & tips for natural healing. Allergen-free, organic dishes. Courses you can prepare in no time. Meal-planning for those "on a budget". Discovering wild edibles. Eco-friendly, conscious, healthy living. . . . at home, in the office, and on the road.
Showing posts with label holidays. Show all posts

To-Be-Devoured Persimmon Pie For The Holidays

Wednesday, October 29, 2014


One of my dear clients who quickly became a wonderful friend too invited me to a Diwali dinner and when I asked her to please tell me what to bring, she said: "a yummy, raw dessert".

Shouldn't be a hard task for someone who eats stuff like that every day, right? Um, not quite! My palate is so different...not like the average person's, to say the least. So every time I get asked to make something for a party or some kind of get together where there will be a variety of non-raw-foodie people present, I get nervous. It's not as simple as writing recipes for a blog and pointing out what is optional what is not and what ranges of the amounts of ingredients you may add to this or that...no, you make it once and that's it. You take what you've made and the guests will either like it or they won't. End of the story. Whew. And it's not that I really care about whether people like my food or not..they can always have something else...but in THIS case...well, this was a different story! Diwali is a beautiful and very important holiday and I felt truly honored to be invited and treated as part of the family and I wanted to make something that they would like. So, it was quite nerve-wracking process! : )

Whenever I'm preparing something for a new crowd I taste test my mixtures and once I find the perfect (to my palate) balance I add more sugar or salt or spices, depending on what kind of dish it is. In this case, obviously, since it's a dessert, I added some sugar. That is optional though if you've been on raw foods for a while and enjoy things closer to their original state.


So, what did I make? Well, the title already has given it away...
I'm not a pie person. Mainly because I don't have a family to feed (yet) so what will I do with a pie? Eat it all? Probably! That's what would happen but (1) I don't want to do that to myself and (2) I'm just not motivated enough to make a pie for me only.


And so, I had to come up with a recipe from scratch because I'd never made persimmon pie before...and I must have done pretty well since it was devoured within minutes, with not a crumb of it left! Ha! Never seen a crowd like a raw dessert so much! And, that's why I'm sharing the recipe with all of you...


Raw Persimmon Pie
Ingredients:
(Makes One 9-inch (23 cm) Pie)

For The Crust
1 ½ cups cashews (use a bit less if you're like me and prefer a thinner crust)*
½ cup dry shredded coconut
8 dried cherries**
4-5 Medjool dates**
1 vanilla bean (only the scrapings of it)
pinch of salt

3 T coconut oil

* any kind of (or the mixture of) buttery nuts may be used: macadamia, walnuts, pecans work well
**any dried fruit you like may be used (I like adding some for tartness, like cherries) but you may use only sweet ones and add a squeeze of lemon or even some lemon zest for a nice twist


For The Filling
9 ripe (soft and dark orange!!) Hachiya persimmons
1 T coconut oil
3 T coconut sugar (optional, taste test the filling for sweetness)
½ tsp psyllium husk powder
½ tsp (or a bit less) allspice
½ tsp cinnamon
¼ tsp ginger powder

Preparations:
1. Grind all crust ingredients, except for the coconut oil, in the food processor to make a homogenous mixture
2. In a glass bowl, work the coconut oil into your crumbly mixture by hand. Make sure the oil is well distributed and there are no chunks of it anywhere in the dough.
3. Press the dough into a pie shell (you may even use a shallow bowl instead) and pinch the edges. Place it in the fridge for 15 minutes to let the crust become firm.
4. To make the filling, the easiest thing to do is to squeeze the soft insides of persimmons into the a blender by cracking the skin open while holding the fruit above the carafe and let the soft part drop in there. Don't use any of the skin or the stems and leaves, of course, only the soft part of the fruits.
5. Add the rest of the ingredients except for maybe all the sugar and blend them into a smooth pudding-like consistency.
6. Taste test your filling mixture and add sugar (or anything else) as desired to adjust the flavor to your and you guests' liking.
7. Pour the filling into the pie crust you have chilled and either spread it with a spatula or make a pattern on top or decorate it later with berries, dried fruits, edible flowers, nuts, coconut flakes, or anything you have on hand and you think would go well and / or look pretty.

I had no berries at home and that's what I would have put on...so, I just made a swirl, which people also commented on and really liked :) simple things can really work well.

8. Place the pie in the fridge to cool and set for at least an hour before serving. You want to make sure it becomes firm enough so that the slices don't collapse and look like sauce upon cutting the pie.


Persimmon Nutrition
Besides the fact that persimmons are so delicious, you may want to take advantage of their ease of use now that they're in season because they're very nutritious too! Read all about their health benefits and another recipe made with them here.


Happy first week of the Holiday Season!...

More to come soon... : )

P.S: What does the Holiday Season come with for many of us? Parties, dinners, abundance of food, temptation to overeat and, yes, actual overeating and being less active...which, more often than not, leads to weight gain.

How would you like to do yourself a favor and help "reset" your body and mind before you're invited to those parties, social events and huge dinners?
You're in luck! Very soon you'll have a chance to sign up and join a group of like-minded people for a Pre-Holiday Body & Mind Reset - Detox Program!..

Stay tuned for the details on that!

♥

Dita

Featured in Funky Raw, UK's raw food magazine


The No-Nut, No-Machine !!! Chocolate Mousse Pie

Thursday, March 13, 2014


Yep, you can just whip it up by hand and make no mess at all….fast track to chocolate heaven! :)
I just wish my grandma was here. This kind of pie would be a perfect way to celebrate her 86th birthday today! I love you so much, grandma! ♥


Avocados are one of the creamiest fruits and they:
- are a complete protein!
- are a great source of calories with healthy monounsaturated fats, which are easily burnt for energy
- have anti-inflammatory qualities
- are a rich source of B vitamins, including folate (B9), and vitamin C
- are an amazing source of pantothenic acid and minerals such as potassium, copper, magnesium, manganese, and phosphorus
- are a good source of fiber

……All of which translates into their being a wonderful food for your skin, bones, heart-health, and supporting a healthy pregnancy.


With cacao being the second main ingredient, giving you loads of antioxidants and minerals, you can't go wrong with something so delicious, so good-for-you, and so quick and easy to prep...


Avocado Chocolate Mousse Pie

Ingredients:
(Makes 1 mini pie)

Crust
2 Tbsp coconut butter
2 Tbsp coconut flour*
2 Tbsp shredded coconut
maple syrup (as needed)

Filling
1 avocado
3 Tbs + 2 tsp cacao powder
2 Tbsp maple syrup
1 Tbsp coconut oil
vanilla
tiny pinch of salt (optional)
dash of cayenne pepper (optional)

Optional garnish: sliced fruit, dried fruit, chopped nuts, coconut flakes

*Feel free to use almond flour instead of coconut flour, if you'd like, or make a more common, nut & date (or any dried fruit) base, like the one here, for a cashew creme pie.


To Prepare:
1. Place the coconut oil in a dish that you can place in hot water and let it sit till it's melted (unless it's warm where you are and it is already in liquid form)
2. Mix the crust ingredients in a small bowl simply using a fork and press it into a tiny pie shell or a shallow bowl
3. Scoop out the avocado, mesh it with a fork and whip it into a smooth consistency as much as you can
4. Mix in the maple syrup and the coconut oil (make sure it's not hot) and little by little, add the rest of the ingredients while stirring it until you get a homogenous filling.
5. Taste test and add more sweetener, etc. to your liking
6. Pour the filling into your crust, decorate if you like, and place the pie in the refrigerator for an hour or so before serving.

Note: this also goes for a chocolate pudding recipe so if you have extra filling you're in luck. Gooble it up right away or chill it for a treat later.

Sweet ♥

D.

One Savory, One Sweet..

Saturday, December 7, 2013

Thank the Universe for laptops and Wi-Fi!  I'm sitting at the airport in Las Vegas, waiting for mechanics to replace a part on the airplane I'm supposed to take home….and I've decided to use this time to share an experience…

Yay for high-resolution phone cameras...I even got some usable photos! :)


While on a business trip, I stayed with my best friend who was more than enthusiastic about learning to prepare some raw foods.  We had lots of fun making 2 - 4 dishes a day (!) and one of the days she had guests over so we even got to introduce others to the magic of this way of eating.

Truth be told, I had no idea whether they would even want to touch raw foods but I wasn't worried about it because my friend was planning on cooking a big pot of veggie soup as well… Except, she didn't end up to...

So, what was initially planned to be a "tea party", later changed to being a girls' night in with dinner, ended up being a raw finger food sampling experience...


***
Oops, new update, they've just announced that this plane can NOT be repaired, so I got plenty of time to give you this recipe, or at least, finish it sooner than later : )
***


So what did we make? As you know, I believe in keeping things simple. I don't think there is a better way to inspire people than showing them how easy it is to prepare delicious, healthy dishes. We made some savory bites and some dessert to top them off.


Savory Walnut Pâté Bell Pepper Boats
Ingredients:
2 - 3 bell peppers (I like using red and orange but it would look really nice to have all colors, yellow and green as well)
2 cups walnuts (you may soak them if you have time)
1 small shallot (or half a medium size purple onion)
6 - 8 leaves of fresh sage
juice of 1 large lemon
1/2 tsp (or to taste) salt
few sprigs of parsley for garnish
optional: 1 clove of garlic and some parsley added to your ingredients

To prepare:
1. Place walnuts into the food processor and grind them until they're fine but not so much that they start becoming a nut butter.
2. Chop the shallot, the sage leaves, and the garlic and parsley (if using some in the pâté) really fine, into tiny pieces
3. Add the chopped ingredients and salt to the lemon juice, stir, and add the mixture to the walnuts.
4. Mix your ingredients well and add more lemon juice / olive oil to your pâté if it's on the dry side. Ideally, you'd like it to have a spreadable texture. Set it aside.
5. Cut up the bell peppers into quarters (try cutting along the veins, where the "dimples" are, that way you'll end up with "boats" that will hold the pâté nicely. Then cut the quarters in halves again.
6. Fill each pepper boat with a couple of spoonfuls of the pâté, arranged them alternating the colors you have on a plate or tray and garnish each with a leaf of parsley or other herb of your choice.
Serve immediately.

Note: This recipe can be made into a dip as well and served as part of a crudité. Add more lemon juice and/or oil of your choice to make it into a softer, more liquidy, consistency and serve it with a variety of chopped up veggies.

For dessert, I intended to make macaroons, because they're so easy but our guests were already there and starved when I haven't even finished the pâté so by the time I got to start on the sweets I decided to quickly roll them into balls and we served them right away as well.


Snowballs
Ingredients:
2 cups dry shredded coconut (plus some extra to roll the balls in)
1/2 cup almond meal (or ground almonds)
1/2 cup honey/agave syrup/sweetener of your choice
1/4 cup coconut butter/oil (I used about half of each for a total of 1/4 cup)
1/2 - 1 tsp ground vanilla
tiny pinch of salt
optional: few tbsp of cacao powder to add to half the mixture if you wish

To prepare:
1. Grind the shredded coconut in a food processor so that it's finer
2. Combine the dry ingredients: the coconut, the almond meal, and the vanilla, in a mixing bowl
3. To melt the coconut butter/oil and honey (if necessary), place your jars in hot water. As an alternative, you can measure them in the unmelted form and place them all in a small bowl that is sitting inside another bowl with hot water in it. Stir your wet ingredients and the salt until melted and homogenous and add this mixture to the dry ingredients.
4. Combine everything till your mixture holds together and you are able to form balls by rolling a spoonful of it at a time between your palms. Roll each ball in the shredded coconut and place them on a serving platter. About half way through, add a few spoonfuls of cacao powder to the mixture (if you want two colors and flavors) and finish up making balls the same way.

It's probably not much of a surprise that all of the pepper boats and snowballs were gone in no time so they've been tested…you can make these for someone who might have not had a chance to try raw foods yet. They're quick, easy an delicious. What else would you need?

I just wish we had taken photos of all of us! We even had the honor of having a beautiful baby entertain us but no pictures…hmmm…oh well, next time.

Some Nutrition Facts 
The two main ingredients, walnuts and coconut, in the above menu, are both "brain foods". They both contain very healthy fats. Walnuts are high in Omega-6, and even more importantly, Omega-3 fatty acids. Coconut is high in saturated fat (yes, it's good for you!), is a good "hormone precursor", especially when it comes to the production of testosterone and progesterone, and coconut oil supports the thyroid and weight-loss.
Bell peppers are high in vitamin C and antioxidants. If you are using red ones you are getting more antioxidants, overall, more health benefits but it's good to eat a "rainbow diet" and include as many colors as possible, if not in every dish, throughout the day. Herbs (used in the pâté) are loaded with minerals and vitamins and sage is particularly known for improving memory and helping those with Alzheimer's disease (Did I mention coconut oil does the same? If you know someone who needs help in this department, I definitely encourage you to look into this and maybe give it a try, say, start with a  spoonful of coconut oil mixed into a breakfast dish, whatever that may be for you, or the person to be helped.) and it has high levels of antioxidants and anti-inflammatory qualities. How many foods / dishes are there that do all this? : )
Enjoy!

♥♥♥

Survival Tips For The Holidays

Thursday, November 28, 2013


Here we are…It's the season for…

overeating
eating foods that are "not your food"
over-consuming food unnoticed, while socializing
drinking alcohol when you don't normally or drinking more than you do usually

…any of these sound familiar?

Thanksgiving is here and, with that, we are entering the holiday season that can throw us off balance quicker than you can blink…ok, maybe not, but within a couple of hours you can surely reach a state of "I'm not feeling so well".
It is challenging for most of us, not only the ones who are practicing a different lifestyle and are followers of a diet that many have not even heard of.  For some, it's the season for falling off the wagon and completely abandoning their healthy eating habits while it doesn't necessarily have to be that way. For others, it may be an extremely stressful time, working till the night before the guests are coming over or getting on the plane to visit family on the other side of the country, trying to do all the shopping, decorating the home, preparing more meals in a few hours than one would do over a week sometimes, while the kids and pets still need your attention, not to mention our self that we tend to forget about while focusing on how to please everyone else…..Whew, that might have been the longest sentence ever typed! :)

In some cases, it is harder if you are following a "other than mainstream" lifestyle and in some cases that's what makes it easier. I've been on both sides and in my case, it's easier if I'm sticking with mine. SO what can you do??? Here are some tips that might help, especially if you are the only one who is living "in the raw".


Tip #1 - Do not panic!
I remember how stressful it was for my mom to try to get everything done in time. She was working full-time, did all the shopping (without a car), cooked all the meals, started baking 3 weeks ahead of time to fill up the cookie jars with holiday treats, cleaned, etc. The list goes on.
I couldn't relate because I was a child. I was sad to see her stressed and it also kind of ruined the holidays for me. But the one thing that was on her side is that she did make an effort to take care of herself. If you feel like it's all on you; you are the one who has to do everything, take care of yourself first. Whether it means meditating or doing some yoga before the crazy preparations marathon, or taking a relaxing bath, or just taking time off, period, so your life doesn't become madness all of a sudden. DO it. And if you can get help, even better. My mom always distributed chores (which I didn't necessarily like but, looking back, I'm glad I could help her during these extra challenging times) and, lucky for her, I always asked how I can help her in the kitchen. I loved the kitchen already as a little girl and it was so much fun for me to hang around :)
So TAKE CARE OF YOURSELF first. That is the ONLY way you can take care of others.


Tip #2 - Plan ahead
Make a to-do-list at least in your head and try to do whatever you can ahead of time. The fewer chores you have left on the busiest day when you are rushing, the less stressed you will be.


Tip #3 - Cater to yourself first
As in most cases, it is difficult when you are the only person in your household who is an advocate of raw foods or maybe even living a 100% raw lifestyle. If you are alone it's easy to attend to your needs but during the holidays you might be going somewhere where nobody has even heard of your "diet". And if you are the only raw member of a family then you might be preparing cooked, traditional foods for others as well...

If you are the host of a party or get-together…
Ok, so everyone is coming to your house. You must have invited people you care for and love to be around. And they must be coming over to spend the holidays with you because they feel the same way.
If you are alone, how about asking them for help? Or maybe even make this a potluck so everyone can contribute and you're not the one trying to make it all happen by yourself. If you're not alone, you've got help, right? Everyone, your significant other and / or children are probably ready to help, and if not, distribute chores (like my mom did :) )! This is not the time to play superhero and then feel the effects later and regret having pushed yourself too hard.
You are home, in your own kitchen, with all your tools. Yay, you're half-way there to sticking with your ways. If nobody else really cares for raw food (yet) then figure out at least one meal, one snack, and one dessert that you will make for yourself. Make your favorite ones if you know you might be tempted to indulge and reach for the rest of what is served. At least fill up on "your food" first and see how you feel about having to eat a serving of that other stuff you never would on a regular day. If you know you will be busy preparing food for your guests all day then try to make your own ahead of time.

If you are invited to someone else's home (within driving distance)…
PLAN AHEAD; have I mentioned that before? This is especially important if it's hard for you to stick with your good habits and you find yourself wanting to eat what the rest of the people around you are having. Maybe it is really hard to not take a piece of that freshly-baked pecan pie or bread pudding...
Chances are, you knew ahead of time you were not going to spend the holidays at home but if it's last minute, you can always grab whatever you have in your pantry. You can go simple and fill a bag with fruits, crackers, leftover dip and some cucumber and celery, don't forget that jar of nut butter that's half-full, and whatever else you can find. Ok, you're set. (BTW: You're probably better off if you never go to some place where the host is not understanding your lifestyle and you find yourself worrying about offending him/her by bringing your own food.) But even more ideal, prepare your favorites. Make an effort and prepare at least a meal that you absolutely love, a snack that is your favorite to reach for, and a dessert that you can't ever wait to devour. That is the bare minimum to get you through if you feel challenged at events where you are surrounded with aromas that bring back memories and foods that you think you can't resist. If you have enough of your favorite dishes with you, you have a much greater chance at sticking with them. Ideally, you may prepare more than what you will bring with you just for yourself. If you have the time and the means, make a dessert that you know everyone will love. This will give you a chance to share and introduce people to a way of eating that they might not be familiar with but will much appreciate once they do learn about. And wait till you have one after the other coming up to you asking you for the recipe! Happens all the time :)

Here's the marble "cheesecake" I've made just now...


If you're flying somewhere to be with family and loved ones…
Well, you know what that means. You are limited as far as what you can get on the plane and might be limited as far as what you can buy in the area where you are going.
Obviously, everything you take with you will be x-rayed but most raw foodies will rather eat x-rayed raw superfoods, etc, than not being able to eat what they want. Pack whatever you may need while traveling, such as easy-to-eat fruits (oranges and bananas travel very well and they have their own "packaging") and veggies, maybe your favorite powders, chocolate, crackers, snack bars, nuts and seeds. Take plenty with you because you never know when your flight is delayed, etc, you might end up spending a much longer time at airports than your itinerary says you will.
If you are preparing some food where you are going, then it's best to bring at least the hard-to-find ingredients with you because you never know what's available. The first thing I do before I travel is spend a good chunk of time Google searching for health food stores and / or raw or organic restaurants. Look up ahead of time whether there is a health food store in the vicinity where you know you'll be able to stock up on produce and raw snacks for your stay out of town. As long as you have tons of snacks around you'll be less likely to reach for those food items that you will regret having eaten later.


Tip#4 - Don't beat yourself up!
Ok, you "failed" at it…at least, that's how you feel.
Most important step for success: Love yourself even if you "failed" at sticking with it. It's the holidays.  This is when we eat more than we should and sometimes things we wish we hadn't. Don't beat yourself up over it! If that's what happened, oh well. You'll be back on your juice or smoothie or plate of fruit or whatever it is that puts you right back on track the next morning. Note to myself too: Worrying about what you have done and / or you shouldn't have done is probably causing more damage than an entire dish of green bean casserole topped with a whole pumpkin pie in your stomach.
It is NOT A BIG DEAL. Maybe even thank yourself for not being so strict. Your flexibility might have allowed you to have more fun and spend a more memorable time with your loved ones.

Happy Holiday Season, Everyone! ♥


Cinnamon-y Rolls

Wednesday, October 2, 2013


This recipe might as well be dedicated to my dearest sister, not only because today is her birthday but also because she will surely appreciate it. The traditional pastry version of these were one of our childhood favorites. I remember how excited we were whenever we stopped by a bakery and got to pick out whatever we felt like, which, quite often, was a cinnamon roll made of phyllo-dough. But that's a different story...

I had my dearest friends over for an afternoon to share some vegan and some raw foods with them under the red woods in the yard.  Since they're neither into a vegan nor a raw lifestyle, it was nerve-racking enough to come up with something that, hopefully, they'd like.  And lo and behold, she couldn't have coconut butter or honey!  You know what that means when it comes to making raw desserts (which I was in charge of creating, of course)....constraints, to say the least! :)  I had already planned on making certain sweets when I found out and had to figure out something completely new since my original recipes contained both the ingredients she avoids.  So, I ended up making a much healthier version of an all time favorite.

Cinnamon-y Rolls
1 cup almond flour
1 cup ground yellow flax seeds
a dozen dates
2 handfuls of (crimson) raisins
bit of coconut oil (just have some ready)
pinches of salt
cinnamon
handful of pecans or walnuts

Preparation:
1.  Make a "sauce" by blending all of the dates (pits removed, of course), a handful of raisins, dashes of cinnamon, and a pinch of salt with a little bit of water.  Make sure you end up with a thick and smooth date paste by starting with very little water and adding more as needed.  You will probably have to give it a whirl several times and scrape down what ends up on the walls of your blender.
2.  In a mixing bowl, combine the almond flour, the flax seeds, salt, and a dash of cinnamon. Add some of the date paste and a tad bit of (start with a half a teaspoon) coconut oil and work your mix into a somewhat sticky dough.
3.  Roll the dough into a ball and then spread it out, using a bottle or a rolling pin with oil on it, on a teflex sheet.  Roll it into about a half-inch thick sheet, as close to a square shape as you can manage.
4.  Here comes the first test: try rolling it up to see if it breaks. You need a pliable dough that will not break and/or stick to the surface it is on. If you have trouble with it you might need to add a bit more oil and work the dough a little longer before you roll it out again. This takes practice so be patience.
5.  Once you're confident your dough will work, spread the rest of your date paste on top of it, sprinkle it with nuts that you have chopped up into tiny pieces, and sprinkle it with more cinnamon, to taste.
6.  And now, the really tricky part: roll up your dough carefully and as tightly as you can.
7.  Cut the rolled up "pastry" into about 1 inch (2.5 cm) thick slices and lay the slices flat on a teflex sheet.
8.  Dehydrate them for a few hours, depending on how much time you have or how crisp you prefer them.
9.  Serve them warm by themselves or with ice cream (that's what I did this time)


Have a sweet and lovely day!

Love and Blessings!


Biscotti In The Raw

Sunday, December 23, 2012


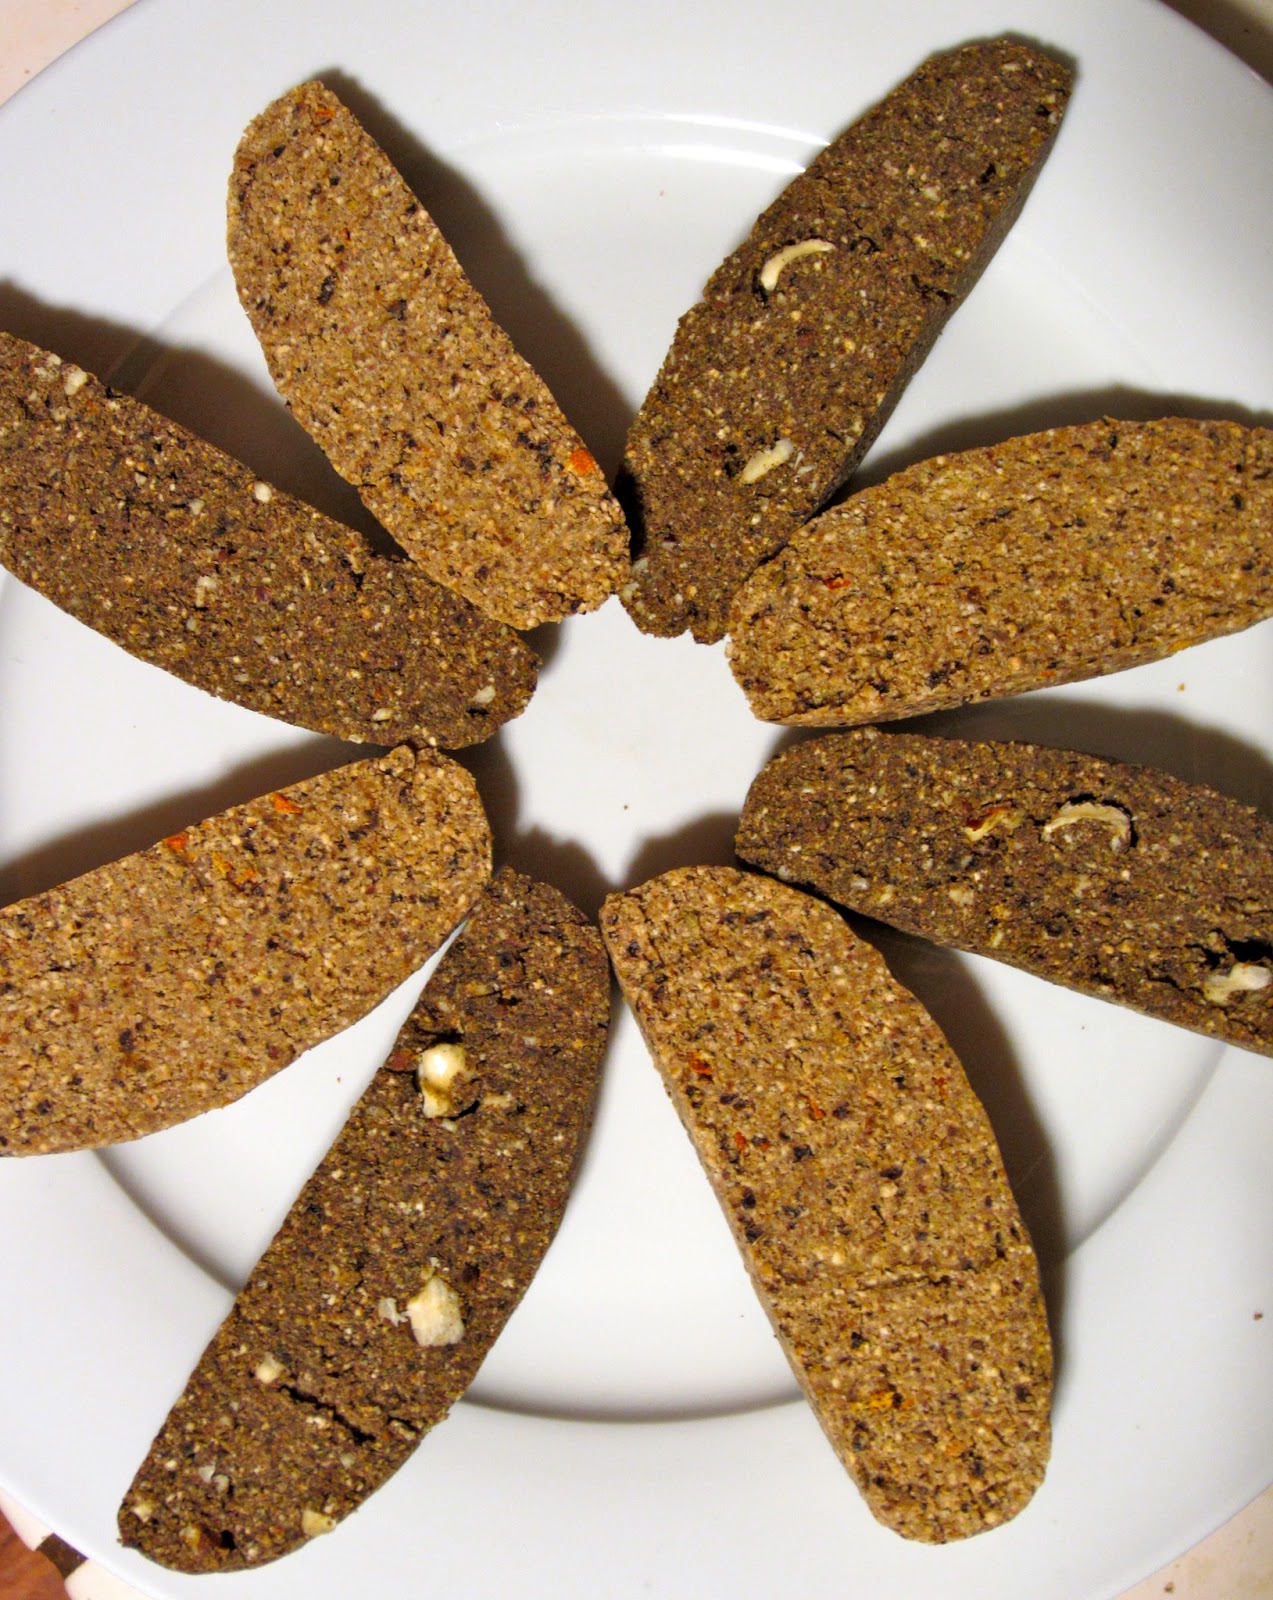
Having turned vegan at such a young age, there are many recipes I never made, cooked or baked the traditional way. While a vegan lifestyle is well-catered to by restaurants and health-food stores I have never seen and/or tried even vegan biscotti, not to mention raw and living vegan biscotti. For some reason though it popped into my head about two weeks ago when I started brainstorming and trying to figure out what to make during the holidays. And then...everything started late (yes, so late that I just started this morning, two days before Christmas, crazy!) because of long hours at work and our busy little life getting in the way of life. While I haven't seen the sun in our beautiful valley for days and the rain won't stop coming down I was courageous enough to attempt to take some photos of these fresh out of the "oven" and here are the results. A double batch of incredibly flavorful (much more so than I expected) biscotti and pictures that will not hurt the reader's eyes, I hope ('sigh'). It could be worse, right!??
I've made two flavors, the classic, Italian version, of course for one. And I planned on making something else for the other but changed my mind in favor of the Carob-Hazelnut variety. Go ahead and substitute cacao for the carob if you prefer a chocolatey version, I probably would too, normally, but I'm avoiding caffeine this week. Ok, too much unnecessary information...here are the recipes, preceded by a health-note:

Nutrition
Almonds, one of the well-known cancer-fighting miracles of nature, are the main ingredients I'm using. Remember to save your pulp every time you make nut mylk, that's where your cheap, eco-friendly, almond flour will come from. And what better way to use almond flour!?
Anise seeds, like most spices/tiny seeds, are very rich in minerals and most B-vitamins, and they're known to be a digestive aid.
And if you go with carob, as I've mentioned before, this caffein-free bean is very rich in calcium, practically fat-free, has no oxalic acid to interfere with absorption of nutrients, and is naturally sweet so you'll probably use less sweetener in your recipes when using carob.


Classic Biscotti The Raw Way
(Makes 8 slices)
6 cups almond flour
6 tbsp golden flax seeds
2 cups raisins (soak them in orange juice or water beforehand)
sweetener (honey/maple syrup/agave syrup) to taste
optional: ~1 tsp coconut oil
2 tsp anise seeds
zest of 1/2 to 1 orange
little salt
soaking liquid


Raw Carob-Hazelnut Biscotti
(Makes 8 slices)
6 cups almond flour
6 tbsp golden flax seeds
2 cups raisins (soak them in orange juice or water beforehand)
1/2 cup carob powder
sweetener (honey/maple syrup/agave syrup) to taste
optional: ~1 tsp coconut oil
few dashes of cinnamon
little salt
soaking liquid

1/2 cup hazelnuts 


Directions:
1. Soak the raisins beforehand for a little while, half an hour will do. I used orange juice but you can use water just as well. Whatever you're using, save the soaking liquid to add to your batter if needed.
2. Grind the flax seeds and put all ingredients (except for the chopped hazelnut, if you're making that version) in the food processor and run it to get an evenly crumbly mixture. Pinch test it, if it sticks together between your fingers you don't need to add more liquids, otherwise add some but just a spoonful at a time because it's very easy to overdo it with these kind of batters.
3. Pour your mixture into a bowl and by kneading it a couple of times form it into a loaf. If this is not happening because your batter is too crumbly, again, add a little liquid.
4. Place your "loaf" onto a teflex sheet and shape it into a flattened, firm, log. Slice it carefully, on the diagonal, making about half inch or a little thicker (~1.5 cm) slices. 
5. Stand them up on a sheet and dehydrate them for an hour at 140˚F (~60˚C) and then lay them flat on a screen and dehydrate them for a few more hours at 115˚F (~46˚C). 

If you have kids, they'll keep asking you "When are they gonna be done?" so make sure to keep them busy with something else. When they are done, have some fresh, while still warm, with a cup of mylk and/or a fruit spread if desired. Once they're cooled off, consider wrapping some for a Christmas present for someone. There's nothing like a home-made present you put your love into! You might want to save a couple so your kids can put them out there on Christmas Eve for Santa too. You never know...one day he might be inspired to go raw and refuse all the cookies at other households ; )

Happy "Baking"!


Nuts Dressed for The Holidays

Monday, November 26, 2012


While I'm a huge fan of roasted chestnuts, and do indulge every year, they're not the only warming holiday treat I can think of, not to mention that they can't be eaten raw. I figured it would be nice to have cupfuls of different kinds of flavored nuts on the table. They're so satisfying to have around and they can be done raw. No roasting or toasting required. They only take a few minutes of preparation and then the dehydrator takes care of the rest. Voilà, your family and friends and your guests can reach for just a handful of savory or sweet goodness amidst the, you know, everything else that's going on...
The savory ones are still being made so here are some sweet versions for now.


Chocolate Almonds
To be coated:
1 1/2 cups almonds
1/2 cup raisins

For the coating:
3-4 tsp honey / agave syrup / other sweetener
2 tsp melted coconut oil / other oil
2-3 tsp cacao powder
tiny pinch of salt
optional: pinch of vanilla, pinch of cayenne

1. Mix the oil, sweetener, and salt and then add cacao little by little. Taste test and adjust the amount of sweetener. Raw cacao is quite bitter so if you're not used to that you might need to add more sweetener to your mixture or simply use less cacao.
2. Optional: Chop up the raisins into smaller pieces.
3. Add the almonds and raisins to your mixture and make sure all of them are coated well.
4. Spread them out on a teflex sheet and dehydrate for a few hours at 115˚F (46˚C).


Maple Walnuts
To be coated:
Walnuts that have been soaked for a couple of hours OR rinsed. The ingredients will only stick to wet walnuts. You may use maple syrup instead of solid sweeteners and then you can keep your walnuts dry. If you go that route the end result will have a glazed look instead of what's pictured here.

For the coating:
4 tbsp maple crystals / coconut sugar / other solid state sweetener in crystal form
1 tbs cinnamon
1/2 - 1 tsp mesquite powder*
tiny pinch of salt
optional: add lucuma powder to your mixture for a hint of "caramel"


1. Mix your coating ingredients. Taste test and adjust the amount of cinnamon, you might want to add more if you're a huge fan of cinnamon like myself. Mesquite has a unique flavor so use less if it's new to you and add more if you like it.
2. Add the wet (really damp but not dripping wet) walnuts to your mixture and make sure all of them are coated well. Because of their shape this might take some moving them around with your hands or a fork so that you get the mixture in the grooves as well. 
4. Spread them out on a teflex sheet and dehydrate for a few hours at 115˚F (46˚C), until crispy.

By the way, good luck having an untouched batch at the end! You might want to make a double batch to start with because the smell and just knowing that they're in the dehydrator might invite more visitors, like Cookie Monster, etc. whom will make sure only about a portion of these nuts will get all the way dehydrated and crunchy. Either way, if by any chance you ended up with empty trays at least you made your house smell like a healthy cake shop :)

*Magical Mesquite
What's used to be a staple food for Native Americans is available in health-food stores now in a powder form. It's a nutritious way to add a very distinct, somewhat sweet and malty, or even caramel-like flavor. Mesquite helps balance one's blood sugar level, which makes this superfood an excellent choice for those healing from diabetes. Very high in protein, fiber, minerals, and the hard-to-get amino acid, lysine, it's no surprise it has been pronounced a "superfood". Use it in desserts, smoothies, mylkshakes, even soups, etc.


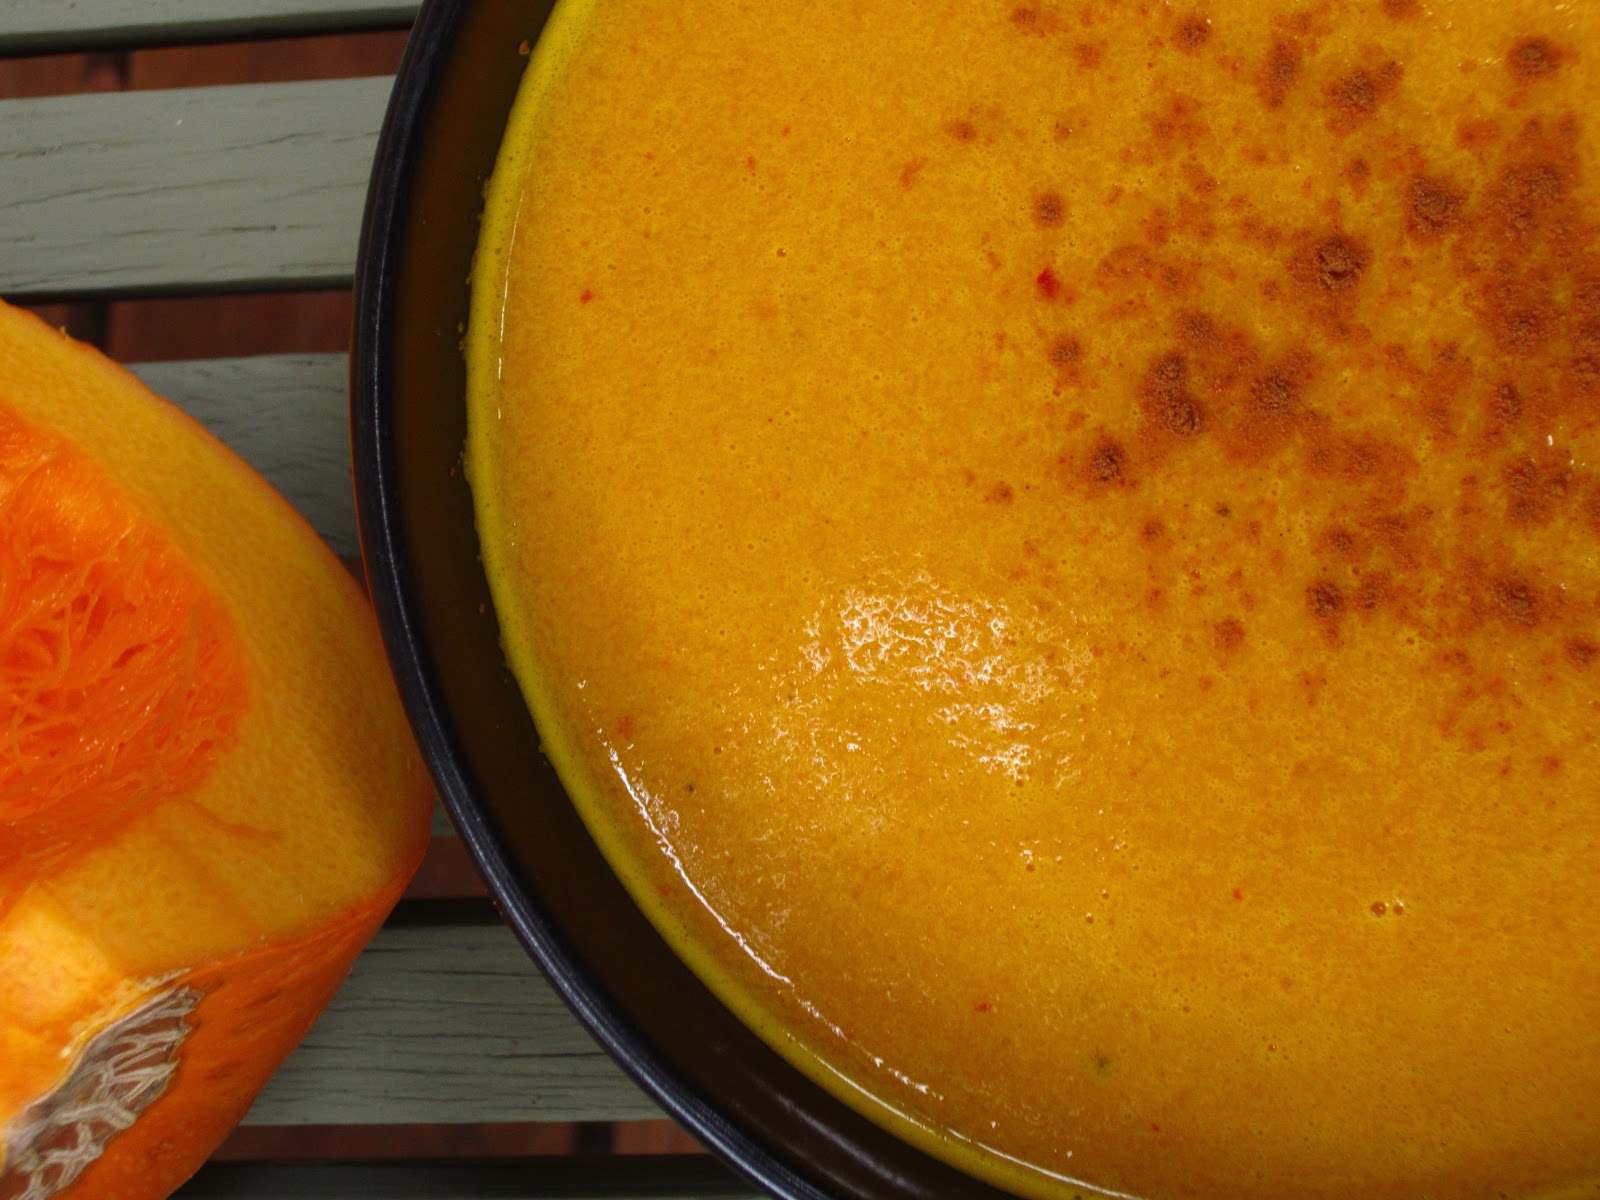
Pumpkin Curry Soup

Monday, October 29, 2012


This time of the year, with holidays approaching, is also about the time when (at least on the Northern hemisphere) the temperature is starting to take a bigger dip. Cooler mornings might call for a cup of warm chocolate and cooler evenings for a bowl of warming soup to cozy up on the couch with. Lucky us, spices of warm energy are available most places year-round and on top of that it's pumpkin season, yay! I'm pretty sure these bright orange squashes are not just for Jack-O Lanterns or pies. Some can be made into soups or stews. And so I do...


Pumpkins' Treat
Pumpkins are very filling and highly nutritious. Being rich in fiber, extremely high in vitamin A, high in vitamin C,  and rich in minerals like potassium, iron and manganese, the favorite holiday squash will nourish your eyes and skin, has anti-oxidants and anti-inflammatory qualities, and will help keep your bones strong.


Pumpkin Curry
(Makes 4 bowls)
1 small pumpkin*
1 small carrot
2 stalks green onion
1 small piece ginger
1/4 cup coconut butter
1 fresh cayenne pepper (or use some ground cayenne)
1 tsp salt
2-3 tbsp curry powder
1 tsp cinnamon
3 cups water

* I know this is relative but I didn't weigh or measure this squash. It was one of those "personal" size pumpkins, about 6-7 in (15-18 cm) across.


Preparations:
1. Remove the seeds from the pumpkin and slice into wedges. It's easier to peel the wedges one by one in my opinion.
2. Shred your wedges and place all of it into a pot along with the carrot, the onion, the ginger, and the pepper chopped. Add 3 cups water (or enough to cover the ingredients).
3. Gently warm it up on a very low flame while stirring it.
4. Place the contents of the pot and the rest of the ingredients, salt and spices, in a blender and process until you get a creamy and smooth texture.
5. Sprinkle with cinnamon or garnish with thinly sliced onions, etc.

If it's really cold where you are, sit by the fire and slurp away...

Happy raw & cozy times! : )


It's Been a Year ~ Thank You!

Sunday, June 17, 2012

For lack of a real birthday cake and a candle.... a macaroon and a scape will do for now : )


Raw Food For Truth's first Birthday! Yes, it has been that long. A year ago yesterday I had enough courage to show this blog to friends and family. The six recipes I had put together up until then have since grown into 70some, the most popular one being "Real Raw Marzipan", which I would have never guessed! Life is full of surprises...
It has been a very exciting journey; I truly enjoy every moment of it. It is lots of work but incredibly rewarding and I'm really grateful for the experience. 

And so I would like to...

Thank Blogger to make this possible.
Thank my husband, for putting up with my insanity and my constant chasing of "new and better" (whatever that means). 
Thank my best friends, A.C. and A.B. for always being there for me.
Thank my sister L. for your honest input (both, compliments and harsh criticism) on my work.
Thank my family for understanding my turning down your wholeheartedly prepared cooked meals.
Thank my children, Ashton, Fiona and Lulu, for being patient and putting up with my typing away on the computer when I should be paying attention to you instead. 
Thank YOU, regular readers for your interest, support, and for coming back from time to time.
Thank all who visit my blog for ideas and using it as inspiration.
Thank all for your letters, e-mails, questions, comments. 
Thank all who decided my recipes were worth printing in magazines.
Thank Google for guiding people in finding this information and help them get healthier.
Thank all local farmers for their hard work in creating the wonderful food that provides me with a never-ending source of inspiration and delicious ingredients for recipes to create!
 THE WORLD IS A BETTER PLACE BECAUSE OF ALL OF YOU!
Thank you!
Namaste!

There's more to come so stay tuned! : )
XOXO


~ June 16, 2012 ~


Coconut Lemon Fudge

Sunday, December 25, 2011


I can't say this is as easy as 1, 2, 3 because it's probably easier. Perfect if you're in a rush to make something sweet maybe for the holidays still or whenever you're crunched for time. My mother always started baking cookies and pastries weeks before Christmas and by the time the tree was up and decorated the dining table and the pantry were full of all kinds of seasonal delights. Coconut lemon cookies were always on her list and they were my inspiration for the ingredients used here to create similar flavors in a raw way. What started out as lemon bars resulted in something more like a delicious fudge with a wonderful texture. These melt in your mouth but aren't as sweet as the traditional ones you might be used to so add more sugar if you prefer it sweeter. 


Coconut Lemon Fudge Bars
(Makes 32 bite size squares)
1 cup melted coconut butter
juice of 2 large lemons
4-5 tbsp coconut palm sugar / your favorite sweetener
2 tbsp shredded coconut
4 tbsp coconut flour
optional: add some lemon zest for extra strong lemon flavor

Combine all of the ingredients and press the mixture into a plastic-wrap-lined, flat dish. Place it in the fridge and allow it to set for an hour or two. You'll need a very sharp knife to cut it into cubes before serving. I've told you it was simple!

Happy Holidays!!!


Poppy Seed Bars

Monday, December 19, 2011

rawpoppyseedbarsélőmákospite


 I love poppy seeds so much that I really don't need to make them into any kind of special recipe...I simply eat them with a spoon. Yes, I am a poppy seed monster. : ) But I felt like playing around and wanted to create the raw version of something I used to buy a lot in a store in Hungary. There it's called "mákos pite", which translates into "poppy seed pie" but I couldn't imagine anyone would call them "pie" here. If you ever walk into a European pastry shop chances are you will find a selection of pastries and sweets with poppy seeds. I'm not talking about a little bit of whole seeds sprinkled on top of a roll, etc.....no, I mean the "real thing" with piles of black filling that beat chocolate or any other sweets in my world. It has no competition whatsoever. And yes, I have health benefits to add to that because they're incredibly rich in minerals (I highly recommend them if you're anemic). I even took a picture for you that speaks for itself... Poppy seeds are also a complete protein (!) and especially high in oleic and linoleic acids, which is particularly good if you struggle with your cholesterol levels. Rich in B vitamins and antioxidants, these seeds are also soothing to the nerves, and can help you sleep.
I know some of you might freak out and think "what in the world is this???" If you grew up in the U.S. chances are you're used to poppy seeds in very small amounts only in salad dressings or sprinkled on top of bagels. Well, here's your chance to try something new that might just become your new addiction too. : ) Their nutty flavor held my sister and I captive from the time we were able to hold a fork and poppy seed pasta, gnocchi, pastries, etc. were always what we screamed for every time we were asked "What do you girls think we should make for lunch tomorrow?"  

Minerals in 1 ounce of poppy seeds. ~ You'll get more than this in just one bar!*


Poppy Seed Bars
Ingredients:
(Makes 8 bars)
1/2 cup agave syrup/honey
little water
You will use some of this for the pastry and some of it for the filling.

For the "pastry" layers:
1 cup quinoa flakes (or rolled oats/barley, etc. if you use any of those)
4 tbsp almond flour (if you can't get almond flour just grind some almonds or use more flakes/rolled oats, etc.)

For the filling:
2 cups ground poppy seeds
pinch of ground vanilla (or vanilla extract)
4 tbsp raisins/currants

Directions:
1. If you're using honey melt it if necessary because you want is as pourable as possible. Add a couple of tablespoons of water (or nut mylk if you prefer) to it and mix well.
2. Grind the quinoa (or whatever you're using) and mix all the pastry ingredients with just enough of the honey-water to get a crumbly texture, which sticks together and can be pressed into a dish.
3. Mix the filling ingredients with the rest of the honey-water.
4. Line a small dish (mine was about a 3 in x 6 in, which is ~ 7-8 cm x 15 cm) with plastic wrap and, with a spoon, press half of the pastry batter into it followed by the poppy seed mix and finished with the rest of the pastry mix. Press all of them down as hard as you can. Place it in the fridge to settle and harden. It'll be easier to slice and it will hold together better. I cut my batch into 8 bars. Use a really sharp knife and be as gentle as possible...after all, they're not held together by eggs, etc.

rawpoppyseedbarsstackélőmákospite

I am a little bit shocked by how much these resemble the traditional, baked version. I didn't expect them to come out like that. The truth is, I was planning on recreating a poppy seed filled wafer that is just two very thin layers of wafers filled with tons of poppy seeds. I have no regrets...I think I ended up with something even better and these kinds of pastries definitely have their place on the holiday table....just in time for Christmas. Needless to say, I devoured all of them in a couple of hours... : )
I hope you'll love them too. Enjoy!
If you have questions, just ask!


*Sources: http://nutritiondata.self.com/facts/spices-and-herbs/203/2

First Raw Thanksgiving!

Friday, November 25, 2011


 I was ready to sacrifice my diet on Thanksgiving and eat some cooked food but when I asked my husband what he felt like having this year he said "Let's make it all raw!" Needless to say, I was really surprised (he's a vegan but not a raw vegan!) and excited at the same time. We never had the traditional meal most people create but always made something different such as African food one year and Thai another time, etc. Well, yesterday was the closest we ever got to preparing the typical dishes but again in a not-so-typical way. Two minor details that are worth mentioning: we went shopping in the last minute (and some things, such as green beans were sold out), and we made all of these dishes in no time. So if you want your next Thanksgiving meal to take less than an hour to prepare and make you feel energized, instead of wanting to fall asleep then take note..

On the menu was:

"Mashed potatoes"
Cauliflower, cashews, olive oil, garlic, salt, pepper, herbs.

Mushroom gravy
Crimini mushrooms, tahini, shallots, olive oil, shoyu sauce, rosemary, salt

Marinated Asparagus
(in place of green beans)
Asparagus, ginger, olive oil, lemon juice, salt

Stuffing
Jicama, sunflower seeds, mushrooms, celery, shallots, shoyu sauce, olive oil, sage, salt & pepper 


Cranberry sauce
Cranberries, apples, dates, honey (not vegan!), ginger

Brownies 
Walnuts, dates, cacao powder, honey (not vegan!), vanilla, salt


It all came out more delicious than I expected. Everything was incredibly satisfying and as a whole, made you feel so good. There was only one thing, too much garlic in the mashed potatoes. I know, if you're a garlic lover like me you might say, "How is it possible to make something too garlicky?" Believe me, it is possible especially when "cooking" raw!

Now, I would like to hear what you had for Thanksgiving! I hope you're kind enough to share! 

Happy Thanksgiving! : )


Buttery Thanksgiving Fruit & Nut Bars

Tuesday, November 22, 2011

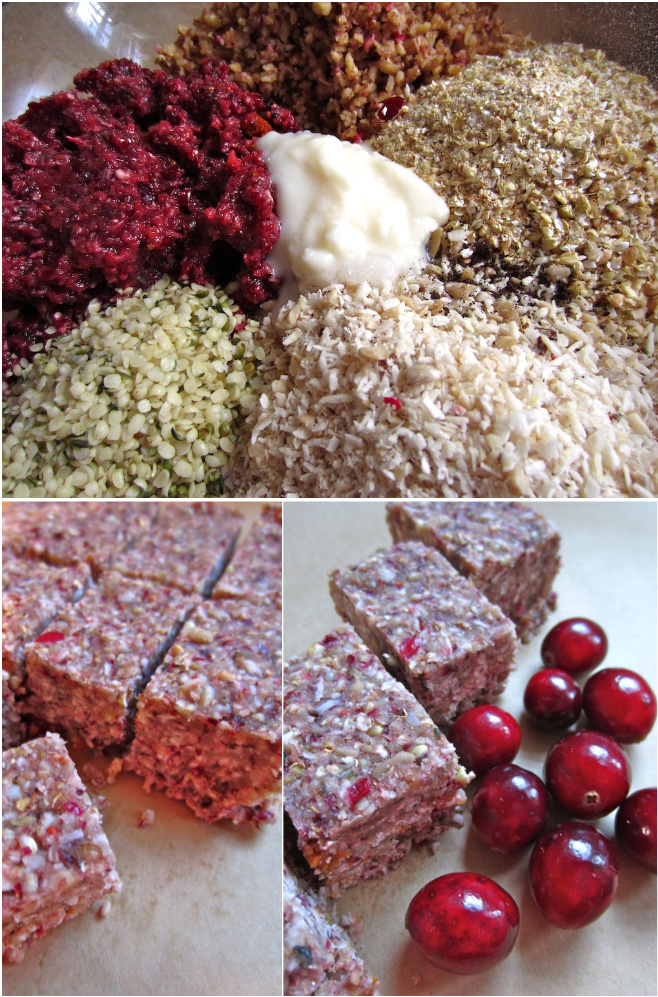
I've never worked with fresh canberries before and since Thanksgiving is around the corner I decided to get some practice with them and use up some of my buckwheaties as well. Buckwheaties are buckwheat that were soaked (at least 6 hours) and dehydrated. I usually make big batches to have them handy whenever I want to make some bread, crackers, or pizza crust, etc.These bars are so rich and flavorful....perfect Fall or Winter dessert.  

Cranberry Nutrition
These tart little pearls are probably most consumed in the form of sauce during holidays and are most known for their ability to provide relief for UTI symptoms. Cranberries are full of antioxidants and rich in vitamin C, manganese, and fiber, which means they may protect you from heart disease, help prevent cancer, keep your bones strong and are good for your digestion. Add to all this the excitement of making dishes with something that you don't eat every single day because they're only available a few weeks a year. Don't you love the changing of seasons?

Raw Crunchy Buttery Buckwheat Bars
Ingredients:
(Makes 8 small bars)
1 cup buckwheaties
1/2 cup walnuts
1/4 cup sunflower seeds
1/4 cup hemp seeds
1/2 cup dried shredded coconut
1/4 tsp ground vanilla bean (or vanilla extract)
pinch of salt
1/2 cup currants/raisins/any dried fruit
3/4 -1 cup cranberries
7 tbs coconut butter (or coconut oil)
2-3 tbs (or to taste) agave syrup/honey (not vegan)/maple syrup (not raw)

Direction:
1. Melt the coconut butter/oil and set it aside
In a food processor:
2. Pulse the buckwheaties a couple of times or grind them to a course meal or as fine as you wish and put them into a mixing bowl
3. Coarsely chop the walnuts and add them to the bowl
4. Pulse the sunflower seeds and add them to the rest of the ingredients along with the hemp seeds, shredded coconut, salt, and vanilla.
5. Grind the cranberries and the dried fruit you're using in to a fine wet mixture and add to the bowl with the coconut butter/oil and sweetener.
6. Mix well with a spoon or your hands
7. Press the mixture into a plastic wrap-lined, flat-bottomed dish chill for a little bit
8. Slice them into desired shapes or bars before serving

Real Raw Marzipan

Tuesday, June 21, 2011

I can’t recall my first love affair with marzipan. All I know, is that whenever my dearest grandma took my sister and I to the confectionary store across the street from her house, and let us pick and choose whatever our hearts desired, I went for the “marzipan log” or the “marzipan potato”. If you’re curious, a “marzipan potato” is a ball of marzipan coated with chocolate cream, then a layer of some kind of soft dough, and the whole thing rolled into a generous amount of cacao powder, in other words: heaven! Needless to say, I was beyond upset if, on any of these occasions, the man behind the counter informed me that they were out of my favorites! This is not an issue anymore. There are no specialty cake shops on every corner here, and I can make my own marzipan any time I want! And so can you!


Traditionally, marzipan consisted of just a couple of ingredients, as it should. I was even lucky enough to visit the famous marzipan factory in Hungary, and saw it for myself. The only question they ask when you place an order is, what grade you’d like. The base, from which all marzipan is made, is about 2/3 almond paste and 1/3 sugar. Depending on how much extra sugar is added to the base, they’re graded 5:50, 70:30, or even 90:10, the highest quality (and most expensive) marzipan, with merely 10% extra sugar added. But, of course, even if you are lucky enough to find some of this wonderful, melt-in-your-mouth delight in stores, chances are, it will have some fillers and other ingredients that don’t belong!

marzipanpreparations 
Health Benefits of Almonds
Almonds are among the most nutritious nuts. They have loads of fiber and they’re especially high in manganese, magnesium, phosphorous, copper, calcium, iron, zinc, vitamin E and riboflavin (vitamin B2). Their high mineral content helps build and maintain strong bones, while the fiber helps in the prevention of colon cancer. B vitamins and vitamin E (an antioxidant), along with calcium, magnesium, and zinc are very important brain foods. A lot of us are deficient in magnesium (do tight muscles or muscle spasms/quivers sound familiar?), which is not so hard to acquire, but it’s a water-soluble mineral so it’s important to replenish your body with adequate amounts on a daily basis! What foods are good sources of magnesium? Good news: nuts and dark chocolate are among the richest sources of this essential mineral! Almonds are high in monounsaturated fats, which will help you keep your heart healthy. They’re a really good snack choice for diabetics too, because they’re high in protein and low in carbohydrates.
Do you need any other excuse to make dessert today? Ok, here’s a couple more….almonds are very nourishing for your skin and, when eaten in moderation, will even help you lose weight! So, go ahead…


Raw Marzipan
Ingredients:
(Makes 1 marzipan log - 5 in long, 2 in ∅)
1 ½ cup almonds*
4 to 5 tbsp agave syrup/maple syrup (not raw)/honey (not vegan)/your favorite sugar, melted
~1 tsp almond extract
cacao powder/cinnamon for rolling (optional)


Directions:
1. Soak the almonds for a couple of hours or until you’re able to remove their skin (raw method) or, as an alternative, blanch them (not a raw method) and then remove their skin.
2. Dry the almonds and, using a food processor, process them into crumbs, then add the sweetener and the almond extract and process the mix until clumps form. 
3. Place the paste into a bowl and make sure it’s well combined; form into a ball or the shape of a log by hand. It really is up to your imagination…you can just roll it into cacao powder or make figures out of it (it behaves like edible playdough) or roll it out and cut cookies out of it or slice it…anything your heart desires.
4. Serve as it is or use your healthy marzipan to decorate a birthday cake.
5. Go back to step 1. and start over, because you know you didn’t make enough!…

*Note: You can purchase almonds in bulk instead of packages. You'll save the planet from lots of trash and it will probably save you some $$$! If you're in a hurry then you can use 1 cup of almond meal (also comes in bulk or packages) instead of almonds and skip the soaking/peeling/grinding part.  

Your marzipan would keep in the refrigerator for quite a while, but it just never lasts more than a day or two in my home. : )

Featured in Funky Raw, UK's raw food magazine